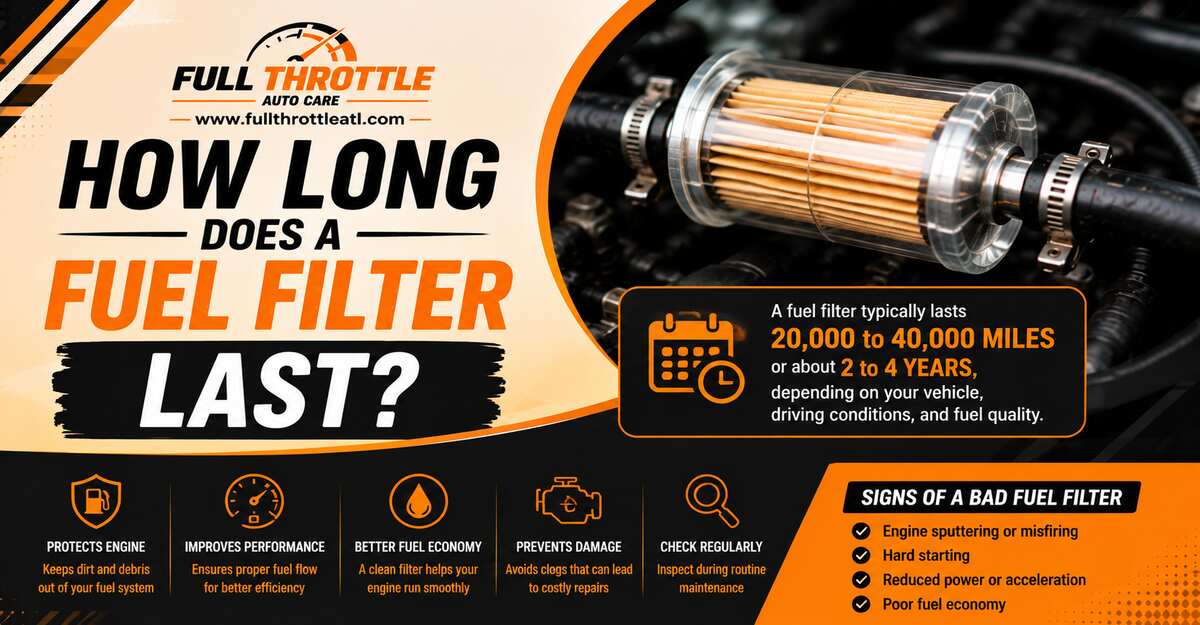
Knowing exactly how long does a fuel filter last-typically 20,000 to 40,000 miles for inline units—prevents stalling and costly fuel pump failure. You can safely replace an inline filter yourself in six straightforward steps taking roughly 60 minutes, with your success largely depending on fully relieving fuel system pressure before disconnecting any lines.
Before You Start
- Total Time Required: 45 to 75 minutes.
- Difficulty Level: Intermediate (requires working under a vehicle with combustible fluids).
- Typical Cost: $15 to $40 (for the filter itself).
- Tools & Materials: 1 exact OEM-spec fuel filter, safety glasses, nitrile gloves, socket set (8mm, 10mm, 12mm), fuel line quick-disconnect tool set, 2 flare nut wrenches (typically 14mm/16mm-do not use standard open-end wrenches), catch pan, 3–5 clean shop rags, hydraulic floor jack, 2 heavy-duty jack stands, penetrating oil (PB Blaster).
- Prerequisites: Your vehicle must have an externally mounted inline fuel filter (usually located along the driver-side frame rail), not an in-tank assembly.
Phase 1: Preparation and Safety
Step 1: Relieve the Fuel System Pressure
Pull the fuel pump fuse and run the engine until it stalls to depressurize the fuel lines safely. Locate your vehicle’s interior fuse box and consult the owner’s manual to find the fuel pump relay or fuse. Remove it using needle-nose pliers, then start the engine and let it idle. Once the engine dies, crank the ignition for an additional 5 seconds to bleed off any residual pressure. Finally, turn the key off and use a 10mm wrench to disconnect the negative battery terminal.
- You’ll know it worked when: The engine sputters, shudders slightly, and completely stalls out within 3 to 10 seconds of starting.
- Common Mistake: Relying on the Schrader valve on the fuel rail to relieve pressure. This often sprays raw fuel over a hot engine bay; pulling the fuse is the only zero-spill method.
Step 2: Elevate and Secure the Vehicle
Lift the vehicle using a hydraulic jack on the factory-designated pinch welds and lower it onto two heavy-duty jack stands. If your filter is located under the chassis along the frame rail, elevate the side of the vehicle where the filter is mounted. Slide the jack stands under the solid frame members, slowly release the hydraulic jack to transfer the weight, and physically shake the vehicle by the fender to ensure it is solidly planted.
- You’ll know it worked when: The vehicle does not shift or creak when pushed, and you have at least 18 inches of clearance to slide underneath.
- Common Mistake: Working under a vehicle supported only by a hydraulic jack. Jacks have mechanical seals that can blow out instantly, crushing you. Always transfer weight to rigid jack stands.
Phase 2: Removal and Installation
Step 3: Clean the Fittings and Position the Catch Pan
Spray the fuel line connections with penetrating oil and scrub them with a rag before placing your catch pan directly underneath. Road grime cakes onto the filter brackets and fittings over years of driving. Wipe the connection points completely clean so dirt cannot enter the open fuel lines once disconnected. Slide your drain pan squarely under the filter and keep 3 dry shop rags within arm’s reach.
- You’ll know it worked when: You can clearly see the plastic release tabs or the metal threads of the fittings without any dirt or rust flaking off them.
- Common Mistake: Skipping the cleaning phase. Pushing dirt into the quick-connect fitting will permanently damage the internal O-ring, causing a persistent high-pressure fuel leak.
Step 4: Disconnect the Fuel Lines
Release the locking mechanisms on both ends of the filter and pull the fuel lines straight back. For quick-connect fittings, slide your plastic disconnect tool over the metal pipe and push it into the fitting to spread the internal retaining clips, then pull the line away. For threaded fittings, hold the filter body steady with one wrench, and use a specialized flare nut wrench on the line fitting to break it loose. Keep the old filter level as you remove it from the bracket.
- You’ll know it worked when: The line pops off with a slight hiss, and about 2 to 3 ounces of fuel drains down into your catch pan.
- Common Mistake: Using standard open-end wrenches on threaded flare nuts. The brass nuts are incredibly soft and will instantly round off under the force of a standard wrench, forcing you to cut and splice the fuel line.
Step 5: Mount and Connect the New Filter
Slide the new filter into the mounting bracket with the flow arrow pointing toward the engine, and snap the lines back into place. Loosen the 8mm or 10mm bracket bolt, remove the old filter (tilting it upward so trapped fuel doesn’t spill on you), and insert the replacement. Tighten the bracket bolt to 5–8 ft-lbs. Push the fuel lines onto the new filter nipples until they bottom out.
- You’ll know it worked when: You hear a distinct, sharp “click” from the plastic quick-connects, and the lines do not slide off when you pull firmly backward on them.
- Common Mistake: Installing the filter backward. Modern filters are directional; reversing the flow starves the engine of fuel, destroys the filter media, and rapidly burns out the fuel pump.
Phase 3: Testing
Step 6: Prime the System and Check for Leaks
Reinstall the fuel pump fuse, reconnect the battery, and cycle the ignition key to rebuild fuel line pressure before starting the engine. Turn the key to the “ON” position (do not crank the engine) for 5 seconds. You will hear the fuel pump hum from the rear of the car. Turn the key off, and repeat this cycle 3 times. Crawl back under the vehicle with a flashlight and physically touch the fittings to check for dampness. If dry, start the engine.
- You’ll know it worked when: The engine starts smoothly without prolonged cranking, idles evenly, and the filter connections remain bone-dry under operating pressure.
- Common Mistake: Cranking the engine immediately without priming. This forces the fuel pump to push air through the dry filter, causing long, dry cranks that severely drain the battery and overheat the starter motor.
Common Mistakes and How to Fix Them
- Failure Mode: Fuel leaking heavily from the new fittings.
- How to Fix: Shut the engine off immediately. Disconnect the leaking line and inspect the inside. The internal rubber O-ring was likely torn during installation, or the line wasn’t pushed in far enough. Replace the O-ring (or the nylon line end) and push firmly until you feel the mechanical click.
- Failure Mode: Engine cranks continuously but refuses to start.
- How to Fix: You either installed the filter backward or have massive air pockets in the line. Verify the flow arrow points to the engine block. If correct, cycle the ignition key “ON” and “OFF” 5 more times to bleed out trapped air.
- Failure Mode: Broken quick-connect plastic retaining clip.
- How to Fix: If you forced the line off and snapped the internal retainer, do not attempt to glue or zip-tie it. You must purchase a fuel line repair kit from an auto parts store, cut the damaged plastic tip off, and splice a new quick-connect fitting onto your existing nylon fuel line using hot water to soften the tubing.
- Failure Mode: Engine bogs down or sputters under heavy acceleration.
- How to Fix: The new filter is defective, has an incorrect micron rating for your vehicle, or you kinked a flexible fuel line near the bracket during installation. Check the lines for severe bends; if clear, replace the filter with a genuine OEM unit.
Variations: In-Tank vs. Inline Filters
The procedure above applies specifically to externally mounted inline fuel filters. If you check your frame rail and cannot find a filter, your vehicle likely uses a different system:
- In-Tank Fuel Pump Assemblies: Most vehicles built after 2005 integrate the fuel filter directly into the fuel pump housing inside the gas tank. These are considered “lifetime” filters (lasting 100,000+ miles) and are not meant for routine maintenance. Replacing them requires dropping the entire gas tank or accessing a trapdoor under the rear passenger seats to replace the whole pump assembly.
- Diesel Fuel Filters: Diesel engines operate at vastly higher pressures and use a different filter style (often a spin-on canister or a drop-in cartridge under the hood). Diesel filters also contain a water separator and a drain valve. When replacing a diesel filter, you must manually bleed the air out of the system using a built-in primer pump on the filter housing, as air in a diesel fuel system will completely prevent the engine from running.
How Long Does It Take and What Does It Cost?
A first-time DIY mechanic should budget 45 to 75 minutes to replace an inline fuel filter. The physical swapping of the part takes less than 10 minutes; the majority of your time is spent safely elevating the vehicle, relieving fuel pressure, and cleaning rusted connections.
If you do the job yourself, your only cost is the filter, which ranges from $15 to $40. Taking this job to a dealership or independent mechanic typically costs between $100 and $180, with labor making up the bulk of the invoice.
Frequently Asked Questions
What are the symptoms of a clogged fuel filter? A severely restricted filter will cause your engine to hesitate during acceleration, idle roughly, misfire, or randomly stall. You may also hear a loud whining noise from the rear of the vehicle, which is the fuel pump struggling against high backpressure.
Can you clean and reuse an old fuel filter? No. Modern automotive fuel filters use densely packed paper or synthetic micro-glass media that traps microscopic particles. Spraying cleaner through them cannot dislodge embedded debris, and you risk tearing the internal media, which would send dirt directly into your fuel injectors.
Does a bad fuel filter throw a check engine light? Not directly. There is no sensor that monitors filter condition. However, a clogged filter will starve the engine of fuel, causing it to run “lean.” This lean condition will eventually trigger a check engine light, usually presenting as a P0171 or P0174 diagnostic trouble code.
How often should I change my fuel filter if I use cheap gas? If you frequently buy fuel from unbranded stations with poorly maintained underground tanks, you should halve the standard maintenance interval. Instead of 40,000 miles, replace your inline filter every 20,000 miles to prevent sediment from burning out your fuel pump.
Knowing how long does a fuel filter last is only half the battle; proactively replacing it before symptoms appear is the cheapest insurance policy you can buy for your vehicle’s fuel system. Follow these steps carefully, respect the combustible nature of gasoline, and your engine will reward you with reliable, hesitation-free performance.