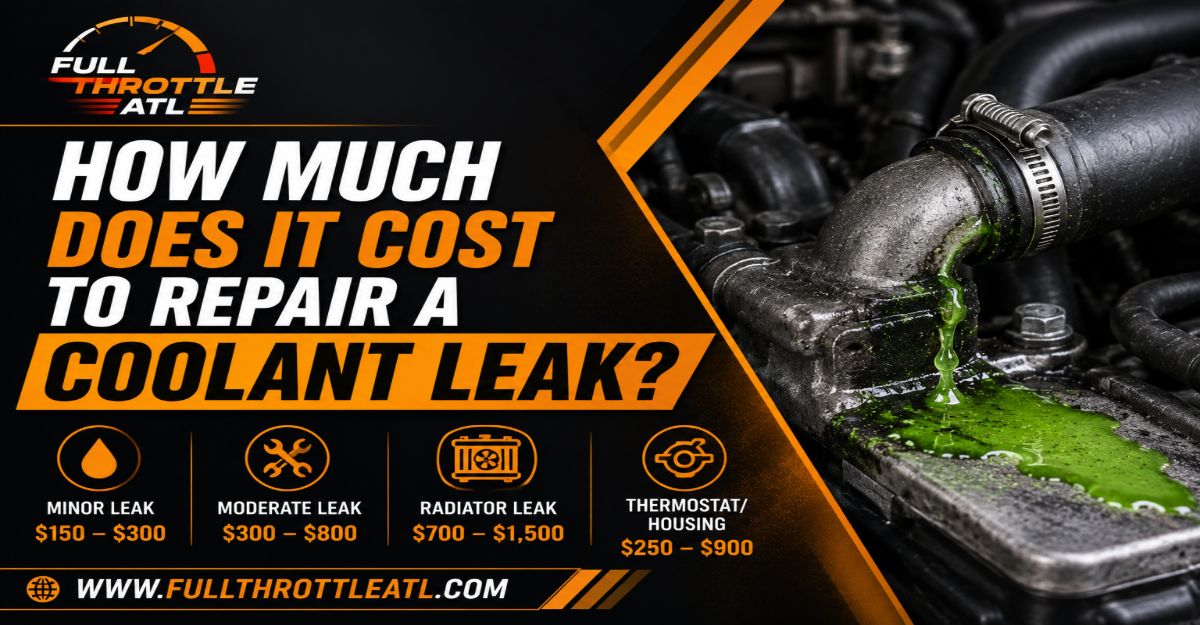
Fixing a coolant leak typically costs between $100 and $1,500 depending on the failed component, while DIY repairs cost $50 to $250 in parts and tools. This comprehensive guide covers diagnosing the leak, replacing the faulty component across 5 detailed steps, preventing air locks, and verifying the repair. Total time is 2 to 3 hours with a moderate difficulty level.
Before You Start
- Time Required: 2 to 3 hours.
- Difficulty Level: Moderate.
- Cost Range: $50–$250 (DIY) / $100–$1,500+ (Professional).
- Tools Checklist: Safety glasses, mechanics gloves, 8mm–14mm socket wrench set, channel-lock pliers, flathead/Phillips screwdrivers, coolant pressure tester kit, torque wrench (inch-pounds), 2-gallon catch pan, spill-free radiator funnel.
- Materials Checklist: Exact-fit replacement component, 2 matching hose clamps, 1–2 gallons vehicle-specific concentrated coolant, 1–2 gallons distilled water, 1 roll shop towels.
- Prerequisites: Level concrete workspace, vehicle parking brake engaged, stone-cold engine (minimum 2 hours inactive).
Step 1: Safety Setup and Leak Diagnosis
Park the vehicle on a level surface, engage the parking brake, and wait at least 2 hours for the engine to cool completely before connecting a coolant pressure tester to the radiator neck and pumping it to the cap’s rated PSI (14 to 16 PSI) to locate the external leak source visually.
- Exact Execution: Attach the correct adapter from your coolant pressure tester kit onto the radiator or expansion tank neck. Pump the hand plunger slowly until the gauge reaches the exact PSI printed on your OEM radiator cap (typically 14 to 16 PSI). Inspect all hoses, the radiator core, the water pump weep hole, and the thermostat housing for dripping or hissing streams of colored fluid.
- Success Checkpoint: You will know this step worked when you spot a steady stream or droplet accumulation pinpointing the exact failure point, or if the pressure gauge needle holds steady for 5 minutes (indicating an internal leak if fluid is dropping elsewhere).
- Common Mistake: Opening a pressurized cooling system while the engine is warm. Always verify the upper radiator hose is completely cold to the touch before removing any caps.
Step 2: Draining the Cooling System
Place a 2-gallon catch pan directly beneath the radiator drain petcock, remove the radiator cap, and slowly open the petcock to drain the coolant level below the faulty component.
- Exact Execution: Position your catch pan under the driver-side or passenger-side bottom corner of the radiator where the plastic or brass petcock is located. Twist or unclip the petcock counter-clockwise by hand or with a light wrench. Remove the upper radiator cap to vent the system and maximize drainage speed. Drain until the fluid drops beneath the level of your repair site, or drain entirely if replacing a water pump or radiator.
- Success Checkpoint: You will know this step worked when the flow stops or slows to a trickle, and no fluid spills out when you disconnect the target component.
- Common Mistake: Failing to secure the catch pan properly, resulting in toxic, sweet-tasting coolant spilling onto driveway pavement where pets or wildlife can access it. Take old coolant to an auto parts store for free recycling.
Step 3: Removing the Damaged Component
Compress the constant-tension spring clamps using channel-lock pliers and slide them down the hose, then gently twist and pull the rubber hose or unbolt the hard component mounting hardware.
- Exact Execution: Grab the ears of factory spring clamps with pliers, compress them, and slide them at least 2 inches down the hose away from the fitting. If the rubber hose is fused to the metal neck, do not pull straight back; twist the hose left and right with your hand to break the adhesive bond before sliding it off. If removing a water pump or radiator, extract all mounting bolts and store them in an organized tray in their exact removal order.
- Success Checkpoint: You will know this step worked when the damaged hose pulls free from its fitting or the hard part unseats cleanly without breaking adjacent plastic connectors.
- Common Mistake: Yanking hard on a fused rubber hose, which bends or snaps fragile plastic radiator nipples or thermostat housing necks.
Step 4: Cleaning and Installing the New Part
Clean the metal mating surfaces thoroughly with a shop towel, slide the new component or hose into position, and position new clamps precisely one-quarter inch away from the hose edge before torquing hardware to factory specs.
- Exact Execution: Wipe down all metal hose barbs or gasket surfaces with a clean shop towel to remove crusty mineral buildup or old gasket material. Slip your two new clamps onto the hose ends before pushing the hose fully onto the metal fitting. Position the worm-gear or spring clamps 1/4-inch back from the open mouth of the hose. If installing a water pump or thermostat housing, apply a star pattern and torque all bolts strictly to manufacturer specifications (typically 80 to 120 inch-pounds).
- Success Checkpoint: You will know this step worked when the hose is seated fully past the raised metal barb and the clamp is tightened securely without cutting into the outer rubber layer.
- Common Mistake: Over-tightening worm-gear hose clamps until they bite deeply and slice through the new rubber hose, creating a brand-new leak path.
Step 5: Refilling, Bleeding, and Testing the System
Mix a 50/50 ratio of concentrated coolant and distilled water in a clean bucket, pour it into the system via a spill-free funnel, and idle the engine with the cabin heater set to high until air bubbles cease rising.
- Exact Execution: Close the radiator drain petcock firmly. Combine equal parts concentrated coolant and distilled water in a clean container to achieve a 50/50 mix. Insert your spill-free funnel kit tightly into the radiator opening. Fill the system slowly until liquid stands halfway up the funnel throat. Turn your dashboard heater control to maximum heat and low fan speed. Start the engine and let it idle with the funnel open. Watch for air bubbles to purge. Once the upper radiator hose turns hot (indicating the thermostat has opened) and bubbles stop, top off the radiator, snap the cap on, and fill the plastic overflow recovery tank to the “Max” line.
- Success Checkpoint: You will know this step worked when the dashboard blowers output steady hot air, the engine temperature gauge remains locked firmly in the middle normal zone, and no further air bubbles emerge into the funnel.
- Common Mistake: Leaving trapped air pockets inside the engine block. Failing to “burp” the system causes rapid localized overheating and potential cylinder head warping.
Common Mistakes and How to Fix Them
- Dripping from New Hose Ends: Caused by a loose clamp or a hose seated short of the retaining barb. Fix: Let the engine cool, loosen the clamp, push the hose 1/2 inch further onto the fitting, and re-tighten the clamp firmly.
- Immediate Engine Overheating Post-Repair: Caused by a trapped air pocket or a stuck closed thermostat. Fix: Shut off the engine, let it cool completely, elevate the front end on wheel ramps, attach your spill-free funnel, and repeat the bleeding process.
- Coolant Level Continues to Drop: Caused by a secondary hidden leak or internal head gasket failure. Fix: Re-attach your pressure tester kit to check for external leaks. Pull your engine oil dipstick; if the oil resembles milky light-brown coffee, coolant is leaking internally past the head gasket.
- Sweet Smell Inside Vehicle Cabin: Caused by a failing heater core hidden behind the dashboard. Fix: Inspect the passenger-side floorboard carpeting for dampness or a greasy fog film collecting on the inside of the windshield.
Variations Based on Situation and Vehicle Type
- European Vehicles (BMW, Audi, Mercedes): These models often utilize proprietary silicate-free OAT coolants (such as G12 or G40) and one-time-use plastic quick-disconnect fittings with metal o-rings. Never substitute standard green coolant or reuse old plastic quick-connect clips.
- Emergency Roadside Fixes: If a hose ruptures far from home, wrapping a leaking hose section with self-fusing silicone repair tape and topping off with plain water is acceptable for a temporary limping maneuver, provided you flush and refill with proper coolant and replace the hose immediately afterward.
- Heavy-Duty Trucks and SUVs: Larger cooling capacities require purchasing 3 to 4 gallons of concentrated coolant and matching distilled water, and may feature dual heater cores that require secondary bleed screws located near the firewall.
How Long Does It Take / What Does It Cost
- Time Investment: A basic hose replacement takes 45 to 60 minutes. Replacing a water pump or radiator takes 2 to 4 hours due to extra component clearance requirements.
- Financial Investment: DIY material costs range from $50 for a single hose and coolant up to $250 if replacing a radiator. Professional mechanics charge between $150 and $300 for hoses, $400 to $900 for water pumps, and $1,500 to $3,000 for head gaskets due to high labor hours.
Frequently Asked Questions
Can I mix different colors of coolant together?
Never mix different chemical formulations like green IAT coolant with orange OAT coolant. Mixing incompatible coolant types triggers a chemical reaction that causes the fluid to gel into a thick sludge, clogging the radiator tubes, heater core, and engine cooling passages permanently.
Why is distilled water mandatory instead of tap water?
Tap water contains dissolved minerals like calcium and magnesium. When heated inside a running engine, these minerals precipitate out of the liquid to form scale deposits on internal metal surfaces, severely reducing heat transfer efficiency and accelerating component corrosion.
How do I know if my head gasket is leaking coolant?
A blown head gasket usually presents white sweet-smelling exhaust smoke, persistent engine overheating, bubbling inside the coolant overflow tank while idling, or engine oil contaminated with coolant that turns thick and milky on the dipstick.
What should I do with old used coolant?
Coolant is highly toxic to domestic pets and wildlife because of its sweet flavor profile. Never pour old coolant down storm drains or onto soil. Pour it into a sealed plastic jug and drop it off at a local auto parts store or municipal household hazardous waste recycling center.
Is it safe to drive with a minor coolant leak?
Driving with a minor leak is risky because cooling system pressure drops rapidly. A minor drip can quickly transform into a catastrophic blowout, leading to severe engine overheating, warped aluminum cylinder heads, and total engine failure within minutes.