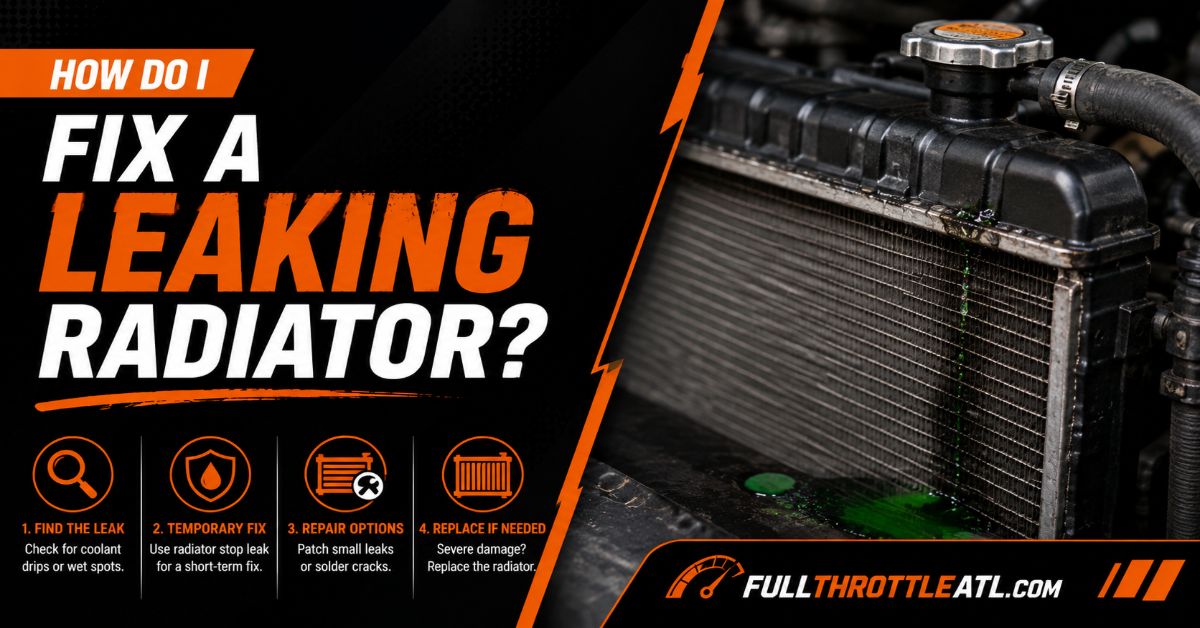
If you are asking how do i fix a leaking radiator safely, this comprehensive 8-step guide resolves pinhole leaks and cracked plastic tanks in 2 to 4 hours. Rated moderate difficulty, this process costs under $50. Your ultimate repair success depends on thoroughly cleaning and degreasing bare metal or plastic before applying any patch.
Before You Start
- Time Required: 2 to 4 hours (includes 1-hour cure time)
- Difficulty Level: Moderate (no advanced mechanical skills required)
- Estimated Cost: $25 – $50
- Prerequisites: Ability to safely raise vehicle hood and operate hand tools
Tools & Materials Checklist
- [ ] 2-Part Epoxy Putty: 1 tube (plastic/metal formulation, e.g., J-B Weld PlasticWeld or SteelStik)
- [ ] Radiator Stop-Leak Fluid: 1 bottle (325 mL to 500 mL; for internal pinholes only)
- [ ] Pre-mixed 50/50 Coolant: 1 to 2 gallons (exact vehicle OEM spec)
- [ ] Sandpaper: 1 sheet of 120-grit coarse aluminum oxide
- [ ] Degreaser: 1 can aerosol brake cleaner or 99% isopropyl alcohol
- [ ] Drain Pan: 1 catch pan (minimum 2-gallon capacity)
- [ ] Safety Gear: Nitrile gloves, splash-proof safety glasses
- [ ] Cleaning Supplies: Microfiber cloths, brass wire brush
Phase 1: Preparation and Leak Diagnosis
Step 1: Cool the Engine Completely
Park the vehicle on flat, level ground, turn off the engine, and allow it to cool completely for 2 to 3 hours before touching any cooling system component. Verify cooling by ensuring the dashboard temperature gauge sits at the baseline minimum mark and squeezing the upper radiator hose with a gloved hand to confirm it feels cold and soft without pressure.
[Cold Engine Check] ---> Squeeze Upper Hose (Must feel cold/soft) ---> Open Radiator Cap
- Success Checkpoint: You’ll know it worked when you can rotate the spring-loaded radiator cap counterclockwise and remove it without hearing a pressure hiss or seeing fluid vapor escape.
- Common Mistake: Opening a warm cooling system releases pressurized, 200°F (93°C) coolant that sprays outward, causing severe severe burns. Always test hose temperature physically before cap removal.
Step 2: Pinpoint the Exact Leak Location
Wipe down all accessible radiator surfaces, seams, and hose connections with clean microfiber cloths to locate active fluid drips, spraying wet spots, or dry crusty residue. If the leak is not actively dripping while cold, top off the radiator neck with 16 fl oz of distilled water, install the cap, start the engine, and let it run for exactly 120 seconds to build light hydraulic pressure before switching off the ignition.
| Leak Appearance | Typical Location | Correct Repair Path |
| Clean split / visible crack | Plastic top/bottom end-tanks | 2-Part Epoxy Putty (Step 5) |
| White/Green crusty spray | Center aluminum cooling fins | Liquid Stop-Leak Fluid (Step 6) |
| Seep around rubber neck | Hose clamp junction | Clamp tightening / Hose replacement |
- Success Checkpoint: You’ll know it worked when you identify the precise physical origin point of the leak marked by fresh wet coolant droplets or bubbling under light pressure.
- Common Mistake: Mistaking a leaking upper radiator hose clamp for a cracked plastic end-tank. Trace the wet path to its highest physical point on the cooling assembly.
Phase 2: Structural Surface Repair
Step 3: Partial-Drain Coolant Below the Leak Line
Drain 1 to 2 quarts of coolant from the radiator drain petcock into a clean catch pan until the liquid level drops at least 2 inches below the damaged area. Locate the plastic drain valve at the bottom corner of the radiator, turn it counterclockwise by hand or with a 1/4-inch drive socket, and catch the draining fluid.
+------------------------------------------+
|  Radiator Plastic Top Tank               |
|  [ CRACK AREA ]                          |
|  ~~~~~~~~~~~~~~~~~~~~~~~~~~~~~~~~~~~~~~  |<-- Target Fluid Level (2" below crack)
|  Coolant Fluid Level                     |
|                                          |
+------------------------------------------+
- Success Checkpoint: You’ll know it worked when looking through the filler neck or crack shows zero liquid resting directly behind or touching the repair zone.
- Common Mistake: Attempting to apply epoxy while coolant remains flush behind the crack. Internal moisture seeps through the gap, preventing chemical bonding to the substrate.
Step 4: Abrade and Degrease the Repair Surface
Scuff a 1-inch perimeter surrounding the crack using 120-grit coarse sandpaper until the glossy surface turns completely matte with deep scratch scoring. Spray aerosol brake cleaner directly onto a clean microfiber cloth and scrub the abraded area aggressively to eliminate oil, grease, road grime, and residual coolant.
- Success Checkpoint: You’ll know it worked when the application zone feels rough to the touch, shows distinct cross-hatch scoring, and is 100% dry and free of oily residue.
- Common Mistake: Skipping sandpaper scoring on smooth nylon end-tanks. Epoxy cannot form a mechanical bond on smooth plastic and will blow off under normal operating pressure.
Step 5: Mix and Apply the 2-Part Epoxy Putty
Cut a 1-inch slice from the 2-part epoxy putty stick and knead it firmly between gloved fingers for 60 seconds until it forms a uniform color with zero streaking. Press the putty directly over the center of the crack, molding it outward to a thickness of 1/8 inch (0.32 cm) while overlapping all outer edges of the crack by at least 0.5 inches (1.27 cm), then allow it to cure undisturbed for 60 minutes.
       0.5" Overlap              0.5" Overlap
      |------------|            |------------|
      +--------------------------------------+
      |         1/8" Thick Epoxy Patch       |
=====>|   ================================   |<===== Plastic Radiator Wall
      |             [CRACK GAP]              |
      +--------------------------------------+
- Success Checkpoint: You’ll know it worked when 60 minutes have elapsed and the epoxy feels rock-hard to fingernail pressure without flexing or yielding.
- Common Mistake: Applying epoxy in cold ambient conditions (below 50°F / 10°C). Use a heat gun or hairdryer on low setting held 12 inches away for 5 minutes to accelerate curing in cold weather.
Phase 3: System Refill, Bleeding, and Final Verification
Step 6: Apply Liquid Stop-Leak (Alternate Pinhole Method)
Pour one 325 mL to 500 mL bottle of liquid radiator stop-leak directly into the cold radiator filler neck if your leak consists of internal core pinholes rather than structural tank cracks. Shake the bottle vigorously for 30 seconds before pouring to distribute the micro-sealing fibers evenly throughout the liquid carrier.
Pour Stop-Leak Fluid ===> [ Cold Radiator Neck ] (YES)
Pour Stop-Leak Fluid ===> [ Plastic Expansion Tank ] (NO - Causes Clogging)
- Success Checkpoint: You’ll know it worked when the entire contents of the bottle are emptied directly into the metal radiator filler neck without spilling into the plastic expansion reservoir.
- Common Mistake: Pouring stop-leak products into the plastic overflow/expansion reservoir. The heavy suspended particles settle at the bottom of the reservoir tank and never circulate through the active radiator core.
Step 7: Refill Coolant and Bleed Trapped Air
Fill the radiator neck to the base of the filler lip with fresh 50/50 pre-mixed coolant, leave the radiator cap off, and start the engine with your dashboard climate control set to maximum heat and fan speed on low. Allow the engine to idle for 15 to 20 minutes; watch the open radiator neck as air bubbles escape, topping off fluid incrementally to maintain the fluid baseline.
Engine Running (Cap OFF) ---> Heater ON High ---> Air Bubbles Escape ---> Level Stabilizes ---> Seal Cap
- Success Checkpoint: You’ll know it worked when air bubbles stop rising in the open neck, the lower radiator hose warms up, and hot air blows continuously from the interior dashboard vents.
- Common Mistake: Reinstalling the radiator cap immediately after filling. Trapped air pockets cause severe localized hot spots, inaccurate dashboard temperature readings, and rapid engine overheating.
Step 8: Perform a Thermal Cycling Pressure Test
Reinstall the radiator pressure cap tightly, wipe away all tools and stray fluid drops from the engine bay, and run the engine at 1500 RPM until the electric cooling fan cycles on and off twice. Turn off the ignition, shine a high-lumens flashlight onto your repair zone, and inspect the perimeter for 5 minutes.
- Success Checkpoint: You’ll know it worked when the engine operates at normal temperature (190°F to 210°F / 88°C to 99°C) for 15 minutes with zero fluid weeping, bubbling, or pressure drops around the patch.
- Common Mistake: Driving the vehicle on public roads immediately without completing a stationary thermal cycle test. Unseen patch failures can cause catastrophic engine seizure under load.
Common Mistakes and How to Fix Them
1. Epoxy Patch Peels Off After Initial Heat Cycle
- Root Cause: Inadequate surface abrasion or oil/coolant residue left on the substrate during application.
- Recovery Procedure: Drain 2 quarts of coolant below the patch level. Use a rigid putty knife to scrape away the failed epoxy completely. Re-sand the base material with fresh 120-grit sandpaper, expanding the scuff zone by an additional 0.5 inches. Saturate the area with aerosol brake cleaner, wipe thoroughly dry with a lint-free cloth, and reapply fresh 2-part epoxy putty.
2. Vehicle Overheats After Adding Stop-Leak Fluid
- Root Cause: Excess sealant compound trapped in narrow heat-exchanger passages or an airlock created during refilling.
- Recovery Procedure: Park the vehicle on a steep incline or jack up the front end so the radiator neck sits as the highest physical point on the car. Remove the radiator cap from a cold engine, attach a spill-free funnel, fill with coolant, and idle for 25 minutes to burp out trapped air pockets. If overheating continues, perform a full cooling system reverse-flush to clear clogged passages.
3. Leak Appears at Radiator Cap Seal After Repair
- Root Cause: The repaired structural patch restored full 15-psi system pressure, exposing a deteriorated rubber gasket inside an old radiator cap.
- Recovery Procedure: Inspect the rubber sealing gasket on the underside of the radiator cap for cracks, flattening, or rot. Replace the radiator cap with a new OEM-spec pressure cap matching your vehicle’s factory psi rating (typically 0.9 bar to 1.1 bar / 13 psi to 16 psi).
4. Cracked Tank Continues Splitting Past the Patch Edges
- Root Cause: Structural flex in the plastic end-tank causing stress propagation at the terminus of the original crack.
- Recovery Procedure: Drill a tiny 1/16-inch (1.5 mm) relief hole through the plastic at each extreme tip of the crack line to relieve mechanical stress concentrations. Scuff the expanded area, clean with alcohol, and apply a wider layer of epoxy putty extending at least 1 inch past the newly drilled relief points.
Repair Variations for Specific Situations
                                  REPAIR VARIATION MATRIX
+--------------------------+---------------------------------+----------------------------------+
| Situation                | Primary Repair Method           | Key Procedure Variance           |
+--------------------------+---------------------------------+----------------------------------+
| Emergency Roadside Fix   | Heavy-Duty Stop-Leak + Tape     | Temporary; limit speed <45 mph   |
| Plastic End-Tank Crack   | Plastic-Bonding Epoxy Putty     | Deep 120-grit mechanical crosshatch|
| Aluminum Core Pinhole    | Metal-Reinforced Epoxy / Liquid | Wire brush aluminum oxidation    |
+--------------------------+---------------------------------+----------------------------------+
Emergency Roadside Fix
When stranded without full tools or cure time:
- Allow the engine to cool until safe to open.
- Carefully relieve pressure and add a bottle of rapid-sealing stop-leak fluid along with fresh water.
- Wrap high-tensile silicone self-fusing tape tightly around external hose or tank leaks if accessible.
- Drive under 45 mph with interior heat on high directly to a service facility.
Plastic End-Tank vs. Aluminum Core Repairs
- Plastic End-Tanks (Nylon 66): Require aggressive surface gouging with 120-grit sandpaper because smooth plastic offers zero natural chemical adhesion. Use plastic-specific epoxy (alkali-resistant).
- Aluminum Core Channels: Require cleaning with a stiff brass wire brush to remove clear aluminum oxide layers before degreasing. Metal-filled epoxy (such as steel-reinforced putty) provides superior thermal expansion matching on aluminum surfaces.
Time and Cost Breakdown
| Component / Phase | DIY Cost Range | Professional Shop Cost | Time Required |
| Epoxy Putty / Sealant | $8 – $15 | $40 – $70 (Part markup) | 10 minutes |
| Pre-Mixed Coolant (1-2 gal) | $15 – $30 | $30 – $50 | 10 minutes |
| Cleaning & Prep Supplies | $5 – $10 | Included | 20 minutes |
| Curing & Air Bleeding Time | $0 | $150 – $300 (Labor) | 1.5 to 2 hours |
| TOTALS | $28 – $55 | $220 – $420 | 2 to 3 hours |
Frequently Asked Questions
Can I drive my car with a leaking radiator?
Driving with a leaking radiator is unsafe because low coolant levels cause rapid engine overheating, warping cylinder heads and blowing head gaskets within miles. If driving is unavoidable during an emergency, keep distance short, run interior heat on maximum to dissipate heat, and stop immediately if temperature rises.
How long does a radiator epoxy repair last?
A properly executed 2-part epoxy patch on a cleaned, abraded plastic or aluminum surface can last anywhere from several months to several years. However, because plastic end-tanks undergo continuous thermal expansion and high pressure cycles, external patches should be viewed as reliable semi-permanent fixes until total replacement.
Can I use superglue or regular silicone instead of epoxy?
Regular silicone or superglue will fail almost instantly on a radiator. Superglue lacks structural gap-filling strength and becomes brittle under heat, while household silicone cannot withstand 15 psi of continuous hydraulic pressure or chemical exposure to ethylene glycol coolant. Always use dedicated high-temperature 2-part epoxy putty.
How do I safely dispose of drained coolant?
Drained coolant contains toxic ethylene glycol and heavy metals, making it illegal and dangerous to pour down household drains or ground soil. Pour used coolant into sealed plastic containers, label them clearly, and drop them off at a local auto parts retailer or municipal hazardous waste recycling facility.
When should I replace the radiator instead of fixing it?
Replace your radiator immediately if cracks exceed 3 inches in length, if end-tank crimp seams have separated from the aluminum core, or if internal corrosion turns coolant into brown sludge. Multiple widespread pinholes across cooling fins also signal systemic core rot that temporary patches cannot safely control.
Summary of Fix
To execute a successful fix for a leaking radiator, ensure your vehicle engine sits cold, drain coolant below the damage line, aggressively sand and degrease the repair surface, and apply a 2-part epoxy putty with proper cure time before refilling and bleeding the cooling system. Adhering strictly to surface prep procedures ensures your repair withstands system operating pressure over time.