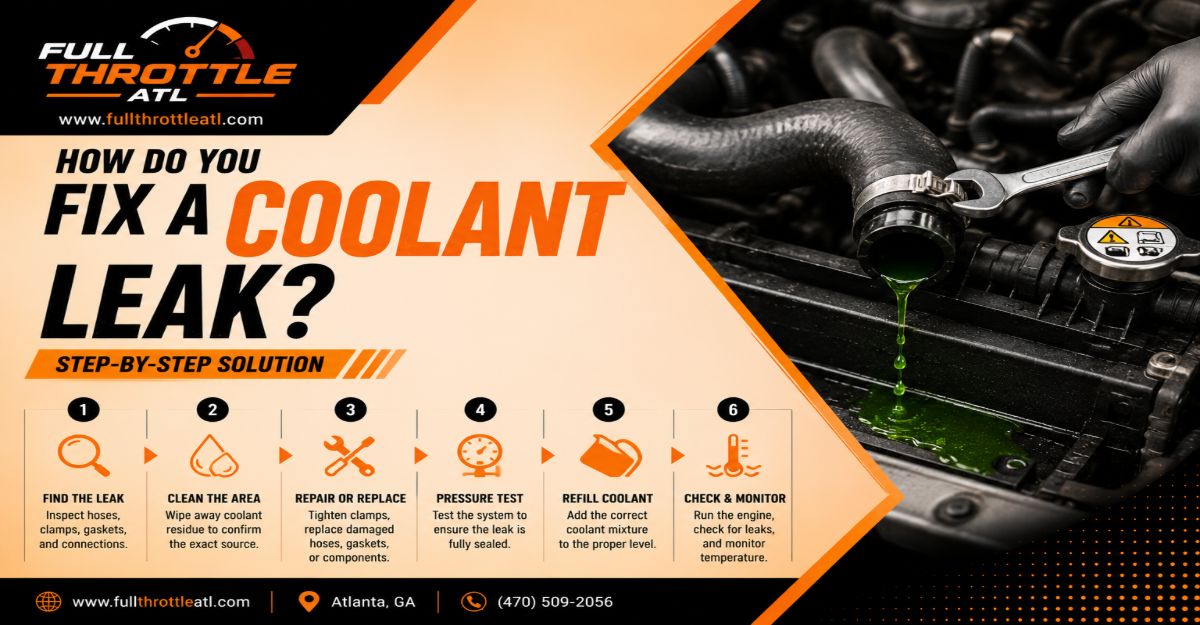
Fixing a coolant leak requires locating the source of fluid loss, safely draining the system, replacing the damaged part or hose, and refilling and bleeding the cooling system. This 6-step repair takes 2 to 4 hours, requires intermediate mechanic tools, and relies on precise bleeding to prevent engine overheating.
📋 Before You Start
- Time Required: 2 to 4 hours total
- Difficulty Level: Intermediate
- Cost Range: $20 to $150 (depending on whether you are replacing a $10 hose or a $120 radiator)
- Tools & Materials Checklist:
- Safety glasses and mechanics gloves
- Socket wrench set (metric 8mm to 15mm) and pliers
- Torque wrench (inch-pounds / low foot-pounds)
- Catch pan (minimum 2-gallon capacity) and shop towels
- Coolant pressure tester pump
- Spill-free coolant funnel kit
- Replacement part (hose, clamp, radiator, or gasket)
- 1 to 2 gallons of vehicle-specific antifreeze (OAT, HOAT, or IAT)
- 1 to 2 gallons of distilled water
- Scotch-Brite pad and brake cleaner solvent
- Prerequisite Conditions: Park on a completely flat, level surface with the engine stone cold.
Step 1: Verify Safety and Perform Cooldown
Park the vehicle on a level surface, engage the parking brake, and allow the engine to cool completely for 30 to 60 minutes.
- How to do it: Never open a hot cooling system. The system operates under 13 to 16 psi (90 to 110 kPa) of pressure, which raises the boiling point of the fluid. Opening it hot causes instant, explosive boiling and severe scalding. Wait until the upper radiator hose is completely cool and soft when squeezed by hand. Drape a thick shop towel over the radiator cap, press down, and turn it counter-clockwise only to the first safety stop to vent any residual pressure before removing it entirely.
- Success Checkpoint: You will know this step worked when the upper radiator hose can be easily compressed flat by hand and the system cap opens without hissing or pushing out fluid.
- Common Mistake: Rushing the cooldown phase. Even if the temperature gauge reads normal, pressurized fluid remains dangerously hot for up to an hour after engine shutoff.
Step 2: Diagnose and Locate the Leak
Inspect the engine bay thoroughly to identify the exact source of fluid loss using visual inspection or pressure testing.
- How to do it: Look for bright puddles (green, pink, orange, or blue) and crusty white or colored residue on components. If the leak is dry or invisible, thread a coolant pressure tester pump onto the radiator neck or expansion tank. Pump the handle gently until the gauge matches the exact pressure rating stamped on your radiator cap (typically 13 to 16 psi). Do not exceed this pressure or you will burst the core. Listen for hissing or watch for fluid weeping from hose joints, radiator seams, or the water pump weep hole.
- Success Checkpoint: You will know this step worked when you spot active dripping or a pressure drop on the tester gauge paired with fresh wetness at a specific component.
- Common Mistake: Over-pressurizing the cooling system with the tester pump, which can compromise aging plastic radiator tanks or heater cores.
Step 3: Drain the Cooling System
Drain all remaining coolant into a catch pan before unbolting any components to prevent chemical spills and engine bay contamination.
- How to do it: Place your 2-gallon catch pan directly underneath the radiator drain plug (petcock), typically located on the lower driver or passenger-side corner of the radiator. Slowly loosen the petcock by hand or with a quarter-turn pliers. Remove the radiator cap (if not already removed) to vent the system and maximize flow speed. Allow the fluid to drain completely. Once flow stops, hand-tighten the petcock firmly; do not use metal wrenches on plastic petcocks to avoid stripping threads.
- Success Checkpoint: You will know this step worked when fluid flow stops entirely and the radiator upper and lower reservoirs are empty.
- Common Mistake: Forgetting that antifreeze is toxic and sweet-tasting; always secure pets and children, and transfer drained coolant into a sealed container for proper recycling at an auto parts store.
Step 4: Remove the Faulty Component and Clean Mating Surfaces
Extract the damaged part and prepare the mounting areas to ensure a tight, leak-free seal for the replacement component.
- How to do it: If replacing a hose, slide the spring clamps back using pliers, twist the rubber hose to break its seal on the metal pipe, and pull it off. If replacing a gasketed part (like a thermostat housing or water pump), unbolt it and use a plastic scraper along with a Scotch-Brite pad and brake cleaner solvent to strip 100% of old gasket material and corrosion from the metal mating surfaces. Wipe the area dry with a clean shop towel.
- Success Checkpoint: You will know this step worked when metal mating surfaces feel entirely smooth to the fingernail with zero traces of old gasket paper, scale, or oil film.
- Common Mistake: Leaving microscopic fragments of old gaskets on the engine block, which creates micro-channels for coolant to escape under pressure.
Step 5: Install the New Component to Specification
Secure the replacement part using correct alignment and factory torque specifications.
- How to do it: Position your new hose or component into place. For hoses, slide the clamp back down so it rests roughly $\frac{1}{4}\text{ inch}$ (6mm) from the edge of the hose, clear of any tapered bead. For gasketed components, install the new gasket dry or with a microscopic film of manufacturer-approved RTV sealant if specified. Use a low-range torque wrench to tighten all bolts in a criss-cross pattern to exact factory settings (typically 8 to 15 lb⋅ft / 11 to 20 N⋅m for aluminum housing bolts).
- Success Checkpoint: You will know and confirm this step worked when all fasteners meet exact torque specs and hoses are pushed fully past the metal retainer ridges.
- Common Mistake: Over-tightening housing bolts on aluminum engine blocks, which strips threads or snaps bolt heads.
Step 6: Refill and Bleed Air From the System
Fill the cooling system with fresh fluid and purge all trapped air pockets to restore proper thermal circulation.
- How to do it: Insert a spill-free funnel kit securely into the radiator opening or expansion tank. Mix your concentrated coolant 50/50 with distilled water (or use pre-diluted fluid) and pour it slowly into the funnel. Turn your vehicle’s interior climate control to Maximum Heat and the blower fan to Low. Start the engine and let it idle. As the engine warms, the thermostat will open, drawing fluid into the block and releasing trapped air bubbles up through the funnel. Continuously add fluid to keep the funnel level above empty. Once bubbles stop rising and hot air blows consistently from the cabin vents, snap the funnel stopper closed, remove it, and tighten the radiator cap.
- Success Checkpoint: You will know this step worked when the cabin vents blow sustained hot air, the engine temperature gauge remains stable in the middle position, and no further air bubbles emerge in the funnel.
- Common Mistake: Failing to purge all trapped air, which creates local hot spots and steam pockets that cause rapid engine overheating.
Common Mistakes and How to Fix Them
| Symptom | Probable Cause | Corrective Action |
| Engine temperature spikes into the red | Trapped air bubble blocking flow or stuck thermostat | Let engine cool completely, reattach spill-free funnel, and re-bleed the cooling system. |
| Slow dampness around a new hose | Clamp positioned too close to the hose end or under-tightened | Reposition the spring or worm-gear clamp $\frac{1}{4}\text{ inch}$ past the metal bead and re-secure. |
| Coolant level drops with no external puddle | Internal leak via a blown head gasket or cracked cylinder head | Check oil dipstick for milky discoloration; perform a chemical block combustion test. |
| Continuous leak from a flat gasket flange | Incomplete cleaning of old gasket residue or uneven bolt torque | Disassemble, strip surface down to bare metal with solvent, install fresh gasket, and torque in sequence. |
Variations Based on System Design
- Pressurized Expansion Tanks: Modern European and newer domestic vehicles lack a radiator cap entirely. In these designs, you must fill and bleed the system exclusively through the plastic coolant expansion tank, which incorporates its own pressure relief cap.
- Remote Bleeder Valves: Some vehicles (such as certain BMW and GM models) feature dedicated plastic bleed screws on the thermostat housing or upper heater hoses. These must be manually cracked open during the refill phase until a steady stream of fluid escapes without air bubbles.
Frequently Asked Questions
Can I use tap water to mix with my coolant in an emergency?
Tap water contains minerals like calcium and magnesium that bond to internal engine passages, creating insulating scale deposits and accelerating corrosion. While tap water is acceptable for a temporary roadside emergency flush, you must drain and refill with a 50/50 mix of distilled water and coolant as soon as possible.
What happens if I mix different coolant colors together?
Mixing incompatible coolants-such as traditional green inorganic acid technology (IAT) with orange organic acid technology (OAT)-causes a chemical reaction that thickens the fluid into a gel-like sludge. This sludge clogs the narrow channels of your radiator and heater core, severely inhibiting heat transfer.
How do I dispose of old coolant safely?
Antifreeze is highly toxic to pets and wildlife due to its sweet taste and ethylene glycol content. Collect all drained fluid in a sealed plastic container, wipe up any drips immediately, and drop it off at a local auto parts store, service garage, or municipal household hazardous waste recycling facility.
How long does a typical cooling system repair last?
When executed with quality replacement hoses, OEM-grade gaskets, and proper torque protocols, a cooling system repair easily lasts 5 to 10 years or 100,000 miles. Rubber components degrade naturally over time, so regular visual inspections during oil changes remain vital.