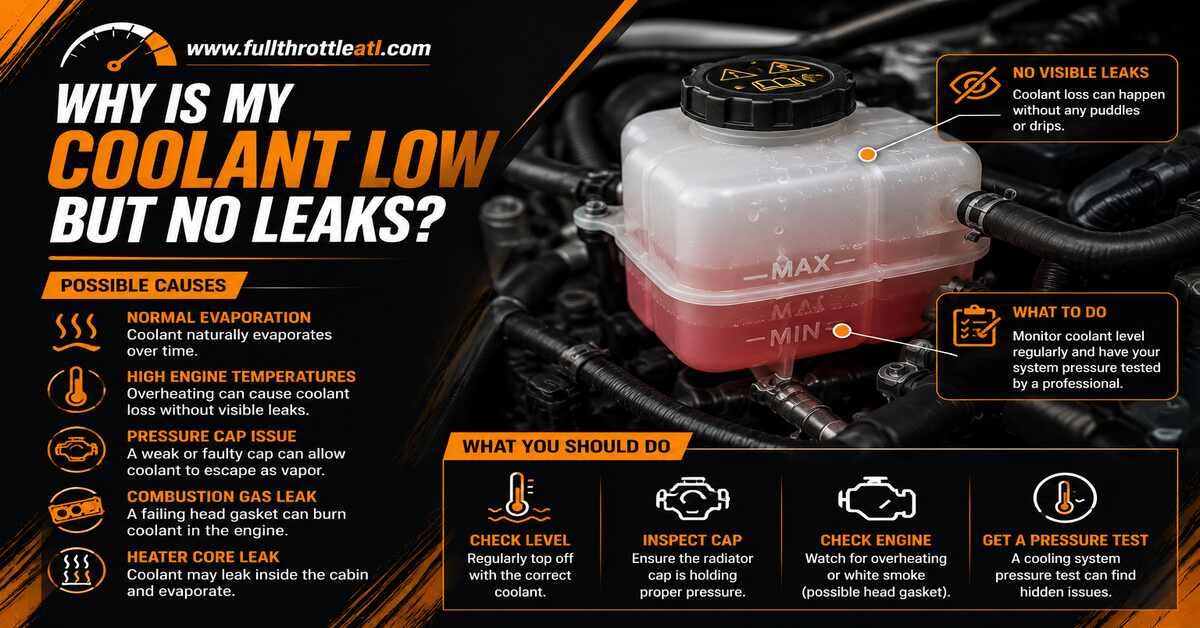
Finding your coolant reservoir empty week after week without a single puddle on your garage floor is frustrating, but it points to a specific set of hidden issues. This definitive guide walks you through the 4-step diagnostic process to locate internal burning, cap vaporization, or micro-evaporation leaks. By following these steps in order, you will accurately isolate the fault in 1.5 to 3 hours using professional testing methods-saving hundreds in diagnostic fees.
Before You Start
- Total Time: 1.5 to 3 hours
- Difficulty Level: Intermediate (Mechanical DIY)
- Estimated Cost: $30 to $100 (depending on whether you already own testing kits)
- Prerequisite Condition: The vehicle engine must be stone cold (sat off for at least 1 hour). Never open a cooling system while hot.
Tools and Materials Checklist
- Coolant Pressure Tester Kit (with radiator/expansion tank adapter caps)
- Combustion Leak Detector Kit (block tester with blue chemical fluid)
- New OEM-Spec Radiator Cap (matching your exact vehicle PSI rating)
- 50/50 Premixed Coolant (1 gallon, matching manufacturer spec)
- UV Leak Detection Dye (1 oz / 30 mL) and UV Flashlight with yellow safety glasses
- Safety Glasses and Nitrile Gloves
- Clean shop rags or paper towels
Phase 1: The Diagnostic Process
Step 1: Inspect and Test the Radiator Cap
Inspect the radiator or expansion tank cap seals and test its ability to hold pressure using a manual cooling system tester.
- Ensure the engine is completely cold (ambient temperature, safe to touch by hand).
- Remove the radiator cap or pressurized expansion tank cap carefully.
- Visually inspect the rubber seals under bright light for cracks, flattening, swelling, or tears.
- Attach the cap securely to your Coolant Pressure Tester using the correct adapter ring from your kit.
- Pump the hand tester until the gauge reaches the exact PSI rating stamped on top of your cap (typically $13\text{ to }18\text{ PSI}$).
- You’ll know it worked when: The gauge needle holds that exact pressure steady for a full 60 seconds. If the needle drops immediately, the internal spring or seal has failed, allowing coolant to vaporize into the overflow tank invisibly.
- Common Mistake: Testing a warm cap. Metal expands when hot, yielding a false pass on a failing seal. Always test cold.
Step 2: Perform a System Pressure Test
Pressurize the entire cooling system to force hidden structural micro-leaks or internal seepage to reveal themselves.
- Connect the coolant pressure tester pump directly to the open radiator neck or expansion tank opening.
- Pump the handle slowly until the gauge reaches your vehicle’s designated system operating pressure (typically $15\text{ PSI}$). Never exceed $20\text{ PSI}$ or you will rupture plastic heater cores or split older rubber hoses.
- Leave the pressurized system undisturbed for 15 to 20 minutes.
- Monitor the gauge needle closely:
- If the needle drops steadily but no puddles form on the ground, coolant is escaping internally (into the cylinders, engine oil, or exhaust).
- If the needle holds completely steady, your leak only opens up under extreme operating temperatures or is a combustion-side issue.
- You’ll know it worked when: You have either verified a steady pressure drop (pointing to internal/hidden loss) or completely ruled out external plumbing leaks.
Step 3: Conduct a Combustion Gas (Block) Test
Check if a failing head gasket is forcing high-pressure combustion gases into your cooling system and burning off coolant.
- Lower the liquid coolant level inside your radiator or tank by approximately 2 inches using a hand siphon so that liquid does not touch the bottom of the tester tool.
- Fill the glass or plastic chamber of your block tester to the marked fill line with the blue chemical testing fluid.
- Insert the rubber tapered cone of the block tester tightly into the radiator or expansion tank opening to create a firm seal.
- Start the engine and let it idle with the air conditioning and heater turned off.
- Squeeze the rubber bulb attached to the top of the tester firmly and repeatedly for 2 minutes to draw air from the cooling system space through the blue chemical fluid.
- You’ll know it worked when: The fluid changes color. If the blue fluid turns Yellow (gasoline engines) or Green (diesel engines), $CO_2$ gas is present in your cooling system, confirming a blown head gasket or cracked engine block. If it stays pure blue, your head gaskets are intact.
Step 4: Run a UV Dye Micro-Leak Test
Introduce fluorescent dye into the cooling system to expose microscopic cracks that evaporate instantly under engine heat.
- Pour 1 ounce (30 mL) of automotive UV coolant dye directly into your radiator or expansion tank.
- Top off the fluid level using your 50/50 premixed coolant and secure the cap.
- Drive the vehicle normally for 1 to 2 days under regular operating conditions, ensuring the engine reaches full operating temperature multiple times.
- Park the vehicle in a completely dark garage or workspace, put on your yellow contrast safety glasses, and turn on your UV flashlight.
- Scan every inch of the cooling system: water pump weep holes, heater core firewall connections, radiator crimp seams, thermostat housing gaskets, and hose clamps.
- You’ll know it worked when: You spot a bright, neon-glowing trail or pool pinpointing the exact micro-fracture where hot coolant was leaking and instantly evaporating.
Phase 2: Common Mistakes and How to Fix Them
- Opening a Hot System: Scalding coolant under intense pressure will erupt instantly, causing severe burns. Fix: Always wait a minimum of 1 hour for the engine to cool down completely before touching caps or hoses.
- Over-Pressurizing the System: Pumping a manual tester past $20\text{ PSI}$ can split radiator end-tanks or burst old heater cores. Fix: Reference your owner’s manual specification and stop pumping the moment you hit the target system PSI.
- Mixing Incompatible Coolants: Combining traditional green ethylene glycol with orange OAT/HOAT formulations triggers a chemical reaction that creates a thick, radiator-blocking sludge. Fix: Always match your exact manufacturer specification (e.g., Dex-Cool, Asian Red/Pink, European Blue/Pink).
- Sucking Liquid Coolant into the Block Tester: If raw coolant gets sucked into the block tester chamber during Step 3, it contaminates the blue fluid and causes a false reading. Fix: Always siphon the coolant level down 2 inches below the filler neck before testing.
Phase 3: Variations Based on Vehicle Design
Modern European Vehicles (Pressurized Expansion Tanks)
Many modern European cars (BMW, Audi, Mercedes, Volkswagen) do not feature a traditional radiator cap; instead, the entire system relies on a heavily pressurized plastic expansion tank cap ($15\text{ to }20\text{ PSI}$).
- Variation: You must use specialized European threaded adapters on your pressure tester kit. Never force a universal rubber-cone adapter onto a plastic expansion tank neck, as it can chip the fragile plastic sealing edge.
Hybrid and Electric Vehicles
Some modern hybrids feature split cooling loops (one for the internal combustion engine and a separate one for the inverter and battery electronics).
- Variation: Ensure you are diagnosing the correct coolant loop. Low coolant in the inverter loop will not show up on a combustion block test; it requires a specialized low-temperature pressure test procedure outlined in the service manual.
Phase 4: Frequently Asked Questions
Can a bad transmission cooler cause low coolant with no leaks?
Yes. In vehicles with automatic transmission fluid coolers integrated inside the radiator side tank, an internal crack can allow engine coolant to leak directly into the transmission fluid. This ruins the transmission while making coolant disappear without a trace on the ground. Check your transmission dipstick for a milky, pinkish-brown fluid consistency.
What are the signs of a hidden heater core leak?
A hidden heater core leak occurs inside your vehicle dashboard. Because the coolant drips onto the passenger-side floorboard or evaporates through the HVAC vents, you will see no exterior puddles under the engine bay. Look for a sweet chemical smell inside the cabin, greasy fog building up on the inside of your windshield, or a damp passenger-side carpet.
How much coolant loss is normal over time?
Under a properly sealed, healthy modern cooling system, zero coolant loss is normal. Coolant operates in a completely closed loop. If your reservoir drops by even an inch every few months, you have an active micro-leak or a failing pressure cap that requires immediate investigation.
Will stop-leak additives fix a coolant loss with no visible leaks?
Stop-leak additives can temporarily plug microscopic radiator or heater core micro-seals, but they are a short-term band-aid. They cannot fix a failed radiator cap, a structural head gasket breach, or a split hose. Furthermore, heavy stop-leak use can clog narrow passages inside your radiator and heater core, leading to engine overheating.