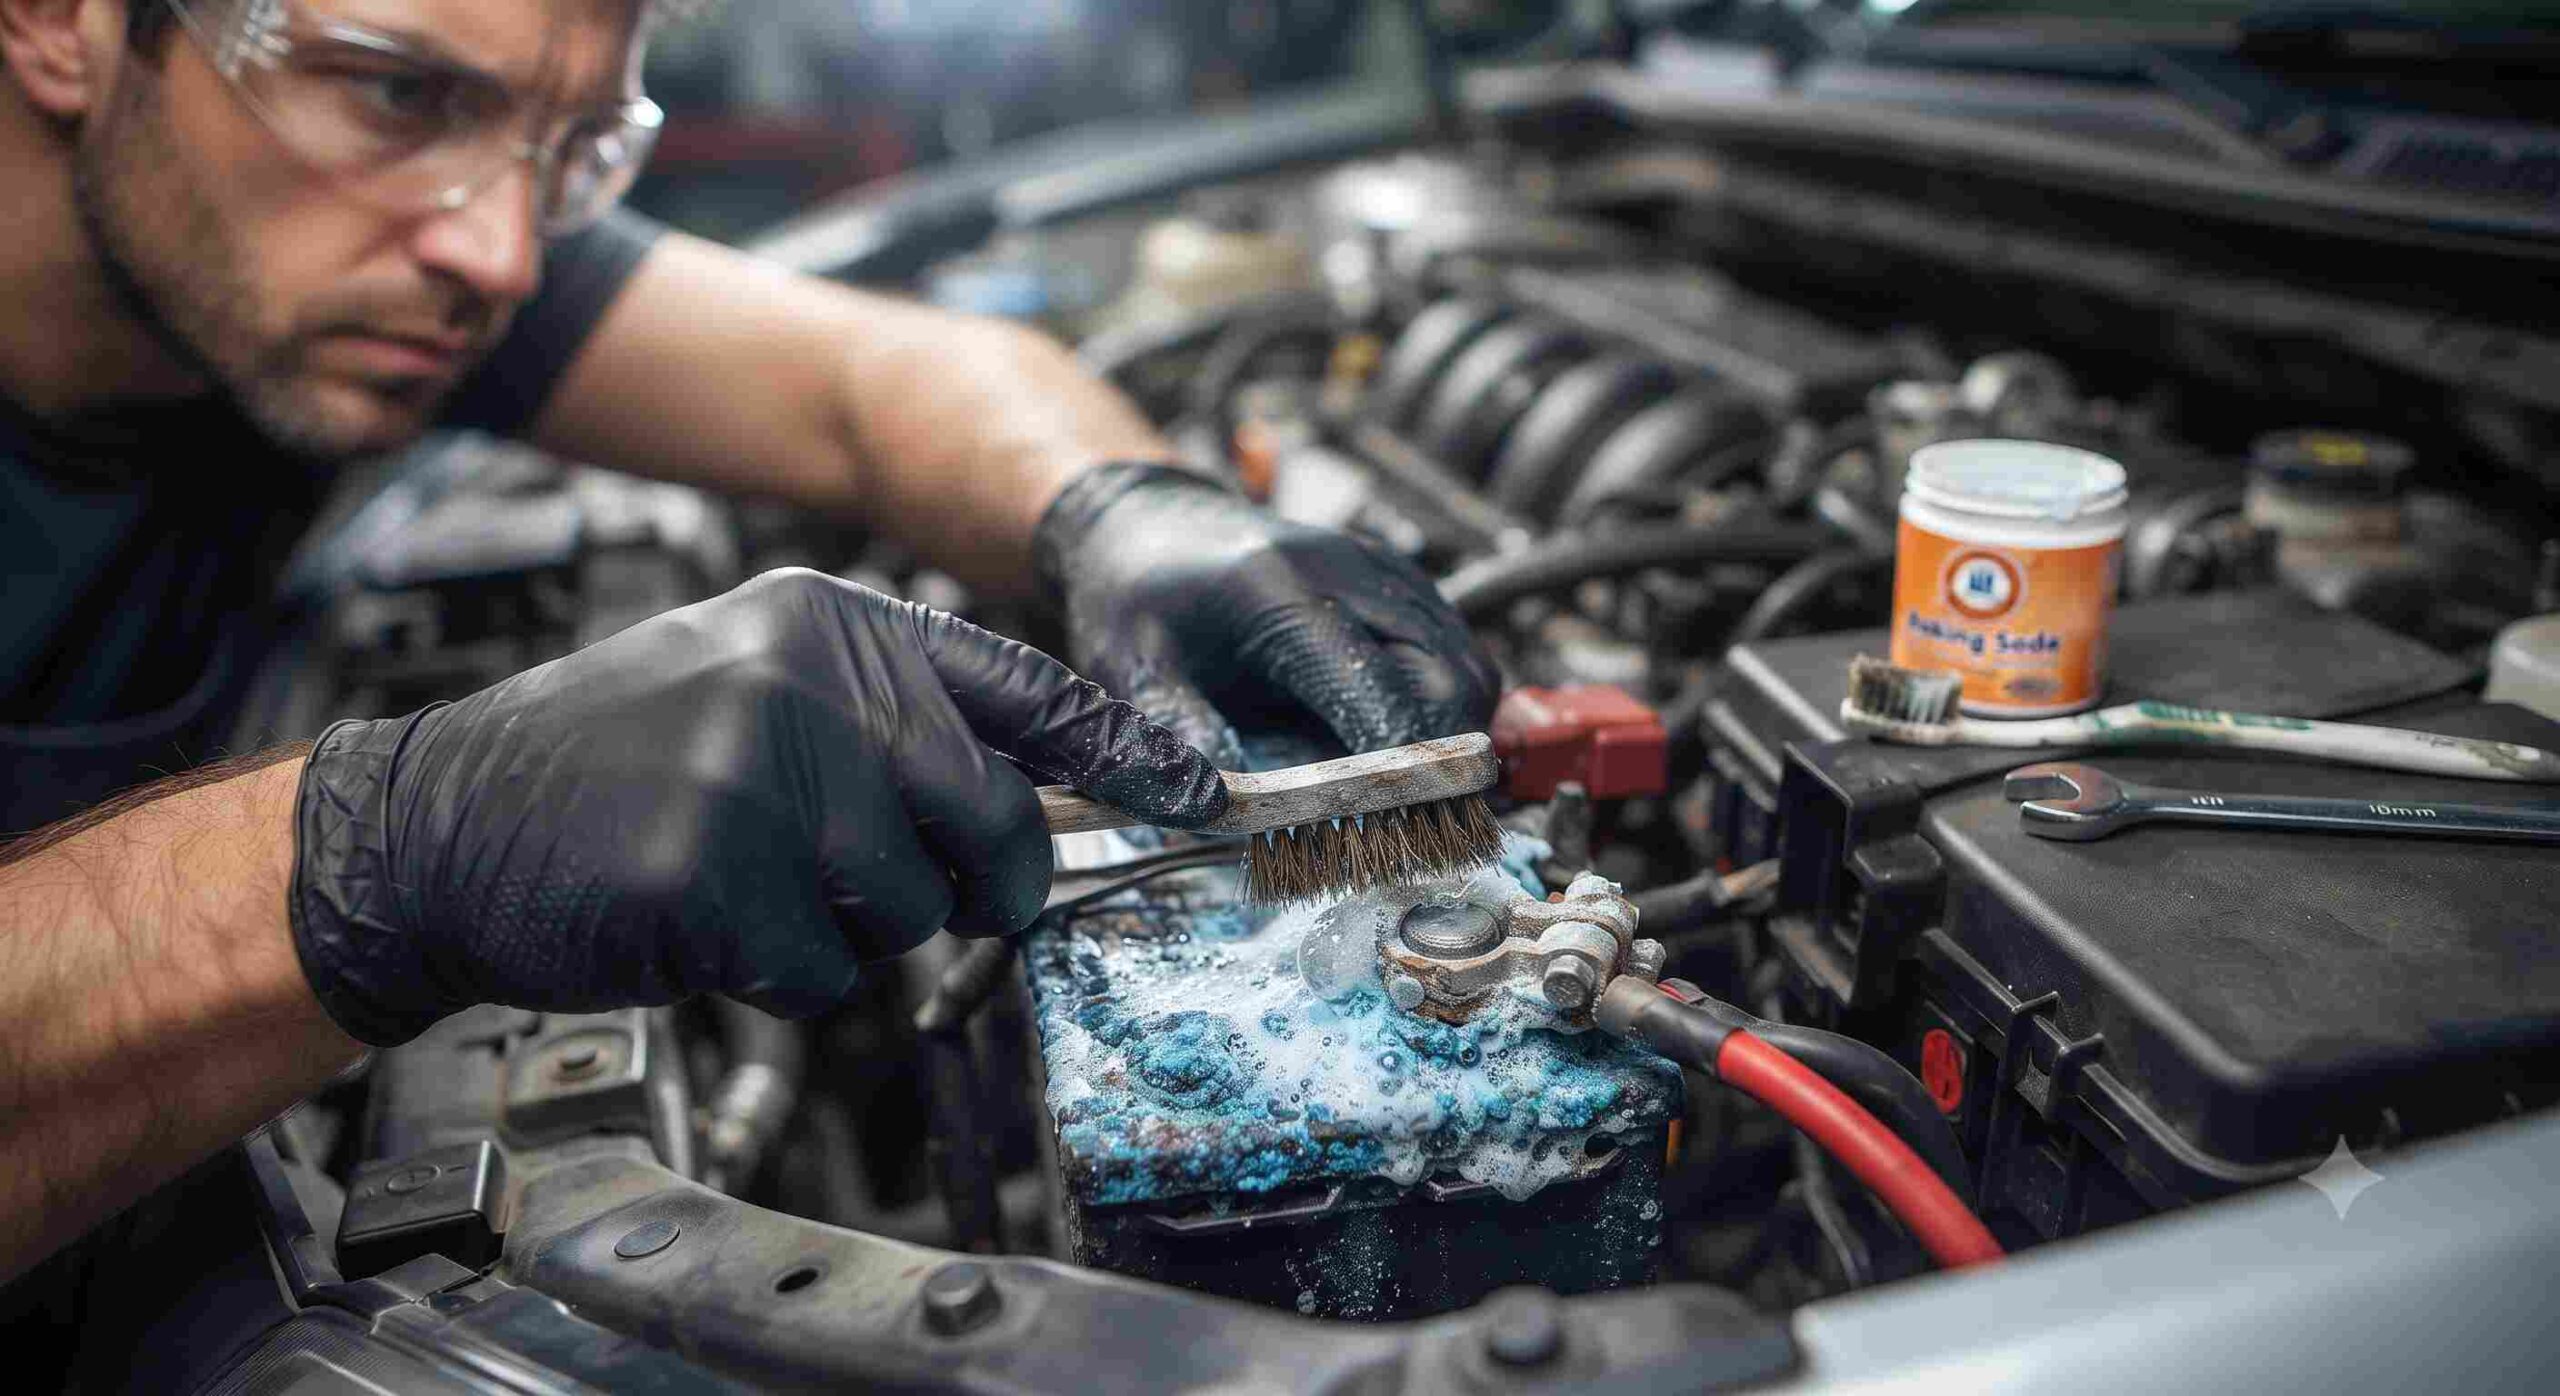
You turn the key in your ignition, or press the start button, expecting the familiar roar of the engine. Instead, you are met with a faint clicking sound, flickering dashboard lights, or total silence. While your first thought might be a dead battery, the actual culprit is often much simpler, and messier, right on top of the battery itself.
That crusty, powdery blue, white, or green buildup on your battery terminals is corrosion. It is a common byproduct of the chemical processes happening inside the battery, accelerated by escaping hydrogen gas and engine heat. This seemingly harmless buildup acts as an insulator, creating high resistance that prevents the necessary electrical current from flowing from your battery to your starter motor. In short, a corroded battery connection can make a perfectly healthy battery behave as if it is completely dead.
Ignoring this issue does not just lead to starting failures; it can eventually damage your alternator by forcing it to overwork, and the acid can spread to damage surrounding engine components. Fortunately, learning how to clean corrosion off car battery terminals is a straightforward, budget friendly, and highly effective DIY maintenance task that can save you from an expensive tow truck call and extend the life of your battery.
In this comprehensive guide, we will walk you through the exact process of safely cleaning your battery terminals, the tools you will need, crucial safety precautions to protect yourself and your vehicle, and preventative measures to keep the corrosion from returning quickly.
Understanding the Dangers: Safety First
Before you pop the hood and grab a wrench, it is imperative to understand that you are working with a powerful electrical component containing sulfuric acid. Safety is not optional here; it is a requirement.
Automotive batteries contain lead plates submerged in an electrolyte solution (sulfuric acid). The corrosion byproduct itself is also acidic and can cause chemical burns to skin and damage to clothing. Furthermore, a short circuit across the battery terminals can cause severe burns, melt tools, and even trigger a battery explosion.
Essential Safety Gear and Preparation
- Safety Goggles: Never attempt this job without proper eye protection. Acid splatter is a real risk when scrubbing or if a tool slips.
- Gloves: Wear heavy duty rubber or nitrile gloves to protect your hands from acid exposure and the corrosive buildup.
- Work Area: Ensure your car is parked in a well ventilated area, preferably outside or in a garage with the door open. Do not perform this task near open flames, sparks, or while smoking, as batteries can release flammable hydrogen gas.
- Vehicle Status: Make sure the car engine is completely turned off and the vehicle is in Park (or Neutral for manual transmissions) with the parking brake engaged.
Project Snapshot: Time, Tools, and Cost
| Category | Details |
|---|---|
| Difficulty | Beginner |
| Time Required | 30 to 45 minutes |
| Total Cost | $5 to $20 (depending on whether you need to buy tools) |
| Key Supplies | Baking soda, water, wire brush, wrench |
Gathering Your Supplies
You do not need specialized, expensive mechanic tools to clean battery corrosion effectively. Most items needed are likely already in your kitchen pantry or toolbox.
The Cleaning Arsenal
- Baking Soda (Sodium Bicarbonate): This is your secret weapon. As a mild alkali, it instantly reacts with and neutralizes the acidic battery corrosion. You will need roughly 2 tablespoons per cup of water.
- Water: Used to create the baking soda paste and for the final rinse.
- Wire Brush or Battery Terminal Brush: A dedicated battery terminal brush (often a circular wire brush designed to clean both posts and clamps) is ideal, but a stiff wire brush or even a sturdy, disposable old toothbrush will work in a pinch for lighter buildup.
- Wrench or Socket Set: You will need a wrench to loosen the nuts on the battery cable clamps. In most modern vehicles, this is a 10mm nut, but it can vary. An adjustable wrench or pliers can serve as a backup if you do not have the right metric size.
- Protective Coating: Petroleum jelly (Vaseline) or dielectric grease. This is crucial for the prevention step.
- Rags or Shop Towels: Several old rags that you do not mind getting dirty or stained with acid.
- Small Container: To mix your baking soda and water paste.
Step by Step Cleaning Procedure
Follow these steps carefully to ensure a safe and effective cleaning process. The sequence of disconnection and reconnection is vital to prevent electrical shorts.
Phase 1: Disconnection
1. Locate the Battery and Identify Terminals Find your car battery. It is usually under the hood, often in a corner near the fender, though some manufacturers place them in the trunk or under a rear seat. Identify the positive (+) terminal and the negative (-) terminal. The positive terminal will often have a red cover or a ‘+’ sign stamped into the plastic nearby, and the cable will usually be red. The negative terminal will have a black cover or a ‘-‘ sign, with a black cable that is typically grounded to the vehicle’s chassis or engine block.
2. The Golden Rule: Disconnect Negative First! This is the most critical safety step. Always disconnect the negative (black, ‘-‘) cable first.
- Use your wrench to loosen the nut on the negative cable clamp just enough so you can wiggle the clamp free from the battery post. Do not remove the nut entirely unless necessary.
- Once disconnected, push the negative cable aside so it cannot accidentally spring back and make contact with the negative battery post while you are working.
- Why negative first? If your wrench touches the positive terminal while you are working on the negative side, nothing happens because the circuit is already incomplete at the negative connection. If you did the reverse, your wrench would create a direct electrical short to the chassis, potentially welding the tool to the car, causing severe burns, or frying sensitive electronics.
3. Disconnect the Positive Terminal After the negative cable is safely secured away, proceed to loosen the nut on the positive (red, ‘+’) cable clamp. Remove the clamp and push it aside, ensuring it does not touch any metal parts of the car or the negative battery post.
Phase 2: Cleaning the Corrosion
4. Apply the Cleaning Paste Take your container and mix baking soda with a small amount of water to create a thick, spreadable paste (the consistency of toothpaste).
- Spoon or brush this paste generously over the corroded battery posts and the inner surfaces of the disconnected cable clamps.
- Watch the Reaction: You will immediately see the paste begin to fizz, bubble, and turn yellow or brown. This is the baking soda neutralizing the sulfuric acid corrosion. Let this chemical reaction work for a few minutes to break down the stubborn crust.
5. Scrub Vigorously Once the fizzing subsides slightly, take your wire brush or old toothbrush.
- Scrub the battery posts thoroughly until all the white and blue crust is gone and you can see the shiny, bare lead metal underneath.
- Pay close attention to the inside of the cable clamps, ensuring they are completely clean of corrosion, as this is where the electrical connection is actually made. A wire terminal brush is particularly effective here, as one end cleans the post and the other cleans the inside of the clamp.
6. Rinse and Dry After scrubbing, use a small amount of clean water to rinse away the remaining baking soda paste, neutralized corrosion residue, and dirt.
- Caution: Be extremely careful not to let the dirty rinse water enter the battery cells through the vent caps (if your battery has removable caps). This water can contaminate the electrolyte and shorten the battery’s life.
- Immediately take a clean rag or shop towel and dry the battery top, posts, and cable clamps completely. Moisture left behind can accelerate the return of corrosion and provide a path for electrical leakage.
Prevention and Reconnection
Cleaning the corrosion is only half the battle; preventing it from immediately returning is the key to long term reliability.
Phase 3: Prevention
7. Protect the Terminals Before reconnecting the cables, apply a thin, protective layer of petroleum jelly (Vaseline) or dielectric terminal grease directly onto the clean battery posts and the inner surfaces of the cable clamps.
- This grease acts as an airtight seal, preventing moisture, oxygen, and acidic battery fumes from reaching the metal and causing rapid oxidation and corrosion.
Phase 4: Reconnection
8. Reconnect Positive Terminal First Just as disconnection had a specific order, so does reconnection, but in reverse.
- Place the positive (red, ‘+’) cable clamp back onto the positive battery post.
- Tighten the nut securely with your wrench. Ensure the connection is snug; you should not be able to twist the clamp on the post by hand, but do not overtighten it to the point of cracking the clamp or damaging the battery post.
9. Reconnect Negative Terminal Last Finally, place the negative (black, ‘-‘) cable clamp onto the negative battery post.
- Tighten the nut securely, ensuring a solid, corrosion free connection.
10. Final Touches If your battery had terminal covers (red or black plastic boots), slide them back into place over the terminals. Close the car’s hood, and you are ready to start the engine.
When to Clean vs. When to Replace
Cleaning your battery terminals is a powerful fix for starting issues related to high resistance, but it is not a cure all for a dying battery.
You should consider inspecting your battery terminals at least twice a year during routine maintenance. If you find that the corrosion is extremely heavy, has eaten away at the metal of the terminals, or is wicking far down underneath the insulation of the cables, a simple cleaning may not suffice. Severely damaged terminals cannot provide a reliable connection, and corroded cables will continue to carry high resistance even after the ends are cleaned.
Furthermore, if you clean the terminals, ensure the connections are tight, and the car still fails to start, the issue likely lies deeper within the battery itself (e.g., a dead cell), the starter motor, or the alternator.
- Ask Yourself:
- Does the car struggle to crank even after cleaning? The battery may be failing to hold a charge and needs a load test.
- Is the corrosion wet or is the battery case bulging or leaking? This indicates a cracked case or severe overcharging, and the battery must be replaced immediately for safety.
- Are the cables themselves stiff with internal corrosion? Replacement of the battery cables may be necessary.
Frequently Asked Questions
Here are answers to some of the most common questions regarding car battery corrosion.
Q1: What causes car battery corrosion in the first place?
Car battery corrosion is primarily caused by the electrochemical process occurring inside the battery. Escaping hydrogen gas from the battery’s vents reacts with moisture and oxygen in the air. This reaction, combined with heat from the engine bay, causes the lead terminals and the copper in the cable clamps to oxidize rapidly. This leads to the familiar powdery buildup of lead sulfate or copper sulfate. Overcharging, a cracked battery case, or simply old age can accelerate this process.
Q2: Can I use Coca-Cola to clean battery corrosion?
While internet hacks suggest using Coca-Cola to clean battery terminals, it is not the best practice. It is true that the phosphoric acid in Coke can help dissolve light corrosion. However, Coke is also full of sticky sugars and syrups. If you use it, you must be extremely diligent about rinsing every trace of the soda away with clean water. If any sticky residue remains, it will attract dirt, dust, and grime, which will accelerate future corrosion and cause more electrical issues down the road. A baking soda and water paste is superior because it neutralizes the acid chemically and rinses away cleanly without leaving sticky residues.
Q3: Does corrosion mean my car battery is dead or dying?
Not necessarily. Heavy corrosion means the connection between the battery and the rest of the car is poor, which mimics the symptoms of a dead battery (clicking, no start). However, cleaning the terminals often restores full power, proving the battery itself may still be healthy. That said, severe corrosion can be a sign of an overcharging alternator or a damaged battery case, which will eventually kill the battery. If the battery is more than 3-5 years old, it is wise to have it professionally tested after cleaning the terminals to determine its true health.
Conclusion
Cleaning corrosion off your car battery is a rite of passage for any DIY car owner. It is an empowering 30 minute job that transforms a seemingly broken car into a reliable vehicle. By following this guide, you not only eliminate the immediate cause of starting failures but also protect your investment in your vehicle’s electrical system.
Regularly inspecting your battery terminals for that telltale crusty buildup can save you from being stranded at the worst possible moment. Arm yourself with safety glasses, gloves, a wrench, and a box of baking soda, and take control of your car’s starting power today.