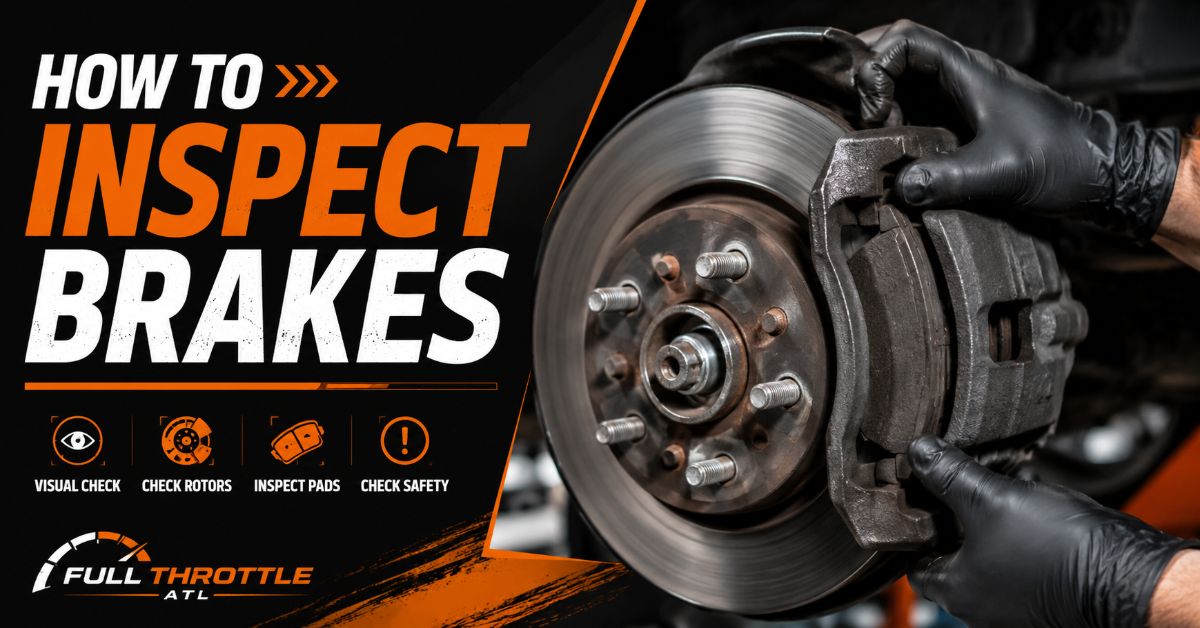
Learning how do you inspect brakes correctly ensures your vehicle’s hydraulic and mechanical stopping systems operate safely under all driving conditions. A complete multi-point brake inspection requires 1 to 1.5 hours using standard garage hand tools and accurate measuring gauges. Follow this step-by-step process to evaluate brake pad wear, rotor thickness, caliper operation, and hydraulic line integrity.
Safety Warning: Working under a elevated vehicle carries inherent risks. Always conduct work on a level concrete surface, engage the parking brake, use wheel chocks, and never rely solely on a hydraulic jack to support vehicle weight.
Before You Start
- Estimated Time: 60 to 90 minutes
- Skill Level: Beginner to Intermediate
- Estimated Cost: $0–$35 (assuming basic garage tools are owned; $15–$30 for specialized gauges)
Tools & Equipment Checklist
- [ ] Floor Jack: Hydraulic floor jack rated for minimum 2-ton (3-ton for trucks/SUVs)
- [ ] Jack Stands: 2 heavy-duty jack stands rated for vehicle weight
- [ ] Wheel Chocks: 2 rubber or steel wheel chocks
- [ ] Lug Wrench / Breaker Bar: 1/2-inch drive socket with breaker bar
- [ ] Torque Wrench: Calibrated 1/2-inch drive torque wrench (20–150 lb-ft range)
- [ ] Brake Pad Thickness Gauge Set: Color-coded metric gauge set (2 mm to 12 mm)
- [ ] Digital Rotor Micrometer / Caliper: Pointed-anvil micrometer or digital caliper
- [ ] Brake Cleaner: 1–2 cans of aerosol brake parts cleaner
- [ ] Wire Brush: Brass or steel wire brush
- [ ] Personal Protective Equipment (PPE): Safety glasses, nitrile gloves, and N95 dust mask
Step-by-Step Brake Inspection Process
Step 1: Inspect Master Cylinder Fluid and Hydraulic System
Pop the hood and locate the brake fluid reservoir mounted on the brake master cylinder near the driver-side firewall. Clean the exterior reservoir cap with a shop rag before opening to prevent debris contamination, then inspect the fluid level between the MIN and MAX indicator lines. Observe fluid color: fresh brake fluid is clear to light amber, while dark brown or black fluid indicates severe thermal degradation and moisture absorption requiring a full fluid flush.
[Clear / Light Amber] ──> Good Condition
[Dark Amber / Brown]  ──> Aging (Plan Flush Soon)
[Black / Murky]       ──> Contaminated (Flush Immediately)
Success Checkpoint: You’ll know it worked when you have verified fluid level is between MIN/MAX marks and confirmed fluid transparency using a brake fluid test strip or visual check.
Common Mistake: Topping off brake fluid when levels are low without checking pad wear. As brake pads wear down, caliper pistons extend further, naturally drawing fluid down in the reservoir; topping it off now will cause overflow when new, thicker pads are installed later.
Step 2: Prepare Vehicle and Loosen Wheel Lug Nuts
Park the vehicle on a hard, level concrete surface, put the transmission in Park (or 1st gear for manual transmissions), and firmly set the parking brake. Place wheel chocks securely behind and in front of the tires on the end of the vehicle that will remain on the ground. Using a breaker bar and correct socket, break loose the lug nuts on the wheels to be inspected by rotating counterclockwise 1/2 turn while the tires remain firmly on the ground.
Success Checkpoint: You’ll know it worked when every lug nut turns smoothly by hand 1/2 turn without the wheel spinning freely or losing stability.
Common Mistake: Attempting to break loose stubborn lug nuts after lifting the vehicle off the ground, causing the suspended wheel to spin and dangerously unstable rocking on the jack.
Step 3: Lift and Secure Vehicle on Jack Stands
Locate the vehicle’s reinforced pinch welds or frame lifting points as designated in your owner’s manual. Position the floor jack under the designated jacking point, raise the vehicle until the tire clears the ground by 2–3 inches, and immediately place a jack stand directly under the secondary factory support point. Slowly lower the hydraulic jack until the vehicle’s weight rests fully on the jack stand, then give the vehicle’s fender a firm push test to confirm absolute stability before placing any part of your body underneath.
Success Checkpoint: You’ll know it worked when the vehicle rests completely stationary on the jack stand with the hydraulic jack lowered slightly as a secondary backup.
Common Mistake: Placing jack stands under floor pans, steering linkage, or aluminum suspension arms, which can bend or puncture structural components under vehicle load.
Step 4: Remove Wheel and Perform Visual Assembly Inspection
Remove the pre-loosened lug nuts completely by hand and set them in a clean tray. Grasp the tire at 3 o’clock and 9 o’clock positions, pull the wheel assembly straight off the wheel hub, and slide it flat under the vehicle frame rail as an emergency safety catch. Visually scan the exposed rotor, caliper assembly, splash shield, and surrounding suspension components for excessive rust flakes, loose hardware, or wet hydraulic fluid sprays.
Success Checkpoint: You’ll know it worked when the wheel is off, safely stowed, and the full rotor and caliper face are visible without obstruction.
Common Mistake: Storing lug nuts directly in dirt or sand, which damages wheel stud threads during reinstallation.
Step 5: Inspect Brake Caliper and Rubber Guide Pin Boots
Examine the brake caliper body, paying specific attention to the rubber dust boot surrounding the main caliper piston and the rubber bellows on the upper and lower guide pins. Look for signs of wet brake fluid dampness near the piston or bleeder valve, which signals an internal seal failure. Grasp the caliper frame and push/pull gently parallel to the rotor to ensure the caliper slides freely on its pins without binding or seizing.
Success Checkpoint: You’ll know it worked when guide pin rubber boots are intact without tears, cracks, or fluid leaks, and the caliper exhibits slight lateral play on floating pin mounts.
Common Mistake: Overlooking torn slider pin boots. Pin boot tears allow road salt and water inside, seizing the pin within months and causing accelerated single-pad wear.
Step 6: Measure Inner and Outer Brake Pad Thickness
Inspect both the outer (visible through caliper window) and inner (engine-facing side) brake pads. Insert a brake pad gauge tool directly between the metal backing plate and the brake rotor surface to measure remaining friction material thickness. Compare your inner and outer pad measurements to evaluate uneven wear.
| Pad Thickness | Condition Status | Required Action |
| ≥ 8 mm (5/16 in) | Excellent | No action required; routine re-check in 10,000 miles. |
| 4 mm–7 mm (5/32–9/32 in) | Moderate Wear | Serviceable; schedule replacement within 3,000–5,000 miles. |
| 3 mm (1/8 in) | Critical Minimum | Replace immediately; wear indicator contacts rotor soon. |
| ≤ 2 mm (1/16 in) | Dangerous | Immediate replacement; high risk of backing plate metal contact. |
Success Checkpoint: You’ll know it worked when you have precise millimeter measurements for both the inner and outer pads on the wheel assembly.
Common Mistake: Measuring only the visible outer pad through wheel spokes. Inner pads wear up to 30% faster due to direct hydraulic pressure from the caliper piston.
Step 7: Measure Rotor Thickness, Rust Lip, and Surface Condition
Inspect the rotor friction surfaces on both sides for deep scoring grooves, cracks, structural heat spots (blue/purple discoloration), or an outer structural rust ridge. Clean dust off the outer edge with brake cleaner, then place a digital rotor micrometer or pointed caliper across the friction surface at 4 distinct locations spaced 90° apart. Compare the smallest measured reading against the “MIN THICK” specification stamped on the rotor hat or edge.
Rotor Measurement Protocol:
  Point A (Top 12 o'clock)  ──> Record mm
  Point B (Right 3 o'clock) ──> Record mm
  Point C (Bottom 6 o'clock)──> Record mm
  Point D (Left 9 o'clock)  ──> Record mm

Rule: If ANY point <= Minimum Thickness spec ──> Replace Rotor
Success Checkpoint: You’ll know it worked when your rotor thickness reading is above the stamped factory minimum spec and shows less than 0.002 inches variation between measuring points.
Common Mistake: Using standard flat-jaw digital calipers that ride on top of the outer rust lip, yielding an inaccurately high thickness reading.
Step 8: Inspect Flexible Brake Hoses and Hard Lines
Trace the rubber flexible brake hose from the caliper bracket back to the hard steel line on the vehicle chassis. Lightly flex the rubber hose by hand while inspecting under bright lighting for dry rot surface cracks, deep chafing marks from suspension contact, swelling (internal line delamination), or wet weeping fittings. Follow the hard steel brake lines along the body undercarriage, checking for flaking rust or crush damage from road debris.
Success Checkpoint: You’ll know it worked when flexible lines show zero micro-cracks under bend tests and metal lines remain smooth and rust-free.
Common Mistake: Ignoring cracked rubber outer jackets. External cracks allow moisture to reach internal synthetic cords, leading to sudden pressure rupture during hard emergency stops.
Final Reassembly and Torque Settings
When inspection is complete, reinstall the wheel onto the hub assembly.
- Thread all lug nuts by hand until seated flush against the wheel rim.
- Carefully raise the vehicle with the floor jack, remove the jack stand, and slowly lower the tire until it lightly touches the ground (preventing rotation without bearing full vehicle weight).
- Tighten the lug nuts in a criss-cross “star pattern” using a calibrated torque wrench.
5-Lug Star Torque Pattern:
       1
   4       3
     2   5
Wheel Lug Torque Specifications
| Vehicle Type | Standard Lug Torque Range |
| Compact / Mid-size Passenger Cars | 75–90 lb-ft (100–120 Nm) |
| Crossovers & Light SUVs | 85–100 lb-ft (115–135 Nm) |
| Full-size Trucks & Heavy Duty SUVs | 120–150 lb-ft (160–200 Nm) |
Common Mistakes and How to Fix Them
1. Seized Caliper Slide Pins Causing Tapered Pad Wear
- The Error: Installing pads without checking slider movement. If slide pins are unlubricated, the caliper cannot float, resulting in the inner pad wearing out completely while the outer pad looks brand new.
- The Fix: Remove the slide pins, clean off old grease and rust using a wire brush and brake cleaner, apply high-temperature silicone or ceramic brake lubricant (never petroleum grease), and replace dried rubber boots.
2. Measuring Rotor Thickness Over Outer Rust Lip
- The Error: Using flat-nosed calipers that bridge across the raised ridge of rust along the outer perimeter of the rotor, skewing measurements by 1.0–2.0 mm.
- The Fix: Use a rotor micrometer with pointed anvils or place 2 small steel ball bearings on the friction surface, measure total thickness, and subtract the thickness of the bearings.
3. Uneven Lug Nut Torque Causing Rotor Distortion
- The Error: Over-tightening lug nuts with an impact gun or tightening sequentially in a circle rather than a star pattern. This distorts the wheel hub mounting flange and induces lateral rotor runout.
- The Fix: Always finish wheel mounting using a calibrated hand torque wrench set to manufacturer spec in a star pattern.
4. Overlooking Electronic Parking Brake (EPB) Service Modes
- The Error: Attempting to service or manually push back rear caliper pistons on modern cars equipped with electric parking brake motors without disabling the system.
- The Fix: Place the vehicle’s infotainment/dash system into “Brake Service Mode” or use a diagnostic scan tool to retract the internal EPB servo motors prior to rear caliper inspection.
Variations: Front vs. Rear & Drum Brake Inspection
Rear Disc Brakes with Drum-in-Hat Parking Brakes
Rear disc rotors often integrate a small drum brake system inside the center “hat” structure specifically for the mechanical parking brake. When inspecting rear rotors, remove the caliper and slide off the rotor to check internal parking brake shoe lining thickness (minimum 1.5 mm thickness required) and return spring tension.
Rear Drum Brakes
Older vehicles and budget compact cars use rear drum assemblies instead of discs.
- Remove the outer drum cover (may require threading two M8 bolts into removal holes to push drum off hub).
- Inspect primary and secondary shoe lining thickness (replace if below 1.5 mm).
- Check the hydraulic wheel cylinder for fluid weeping under rubber dust boots.
- Inspect shoe return springs and auto-adjuster star wheel threads for binding rust.
How Long Does It Take / What Does It Cost?
| Option | Estimated Time | Average Cost | Notes |
| DIY Garage Inspection | 60–90 min | $0–$30 | Requires basic floor jack, stands, and digital measurement tools. |
| Professional Shop Inspection | 30–45 min | $50–$120 | Fee is often waived if you approve suggested repair work. |
Frequently Asked Questions
How often should you inspect your car’s brakes?
Inspect your complete brake system every 12,000 miles or once every 12 months—whichever comes first. Additionally, perform an immediate visual inspection whenever you rotate your tires or if you notice unusual squeaking, grinding, steering pulsation, or increased stopping distance.
Can I inspect brake pad thickness without removing the wheel?
On vehicles with open alloy wheel designs, you can visually inspect outer pad thickness using an inspection gauge or flashlight. However, this method is incomplete: it misses inner pad wear, rotor inner face condition, slider pin freedom, and hydraulic line leaks. Full inspection requires wheel removal.
What causes a brake pedal to feel soft or spongy during testing?
A spongy brake pedal indicates air bubbles inside the hydraulic lines, deteriorated flexible rubber lines expanding under pressure, or an internal master cylinder seal failure. If fluid level is normal, perform a full brake fluid bleed sequence to purge trapped air.
How do I know if my brake rotors need to be turned or replaced?
Measure rotor thickness with a digital micrometer. If remaining thickness is above the stamped “MIN THICK” threshold and surface scoring is less than 1/16 inch deep, rotors can be resurfaced (turned). If thickness is at or below minimum spec, replace them entirely.