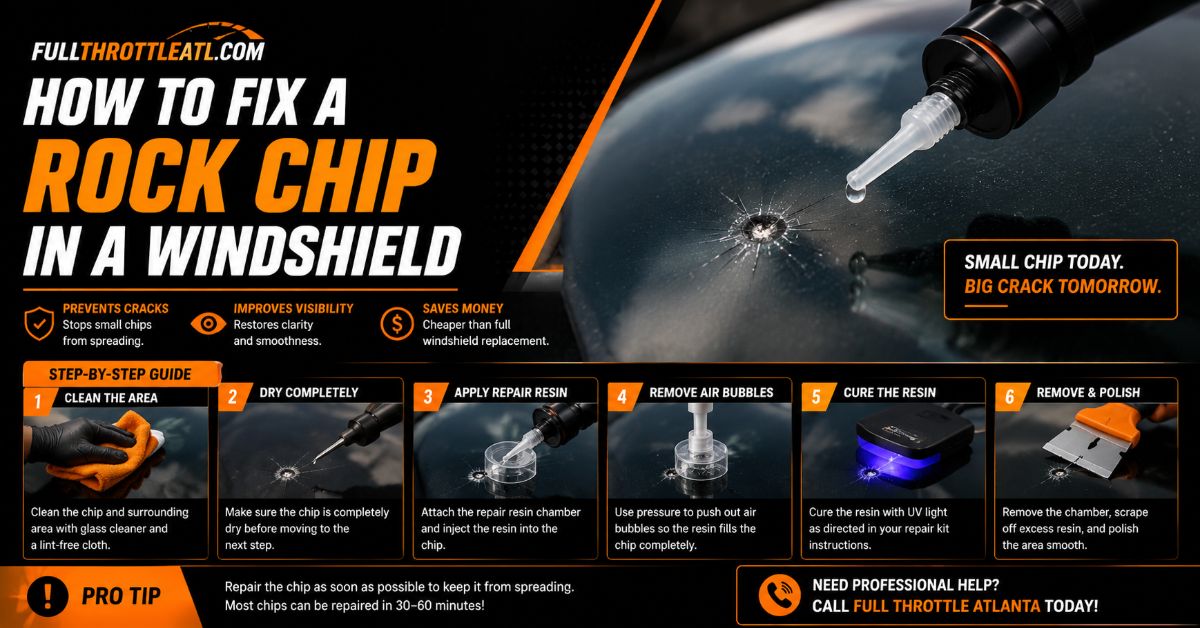
Learning how to fix a rock chip in a windshield prevents a small annoyance from becoming a costly replacement. This 7-step process takes exactly 55 minutes, requires beginner-level skills, and relies entirely on precise temperature control and vacuum pressure to seamlessly inject UV-curing resin into damaged glass.
Before You Start
- Time Required: 55 minutes total (15 minutes active labor, 40 minutes waiting).
- Difficulty Level: Beginner to Intermediate.
- Typical Cost: $15 to $20 for a complete DIY kit.
- Tools and Materials:
- Standard Windshield Repair Kit (Permatex, Rain-X, or Blue Star).
- 70% or 91% Isopropyl Alcohol.
- Two clean microfiber cloths.
- One safety pin or sewing needle.
- One straight-edge razor blade.
- A portable UV lamp (365nm) or access to direct midday sunlight.
- A small handheld mirror (optional but highly recommended).
- Prerequisites: The impact crater must be smaller than a 25-cent coin (24mm wide). The glass surface temperature must measure strictly between 10°C and 24°C (50°F to 75°F). The glass must be bone dry with zero trapped moisture.
Step 1: Clean and Prepare the Impact Zone
Park your vehicle completely in a shaded area to ensure the glass is cool to the touch.
Start by cleaning the inside of your windshield directly behind the rock chip with isopropyl alcohol and a microfiber cloth. A clean interior background is mandatory for spotting microscopic trapped air bubbles later. Next, move to the outside of the car. Take your safety pin and gently scrape inside the impact crater to dislodge crushed glass dust and microscopic debris. Blow the dust away. Soak a fresh corner of your microfiber cloth with pure 70% isopropyl alcohol and wipe the exterior glass around the chip. Do not spray alcohol directly into the open crater. Place your small handheld mirror on the inside of the dashboard, angled so you can see the back of the chip while standing outside the car.
- You’ll know it worked when: The glass around the chip squeaks when rubbed with a dry finger, and you can clearly see the dark, unbroken lines of the internal cracks reflecting in your interior mirror.
- Common Mistake at this Step: Using standard household glass cleaner (like Windex) instead of rubbing alcohol. Household cleaners contain ammonia and surfactants that leave a microscopic chemical film. This film acts as a barrier, permanently preventing the acrylic resin from bonding to the silica glass.
Step 2: Apply the Adhesive Base Seal
Peel the protective paper backing off one side of the double-sided adhesive seal, holding it by the outer edges.
Look directly down at the rock chip. Hover the adhesive seal over the glass and align the perfectly circular cutout exactly over the center of the impact pit. Press the adhesive seal down onto the glass. Use the rounded back of your fingernail to trace firmly around the entire circle, pressing the adhesive into the glass to remove all trapped air pockets. The seal must be completely flush to hold hydrostatic pressure. Wait one full minute for the adhesive to grab the glass, then carefully peel off the top layer of protective backing, exposing the upward-facing sticky side.
- You’ll know it worked when: The center hole of the adhesive perfectly frames the deepest part of the chip without covering any of the major radiating cracks, and the adhesive ring looks uniformly dark against the glass without any lighter air bubbles underneath.
- Common Mistake at this Step: Placing the adhesive off-center. If the central pit sits under the sticky part of the ring instead of perfectly inside the empty hole, the liquid resin will hit a wall of tape instead of flowing into the fracture.
Step 3: Attach the Pedestal and Add Resin
Align the plastic pedestal tool over the exposed adhesive seal and press it firmly into place.
Match the tabs on the pedestal with the shape of the adhesive seal. Once seated, press down hard on the base of the pedestal for 30 seconds to lock the two adhesive layers together. Take your bottle of specialized UV-curing repair resin and snip the very tip off the applicator. Hold the bottle vertically above the open top of the pedestal. Squeeze exactly 4 to 6 drops of resin directly down the center tube. To prevent your syringe plunger from getting stuck later, wipe one tiny drop of resin onto the black rubber O-ring of the plunger to act as a lubricant.
- You’ll know it worked when: You look into your interior dashboard mirror and see the liquid resin pooled directly over the impact pit, ready to be forced downward.
- Common Mistake at this Step: Adding too much resin (more than 8 drops). Overfilling the pedestal chamber reduces the volume of air inside the syringe. This prevents the tool from generating the necessary vacuum and pressure extremes required to manipulate the fluid.
Step 4: Draw Out Trapped Air (Vacuum Cycle)
Push the syringe plunger all the way down into its barrel, twist the entire assembly tightly into the top of the pedestal, and pull the plunger upward to lock it in the vacuum position.
Ensure the connection between the syringe and the pedestal is airtight. Hold the clear base of the syringe with your left hand to keep it steady. With your right hand, pull the plunger rod straight up. You will feel significant resistance. Pull the rod until the lowest notch is exposed, then snap the locking clip into that lowest notch. This mechanically locks the plunger in the upward position. Leave the vehicle completely undisturbed for exactly 10 minutes. During this time, the vacuum physics will actively suck the trapped atmospheric air out of the tiny glass fissures, pulling it up through the liquid resin as visible bubbles.
- You’ll know it worked when: You look at your interior mirror and see tiny silver air bubbles floating up away from the chip, and the dark legs of the star break begin to look slightly fainter as the air leaves.
- Common Mistake at this Step: Attempting the vacuum cycle in direct sunlight. Ultraviolet light cures the resin in under 60 seconds. If sunlight hits the windshield now, the resin will harden inside the pedestal and permanently seal the air inside the crack.
Step 5: Force Resin into the Crack (Pressure Cycle)
Remove the syringe momentarily to let air into the barrel, then reattach it and press the plunger downward into the locked pressure position.
Unclip the syringe and pull it completely out of the pedestal. You will hear a soft pop as air rushes in. Push the plunger back down just enough to re-insert the syringe tightly into the pedestal. Now, carefully press the plunger downward toward the glass. The air you just let into the barrel is being compressed, creating intense hydrostatic pressure that forces the liquid resin deep into the microscopic voids. Push the plunger down until you reach the upper notch and lock the clip into place. Leave the system pressurized for exactly 20 minutes.
- You’ll know it worked when: Looking through your interior mirror, the black or silver lines of the crack vanish completely, blending in with the surrounding clear glass.
- Common Mistake at this Step: Rushing the pressure cycle. If you remove the pressure after only 5 minutes, the highly viscous resin will not have enough time to creep to the very microscopic ends of the fractures, leaving visible shadows that will eventually expand.
Step 6: Fill the Surface Pit and UV Cure
Remove the entire pedestal apparatus with a razor blade, apply one final drop of resin to the surface crater, and cover it with a clear curing strip under UV light.
Gently slide your straight-edge razor blade under the adhesive seal to separate it from the windshield. Lift the entire pedestal and syringe assembly away. Wipe away any runny excess liquid with a dry paper towel, but leave the central pit alone. Squeeze exactly 1 fresh drop of resin directly into the small surface crater. Immediately take one of the clear plastic curing strips from your kit and lay it flat over the drop. The liquid will spread out under the plastic. Move the vehicle into direct midday sunlight, or place a high-intensity 365nm UV lamp directly over the plastic strip. Let it cure undisturbed for exactly 15 minutes.
- You’ll know it worked when: The resin underneath the clear plastic strip transforms from a slippery liquid into a solid, hard plastic that cannot be dented by a fingernail.
- Common Mistake at this Step: Pressing down hard on the clear plastic strip to squeegee out air bubbles. Heavy pressure pushes all the liquid resin out of the pit. Just lay the strip down gently (capillary action will spread it) and leave it alone.
Step 7: Scrape Excess Resin for a Flush Finish
Hold your razor blade perfectly perpendicular to the glass and scrape rapidly over the cured patch to shave away the excess hardened plastic.
Peel away the clear plastic curing strip (it should snap off easily). The cured resin will look like a messy, dried puddle on your glass. Grip your razor blade firmly. Plant the blade against the glass at a strict 90-degree angle. Scrape aggressively back and forth over the dried resin. The blade will not scratch the glass at a 90-degree angle. You will see white flakes of dried resin shaving off. Continue scraping until the blade glides smoothly over the repair zone without catching, and the resin sits perfectly flush with the curvature of the windshield.
- You’ll know it worked when: You run your bare thumb over the repaired area and cannot feel any bump, ridge, or indentation where the original impact crater used to be.
- Common Mistake at this Step: Angling the razor blade to slice the resin like a knife. A shallow angle allows the flexible steel blade to dip into the impact pit and gouge out the soft resin you just spent an hour curing, forcing you to repeat Step 6.
Common Mistakes and How to Fix Them
Even when following instructions closely, varying environmental conditions can cause hiccups. Here are the most common failures and the exact mechanical steps to recover your repair.
The crack lines are still dark after the pressure stage.
A dark line means atmospheric air is still trapped inside the glass fracture. While the syringe is still locked in the downward Pressure Cycle (Step 5), take a lighter or a hair dryer and gently heat the inside of the windshield directly behind the chip for 10 seconds. The heat causes the trapped air to expand and forces the liquid resin to thin out. As the glass cools, the shrinking air pocket will pull the thinned resin to the very tips of the crack.
Resin leaks out from under the adhesive base.
This occurs when the windshield was too cold (preventing adhesive bonding) or the glass was not cleaned properly. Abort the process immediately. Unclip the syringe, scrape off the ruined adhesive ring, and wipe the wet resin away with pure alcohol. Allow the glass to dry completely, ensure the temperature is above 10°C, and start over at Step 2 with a brand new adhesive seal.
The final surface pit has a dent or crater after scraping.
This happens when the resin shrinks slightly during the UV curing process, or if you accidentally gouged the fill with an angled razor blade. You do not need to repeat the vacuum steps. Clean the small indentation with alcohol. Place a tiny fraction of a drop of resin into the dent, apply a new curing strip, cure it under UV light for 15 minutes, and re-scrape at a strict 90-degree angle.
The repair looks cloudy or milky instead of clear.
Cloudy resin is the result of water contamination. If you washed the car or it rained within 24 hours prior to the repair, microscopic moisture remains trapped in the cracks. Once acrylic resin mixes with water, it cures with a permanent foggy appearance. Unfortunately, a cured, cloudy repair cannot be dissolved or redone. The only solution is professional drilling or windshield replacement.
Variations in Damage Types
The standard procedure works perfectly for “bullseye” chips (a perfect circle of separated glass). However, different impact shapes require slight mechanical adjustments.
Star Breaks:
Star breaks feature long, spider-like legs radiating from a central point. These tight cracks resist liquid flow. During the Pressure Cycle (Step 5), take a blunt object like the plastic handle of a screwdriver. Go inside the car and gently press outward on the glass directly behind the crack. This micro-flexes the windshield, forcing the tight cracks to open by a fraction of a millimeter and allowing the pressurized liquid to flow into the legs.
Half-Moon Chips:
These are asymmetrical impacts where only half of a bullseye formed. Because the central pit is usually located on the far edge of the damage rather than the dead center, you must offset your adhesive seal. Do not center the seal over the entire damage area. Center the hole of the seal exclusively over the deepest impact pit to ensure the syringe pushes fluid directly into the opening.
How Long Does It Take and What Does It Cost?
Time and cost are the primary reasons drivers choose DIY repairs over professional glass shops.
A standard DIY repair kit costs between $15 and $20 at an auto parts store. If you do not have rubbing alcohol or a razor blade, expect to spend an additional $5. By contrast, a professional mobile glass repair service will charge between $75 and $150 to perform the exact same injection process on a single chip.
In terms of time, the DIY process takes roughly 55 minutes from start to finish. However, only 15 minutes of this is active labor (cleaning, mounting the tools, and scraping). The remaining 40 minutes consist of waiting for the vacuum cycle (10 minutes), the pressure cycle (20 minutes), and the UV curing process (10 to 15 minutes).
Frequently Asked Questions
Can I wash my car immediately after fixing the chip?
Yes. Once the acrylic resin undergoes total UV polymerization and cures into a solid plastic, it becomes entirely waterproof and chemically inert. You can safely take the vehicle through a high-pressure car wash immediately after you finish scraping off the excess resin.
Will fixing the chip make it completely invisible?
No repair makes a rock chip 100% invisible. A successful repair removes about 80% to 90% of the visual distortion. When looking closely at the correct angle, you will still see a faint outline resembling a water spot or a tiny smudge where the glass was permanently scarred by the impact.
Will a repaired windshield pass a state safety inspection?
In most jurisdictions, a successfully filled rock chip will pass a safety inspection. Inspectors look for active, spreading cracks in the driver’s direct line of sight. Because the injected resin restores the structural integrity of the safety glass and stops the crack from spreading, it fulfills the legal safety requirements.
What happens if I use super glue instead of the kit resin?
Super glue (cyanoacrylate) dries cloudy, lacks the flexibility to expand and contract with the automotive glass during temperature changes, and cannot be forced into micro-fractures without a vacuum syringe. Using super glue will ruin the chip, make it look worse, and permanently prevent a proper resin repair.
Is it safe to drive with the repair kit attached during the wait times?
Absolutely not. Driving vibrates the windshield, which breaks the airtight seal of the adhesive pedestal. Furthermore, moving the car risks exposing the uncured liquid resin to direct sunlight, which will prematurely harden the fluid before the pressure cycle is completely finished. Keep the vehicle parked until Step 7 is complete.
Understanding exactly how to fix a rock chip in a windshield gives you the power to save hundreds of dollars in glass replacement costs. By strictly controlling your glass temperature, respecting the precise vacuum and pressure times, and curing the final pit thoroughly, you can achieve a professional-grade structural seal in your own driveway.