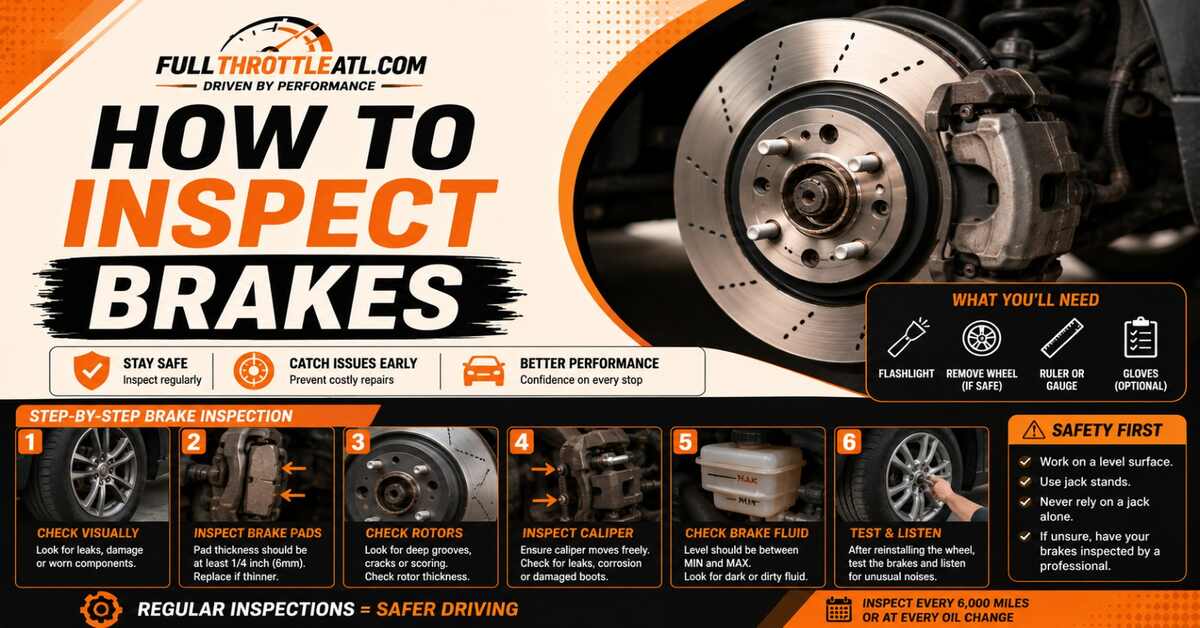
Inspecting your brakes takes about 60 to 90 minutes and gives you absolute certainty about your vehicle’s stopping power. By systematically checking your fluid, brake pads, rotors, and calipers across seven distinct steps, you can prevent catastrophic failures. Success comes down to one critical detail: accurately measuring the hidden inner brake pad, which handles the brunt of the braking force and wears out twice as fast as the outside pad.
Before You Start
- Time Required: 60–90 minutes
- Difficulty: Intermediate
- Estimated Tool Cost: $20–$50 (if you already own a jack and wrenches)
- Tools Needed: 1 floor jack, 2 heavy-duty jack stands (2-ton minimum rating), lug wrench, torque wrench (80–150 ft-lbs capacity), brake pad thickness gauge (mm), micrometer (0.001 mm precision), brake fluid moisture test strips, 1 can of aerosol brake cleaner, wire brush, flashlight, nitrile gloves, and safety goggles.
- Prerequisites: A perfectly flat, level concrete surface (never asphalt or dirt).
Phase 1: Preparation and Safety
Step 1: Test Fluid and Inspect Lines
Test the brake fluid moisture content and visually inspect the rubber lines before lifting the vehicle. Open the hood, locate the master cylinder reservoir near the firewall on the driver’s side, and wipe the cap clean before opening to prevent dirt from falling inside. Dip a brake fluid test strip into the fluid for 1 second, remove it, and wait 60 seconds to read the color change. Next, trace the flexible rubber hoses connecting the steel frame lines to the wheel. Flex them gently by hand to look for dry rot, deep cracks, or weeping fluid.
- Success checkpoint: You’ll know it worked when you confirm the fluid level is between the MIN and MAX lines and the moisture content registers strictly below 3%.
- Common mistake: Topping off the fluid just because it is near the MIN line. Fluid level drops naturally as brake pads wear thin and caliper pistons extend. If you top it off now, the reservoir will overflow and spill corrosive fluid onto your paint when you eventually install new pads and compress the pistons.
Step 2: Secure the Vehicle and Loosen Lugs
Lock the vehicle strictly in place and break the lug nuts loose while the tires are grounded. Park on flat concrete, shift the transmission to Park (or 1st gear for manuals), and engage the parking brake. Place heavy rubber wheel chocks firmly behind and in front of the tires that will remain on the ground. Using your lug wrench or breaker bar, loosen every lug nut on the wheels you plan to remove by exactly 1/2 turn counterclockwise.
- Success checkpoint: You’ll know it worked when you can turn each lug nut with light pressure from the wrench, but the wheel remains perfectly seated against the hub.
- Common mistake: Fully removing the lug nuts while the car is on the ground, which can snap the wheel studs, or forgetting to loosen them entirely, making it impossible to remove the wheel once it is spinning freely in the air.
Step 3: Lift and Support the Car
Lift the vehicle using the factory-designated reinforced pinch welds and lower it onto structural jack stands. Slide your floor jack under the proper jacking point (consult your owner’s manual) and pump until the tire is 2 inches off the ground. Slide a jack stand underneath the adjacent frame rail or reinforced subframe. Slowly release the jack’s hydraulic pressure to lower the vehicle’s weight entirely onto the stand.
- Success checkpoint: You’ll know it worked when you can give the car a firm shove on the fender and it remains entirely rigid on the jack stands with zero wobbling.
- Common mistake: Working on a vehicle supported only by a hydraulic floor jack. Hydraulic seals fail without warning; never put any part of your body under a car without physical jack stands bearing the load.
Phase 2: Component Measurement
Step 4: Measure the Inner and Outer Brake Pads
Measure the remaining friction material on both sides of the rotor using a millimeter brake pad gauge. Look through the top inspection window of the brake caliper. You are measuring strictly the friction material, ignoring the steel backing plate it is glued to. Use your flashlight and a mechanic’s mirror (or your phone camera with the flash turned on) to clearly see the inner pad. Slide the blades of your pad gauge into the gap until one fits snugly against the rotor face.
- Success checkpoint: You’ll know it worked when you have distinct thickness measurements for all four pads on the axle. Readings of 5mm or higher are safe; 3–4mm means plan for a replacement soon; 2mm or less requires immediate replacement.
- Common mistake: Only checking the outer pad. Because the hydraulic piston sits on the inside of a floating caliper, the inner pad strikes the rotor first and often wears down to bare metal while the outer pad still looks entirely safe.
Step 5: Measure Rotor Thickness and Runout
Measure the structural thickness of the metal brake rotor at four different quadrants using a micrometer. Place the micrometer deep enough onto the rotor face to measure the shiny “swept area” where the pad makes contact, avoiding the rusty outer edge. Read the measurement and compare it to the “Minimum Thickness” specification stamped directly into the metal hub of the rotor (e.g., “MIN THICK 22.4mm”). Finally, run your gloved fingernail across the rotor face to feel for deep grooves.
- Success checkpoint: You’ll know it worked when your micrometer readings across all four points are identical and strictly above the stamped minimum thickness limit.
- Common mistake: Using a standard vernier caliper instead of a micrometer. A standard caliper will catch on the rusty, unworn “lip” at the extreme outer edge of the rotor, tricking you into thinking the rotor is much thicker than it actually is.
Step 6: Inspect Calipers and Slide Pins
Test the mechanical movement of the brake caliper and inspect its rubber seals. Grab the heavy metal caliper body with both hands and attempt to push and pull it laterally. It should slide slightly (about 1–2mm) with firm pressure. Shine your flashlight onto the accordion-style rubber dust boots covering the slide pins, and the large circular boot around the main hydraulic piston, checking for tears or weeping fluid.
- Success checkpoint: You’ll know it worked when you verify the caliper floats smoothly on its pins and all rubber dust boots are dry and fully intact.
- Common mistake: Ignoring tapered pad wear. If the top of a brake pad measures 5mm but the bottom measures 2mm, the caliper slide pins are seized. You must extract, clean, and re-grease the pins with silicone ceramic brake paste.
Phase 3: Reassembly and Testing
Step 7: Remount Wheels and Restore Pressure
Clean the mating surfaces, secure the wheels to factory specifications, and re-pressurize the hydraulic brake lines. Spray the wheel hub with brake cleaner and vigorously scrub it with a wire brush to remove rust buildup. Slide the wheel back onto the studs and hand-thread every lug nut. Lower the vehicle off the jack stands until the tires just barely touch the ground to prevent spinning. Use your torque wrench to tighten the lugs in a star (criss-cross) pattern to your vehicle’s spec (typically 80–100 ft-lbs for cars, 120–150 ft-lbs for trucks). Lower the jack completely.
- Success checkpoint: You’ll know it worked when the torque wrench clicks at the exact specified weight on every lug nut, and the brake pedal feels firm and tight when pressed.
- Common mistake: Driving away without pumping the brakes. If you compressed the caliper pistons during your inspection, the first time you hit the brake pedal, it will sink straight to the floor with zero stopping power. Always pump the pedal 5 times in Park until it feels hard before putting the car in gear.
Common Mistakes and How to Fix Them
- Breathing Toxic Brake Dust: Asbestos and modern ceramic dust accumulate heavily inside wheel wells. Never use compressed air to blow off the assembly. Fix: Liberally spray the brakes with wet aerosol brake cleaner over a drip pan; the liquid captures the dust and evaporates cleanly.
- Hanging the Caliper by the Hose: If you need to unbolt the caliper to see the pads better, letting it dangle by the rubber brake line will internally tear the hose lining. Fix: Always hang a removed caliper from the suspension coil spring using a zip tie or a mechanic’s wire hook.
- Misdiagnosing a Squeal: A squealing noise does not always mean ruined rotors. Fix: Look for the small metal “wear indicator” tab on the brake pad. When pads hit 2.5mm, this tab intentionally drags on the rotor to cause a screech. Replace the pads immediately to save the rotor.
- Mounting Wheels on Rust: Bolting an alloy wheel against a rusty hub face prevents the wheel from sitting perfectly flat. Fix: If your steering wheel shakes only under heavy braking immediately after reassembly, remove the wheel, aggressively wire-brush the hub face, and retorque.
Inspection Variations
- Rear Brakes (Electronic Parking Brakes): If inspecting rear brakes, the parking brake tightly locks the rear calipers. You must strictly chock the front wheels, then safely release the parking brake to rotate the rear rotors or wiggle the calipers. On modern cars, you may need a digital OBD2 scanner to put the electronic parking brake into “Service Mode” before the caliper will move.
- Drum Brakes: Older vehicles and base-model trucks often have drum brakes in the rear. You cannot see the “shoes” (pads) through a window. You must remove the wheel, unbolt the drum housing, and pull the heavy metal drum off entirely to measure the friction material thickness.
How Long Does It Take and What Does It Cost?
A visual and measured inspection of all four corners takes a beginner roughly 60 to 90 minutes. The inspection itself is free, assuming you own basic tools. If you are starting from scratch, expect to spend:
- Minimum Setup (Jack, stands, lug wrench): $150–$250
- Inspection Tools (Pad gauge, micrometer, fluid strips): $20–$50 A shop typically charges one hour of labor ($100–$150) for a full diagnostic inspection, meaning buying the measuring tools pays for itself on the first attempt.
Frequently Asked Questions
Do I need to bleed my brakes after inspecting them? No. As long as you did not loosen any bleeder valves or detach the rubber brake hoses, the hydraulic system remains sealed. Bleeding is only required if you introduce air into the lines or completely flush old fluid.
Can I just look at the pads without taking the wheel off? Some alloy wheels have large spokes that allow you to see the outer pad. However, you cannot properly see the inner pad, measure rotor thickness, or check for seized slide pins through a wheel. A true inspection requires wheel removal.
Why are my brakes grinding if my outer pad is thick? The metal backing plate of the inner brake pad is likely grinding against the inside of the rotor. This is a classic symptom of seized caliper guide pins, which trap the inner pad against the spinning metal while the outer pad barely wears at all.