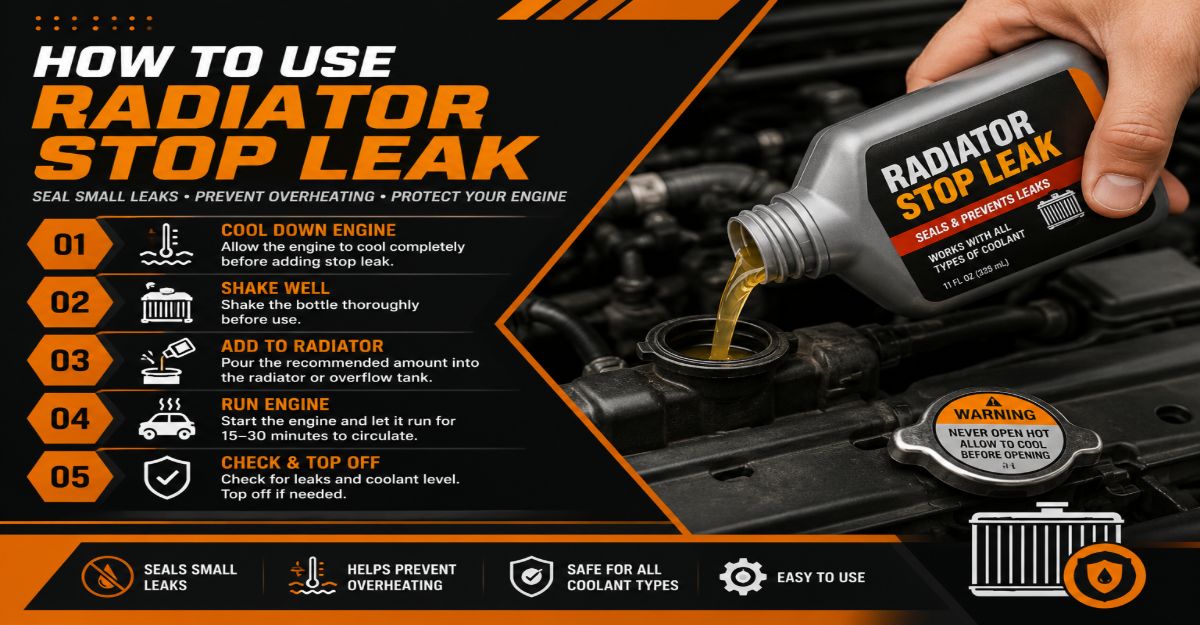
Using a radiator stop leak is a reliable temporary fix to seal small coolant leaks under 0.8mm in your vehicle’s cooling system. By following a structured 7-step process-involving cooling, precise fluid adjustment, active circulation, and system bleeding-you can complete this task in 45 minutes for a modest product cost, with success depending entirely on proper engine temperature management during circulation.
Before You Start
- Time Required: 45 to 60 minutes (including cooldown and idling time)
- Difficulty Level: Beginner
- Cost Range: $10 to $30 (USD)
- Tools & Materials Checklist:
- 1 bottle of radiator stop leak (325ml to 500ml, treats up to 12 liters of coolant)
- 1 to 2 liters of fresh coolant/antifreeze (matching your vehicle’s manufacturer specifications)
- 1 liter of distilled water
- Thick work gloves and safety glasses
- 1 clean plastic funnel
- Drain pan
- Clean microfiber cloth or shop rags
- Turkey baster or fluid siphon pump
- Prerequisites: The vehicle must be parked on level ground, completely cooled down, and the leak must be identified as a small pinhole or hairline crack rather than a ruptured hose or major structural split.
Step 1: Cool the Engine Down Completely
Let the engine sit completely turned off with the key out of the ignition until the cooling system is safe to touch.
Park your vehicle on flat ground, engage the parking brake, and turn off the engine. Do not open the hood immediately if the car has been driven recently. Wait 30 to 60 minutes until the metal hood, upper radiator hose, and engine block feel completely cold to the bare hand.
- You’ll know it worked when: The upper radiator hose feels soft, limp, and completely cool to the touch.
- Common Mistake: Opening a pressurized cooling system while hot. This causes boiling coolant to instantly flash-boil and spray, resulting in severe second- and third-degree facial and hand burns. Always verify temperature manually.
Step 2: Locate and Open the Radiator Cap
Put on your safety glasses and work gloves, then press down firmly on the radiator cap and twist it counterclockwise.
Locate the metal radiator cap at the front of the engine bay. (If your vehicle uses a pressurized plastic expansion tank instead of a direct radiator cap, perform this step on the expansion tank cap). Push down against the internal spring mechanism, rotate the cap a quarter-turn counterclockwise to release any residual low pressure, press down again, and lift the cap completely off. Set it aside on a clean rag.
- You’ll know it worked when: The cap is removed, revealing the fluid channel of the radiator neck without any sudden bursts of steam or hissing sounds.
- Common Mistake: Failing to wear safety glasses. Even a cool system can retain minor vacuum pockets or trapped pressure that flickers droplets upward into the eyes.
Step 3: Check and Adjust the Coolant Level
Ensure there is enough empty space inside the radiator neck to accommodate the incoming stop leak fluid without overflowing.
Look down into the radiator filler neck. If the coolant is filled right to the brim, take a clean turkey baster or fluid siphon pump and extract approximately 350ml to 500ml of existing coolant. Discharge this extracted liquid into your drain pan or a sealable container to preserve workspace capacity.
- You’ll know it worked when: The liquid level drops about 1 to 2 inches below the base of the radiator filler neck, leaving a clear volumetric buffer for the stop-leak additive.
- Common Mistake: Pouring stop leak directly into a completely full radiator, which forces concentrated chemical treatment to spill out onto your engine bay components or driveway immediately.
Step 4: Shake and Pour the Stop Leak Solution
Vigorously shake the stop leak bottle for 30 seconds, insert your funnel into the radiator neck, and pour the entire contents in.
Pick up your 325ml to 500ml bottle of stop leak and shake it aggressively for 30 to 45 seconds to re-suspend any settled metallic, ceramic, or organic micro-fibers. Place your clean plastic funnel securely into the radiator neck. Pour the recommended volume (typically the entire 1-bottle contents for standard passenger cars) directly through the funnel. Use your shop rag to catch any drips on the funnel rim.
- You’ll know it worked when: The bottle is completely emptied through the funnel and the thick suspension has drained fully into the cooling channels.
- Common Mistake: Pouring the product into the plastic overflow/recovery tank instead of directly into the radiator or pressurized surge tank. Non-pressurized overflow tanks will trap the sealing particles, preventing them from ever reaching the engine block and radiator core leaks.
Step 5: Top Off the System and Re-Cap
Pour a fresh 50/50 coolant and water mix into the radiator until it reaches the base of the filler neck, then twist the cap back on clockwise.
Remove the funnel. Take your pre-mixed coolant (or a 50/50 split of fresh antifreeze and distilled water) and pour it slowly into the radiator neck until the fluid level rises right up to the base of the filler neck opening. Take your radiator cap, place it back onto the neck, press down firmly, and twist clockwise until it hits its hard mechanical stop or clicks into a locked position.
- You’ll know it worked when: The fluid level is stable right at the neck floor and the cap is securely locked, preventing air intrusion under pressure.
- Common Mistake: Using straight tap water to top off. Tap water introduces mineral deposits and scale that react adversely with stop-leak resins, accelerating internal radiator clogging. Always use distilled water or pre-mixed coolant.
Step 6: Run the Engine and Activate the Circulation Loop
Start the engine, set your cabin climate controls to maximum heat, and let the vehicle idle for 15 to 20 minutes.
Ensure your vehicle is safely in PARK or NEUTRAL with the parking brake fully engaged. Start the engine and let it run at a normal idle. Move inside the cabin and turn your dashboard climate control temperature dial to MAX HEAT and adjust the fan blower speed to HIGH. Leave the vehicle running undisturbed for 15 to 20 minutes.
- You’ll know it worked when: Hot air blows consistently out of your cabin vents, indicating that the thermostat has opened and coolant is actively flowing through the entire loop—including the heater core.
- Common Mistake: Leaving the cabin heater turned off. Many modern heating systems feature a heater control valve that stays closed unless the cabin heat is maxed out. If closed, the stop-leak fluid cannot circulate through the heater core, leaving heater-core leaks unsealed.
Step 7: Post-Activation Check and Air Bleeding
Turn off the engine, let it cool completely, verify the fluid level, and check for any remaining external drips.
Shut off the engine and allow the vehicle to cool down for another 30 minutes. Carefully reopen the radiator cap to check if the fluid level dropped as trapped air bubbles escaped during the idle cycle. Top off with a small amount of coolant if needed, and secure the cap. Finally, inspect the engine bay and ground underneath with a flashlight to confirm the leak has stopped.
- You’ll know it worked when: The fluid level remains steady, no fresh coolant puddles form on the ground, and your temperature gauge stays locked in the normal operating range during a subsequent test drive.
- Common Mistake: Driving immediately without letting the engine cool down to check and bleed trapped air pockets, which can cause localized hot spots and engine overheating.
Common Mistakes and How to Fix Them
Applying stop leak incorrectly can lead to system blockages. Review these common failure modes and their exact recovery procedures:
- Overusing the Product: Pouring multiple bottles into a small system coagulates excess polymer solids, completely choking off narrow tubes in the radiator. Fix: Drain the system entirely, run a commercial chemical radiator flush for 15 minutes, drain, flush with clean water, and refill with fresh coolant.
- Ignoring Large Cracks: Expecting stop leak to bridge structural gaps wider than 0.8mm or split rubber hoses. Fix: Stop leak is engineered strictly for pinholes. Replace any split rubber radiator hoses or cracked plastic tanks manually with new OEM parts.
- Trapped Air Overheating: Air pockets left in the system after sealing cause erratic temperature spikes. Fix: Elevate the front of the vehicle on ramps, remove the radiator cap on a cold engine, start the car, let it reach operating temperature while squeezing upper hoses, and top off as air bubbles burp out.
Variations: Adjusting the Process for Specific Situations
- Vehicles Lacking a Direct Radiator Cap: Some modern European and domestic vehicles use a sealed radiator with a pressurized plastic expansion tank only. For these vehicles, pour the stop leak directly into the pressurized expansion surge tank, ensuring you do not exceed the “MAX” fill line when topping off.
- Heavy-Duty Trucks and Large SUVs: Cooling systems exceeding 12 liters capacity (such as full-size trucks or V8 engines) require two full bottles of stop leak rather than one. Scale your dosage accurately according to the product back-label volume instructions.
How Long Does It Take and What Does It Cost?
- Time Investment: Total hands-on working time is about 15 minutes, but factoring in the mandatory engine cooldown periods (30 to 60 minutes) and the 20-minute activation idle time, budget roughly 1.5 hours from start to finish.
- Financial Cost: A quality bottle of radiator stop leak (such as Bar’s Leaks, K-Seal, or BlueDevil) ranges from $12 to $28, and a jug of fresh coolant costs $15 to $25, making this DIY repair cost between $27 and $53 total—saving hundreds compared to a mechanic shop diagnostic and core replacement.
Frequently Asked Questions
Can I leave radiator stop leak in my cooling system permanently?
Yes, most modern chemical stop-leak formulas (such as micro-fiber or copper formulations) are designed to remain suspended safely inside your coolant mixture for years without harming water pumps or metal components, acting as ongoing insurance against micro-leaks.
Will radiator stop leak ruin my water pump?
No, high-quality modern formulations use lubricating agents and suspended sealing particles that flow safely past water pump seals and impellers without causing binding, provided you use the correct dosage and avoid over-pouring.
Can I use stop leak if my car is already overheating?
You should not use stop leak while the engine is currently overheating. Overheating indicates either a major coolant loss, a blown head gasket, or a stuck thermostat-none of which stop leak can fix. Cool the engine down fully and diagnose the root cause before applying any chemical sealant.
Does stop leak work on head gasket leaks?
Some specialized heavy-duty formulations claim to patch minor head gasket seepage, but standard radiator stop leaks are specifically formulated for metal radiator cores, heater cores, and intake manifold gaskets. For true head gasket failures, a dedicated permanent block sealer is required instead.
Can I mix different brands of stop leak?
You should never mix multiple brands or types of stop leak. Combining disparate chemical compositions (such as silicate-based formulas with organic particulate sealers) can cause sudden chemical coagulation, instantly clogging your radiator tubes and heater core.