Replacing a worn ball joint restores steering precision and safety, taking 2 to 4 hours per side at an intermediate DIY skill level, with success depending entirely on maintaining straight alignment during the pressing process.
Before You Start
- Total Estimated Time: 2 to 4 hours per side.
- Experience Level: Intermediate to Advanced DIY.
- Estimated Cost: $30 to $150 per side (for parts and rental tools).
- Prerequisite Skills: Basic suspension work, safe vehicle jacking procedures, and torque wrench operation.
Tools and Materials Checklist
- New Ball Joint Kit: 1 per side (OEM or upgraded aftermarket)
- Ball Joint Press Kit: 1 kit featuring C-clamp and assorted receiving/installation adapters
- Torque Wrench: 1 unit capable of measuring up to 250 lb-ft (339 Nm)
- Breaker Bar / Impact Wrench: 1 unit for high-torque suspension fasteners
- Socket and Wrench Set: Metric and standard (sizes 14mm to 36mm depending on axle nuts)
- Needle-Nose Pliers: 1 pair for cotter pins
- Snap Ring Pliers: 1 pair for retaining rings
- Wire Brush & Brake Cleaner: 1 of each for bore cleaning
- Anti-Seize Lubricant: 1 small tube for control arm interface
- Chassis Grease & Gun: 1 gun for greaseable service fittings
- Heavy-Duty Jack & Jack Stands: 1 jack and 2 stands rated for vehicle weight
- Wheel Chocks: 2 units
Step 1: Inspect and Verify Ball Joint Wear
Lift the vehicle securely on jack stands until the front wheels hang freely. Grab the tire at the 12 o’clock and 6 o’clock positions and rock it back and forth firmly. Observe the lower and upper ball joint studs for any vertical play or gap movement.
- Success Check: You’ll know this step worked when you isolate whether the play originates from the wheel bearing or the ball joint stud. If the stud moves vertically relative to the control arm or steering knuckle by even 1mm, the ball joint is failed and must be replaced.
- Common Mistake: Confusing wheel bearing play with ball joint play. Have an assistant press the brake pedal while you rock the tire; if the play disappears, it is a wheel bearing, not a ball joint.
Step 2: Vehicle Prep and Wheel Removal
Park on a flat, level concrete surface, engage the emergency parking brake, and place wheel chocks firmly behind the rear tires. Loosen the front wheel lug nuts one-half turn using your breaker bar while the tires remain on the ground. Raise the vehicle using factory lift points and lower it securely onto two heavy-duty jack stands. Remove the lug nuts entirely and take the wheel off the vehicle.
- Success Check: You’ll know this step worked when the vehicle is rock-solid on level jack stands and the work area is completely unobstructed.
- Common Mistake: Working on asphalt or unpaved ground with a single hydraulic floor jack supporting the car’s weight. Always use rated jack stands.
Step 3: Disassembly of Brake and Hub Components
Remove the brake caliper mounting bolts using your socket set and lift the caliper off the rotor. Hang the caliper securely from the coil spring or frame using a bungee cord or mechanic’s wire, ensuring zero tension on the rubber brake hose. Slide the brake rotor off the wheel hub. If you are working on a four-wheel-drive or all-wheel-drive vehicle, remove the cotter pin, nut retainer, and heavy axle nut using an impact wrench or breaker bar.
- Success Check: You’ll know this step worked when the steering knuckle and hub assembly are stripped of heavy peripheral parts, granting clear physical access to the ball joint castle nut.
- Common Mistake: Letting the brake caliper dangle by its rubber hydraulic hose. This internal stress can rupture the line and cause brake failure.
Step 4: Separating the Steering Knuckle
Pull out the old cotter pin from the ball joint castle nut using needle-nose pliers and back the castle nut off until only two threads remain engaged at the top of the stud. Attach a ball joint separator tool or strike the side of the steering knuckle boss sharply with a heavy hammer to shock the tapered stud free. Remove the nut entirely, push the steering knuckle away from the ball joint stud, and secure the knuckle out of the way with a bungee cord.
- Success Check: You’ll know this step worked when the tapered stud drops out of the steering knuckle cleanly without damaging adjacent rubber boots or wiring harnesses.
- Common Mistake: Striking the threaded stud directly with a hammer. This mushrooms the threads, making it impossible to remove the castle nut. Always strike the cast iron knuckle boss or use a proper separator tool.
Step 5: Pressing Out the Old Ball Joint
Remove the retaining snap ring from the control arm using snap ring pliers if your vehicle is equipped with one. Configure your ball joint press tool by placing the correct size receiving cup underneath the control arm and the pushing adapter squarely on top of the ball joint stud. Crank the C-clamp forcing screw clockwise using a breaker bar or impact wrench until the old ball joint presses entirely out of the control arm bore.
- Success Check: You’ll know this step worked when the old ball joint drops free into the receiving cup and the control arm bore is completely empty.
- Common Mistake: Using an incorrect receiving cup size that blocks the path of the exiting joint, which bends the C-clamp frame under high pressure.
Step 6: Prepping the Control Arm Bore
Clean the inner diameter of the control arm receiving hole thoroughly with a wire brush and spray it down with brake cleaner to strip away embedded rust, old scale, and metal burrs. Wipe the surface completely dry with a shop rag. Apply a microscopic, thin film of anti-seize lubricant along the inner wall of the control arm bore to ease the installation of the replacement part.
- Success Check: You’ll know this step worked when the inner bore shines like bare metal and is entirely free of grit or pitting.
- Common Mistake: Skipping the cleaning step or applying thick grease, which traps debris and prevents the new press-fit joint from seating tightly.
Step 7: Pressing In the New Ball Joint
Position the new ball joint perfectly straight into the cleaned control arm bore by hand. Reconfigure your press C-clamp kit by placing the receiving cup on top of the control arm and the flat installation adapter directly underneath the bottom lip of the new joint. Slowly crank the press screw clockwise while visually checking every 180 degrees to ensure the joint enters the bore at a precise 90-degree angle, continuing until the metal flange seats completely flush against the control arm. Install the new snap ring securely into its groove.
- Success Check: You’ll know this step worked when the snap ring snaps fully into its machined groove with an audible click and you cannot slide a feeler gauge anywhere under the joint flange.
- Common Mistake: Allowing the new joint to tilt sideways while cranking the press. Forcing a crooked joint ruins the control arm bore permanently.
Step 8: Reassembly and Final Torque Settings
Insert the new ball joint tapered stud into the steering knuckle and thread the new castle nut on by hand. Torque all suspension fasteners strictly to factory specifications using your calibrated torque wrench:
- Ball Joint Castle Nut: 50 to 80 lb-ft (68 to 108 Nm)
- Axle Nut (if applicable): 150 to 250 lb-ft (203 to 339 Nm)
- Brake Caliper Bracket Bolts: 70 to 100 lb-ft (95 to 135 Nm)
- Wheel Lug Nuts: 80 to 110 lb-ft (108 to 149 Nm)
Align the slot in the castle nut with the hole in the stud. If they do not align, tighten the nut slightly further until they match; never loosen it. Insert a fresh cotter pin and bend the legs securely over the nut. Install the grease zerk fitting if the joint is greaseable and pump 2 to 3 strokes of chassis grease into the boot until it begins to swell. Reinstall the brake rotor, caliper, and wheel, then lower the vehicle back to the ground.
- Success Check: You’ll know this step worked when all fasteners meet exact torque specs, cotter pins are locked, and the vehicle sits at normal ride height without suspension binding.
- Common Mistake: Loosening a castle nut back to meet a cotter pin hole, which causes loose joints and catastrophic steering failure. Always tighten forward.
Common Mistakes and How to Fix Them
- Crooked Pressing: Forcing the new joint into the arm at an angle. Fix: Stop immediately, back the press out, inspect the bore for scoring, and reset the adapters squarely before trying again.
- Torn Rubber Dust Boot: Puncturing the boot during press setup or knuckle installation. Fix: If grit has not entered the joint, slide a replacement boot over the stud; otherwise, replace the entire joint assembly.
- Reusing Old Hardware: Reusing stretched self-locking nuts, old cotter pins, or fatigued snap rings. Fix: Always use the fresh hardware supplied in modern replacement kits.
- Over-Greasing the Boot: Pumping grease until the boot balloon pops or ruptures. Fix: Stop pumping as soon as the rubber boot expands slightly; clean excess grease off exterior components.
- Neglecting Wheel Alignment: Skipping alignment after suspension repair. Fix: Schedule a professional four-wheel alignment immediately to prevent rapid tread wear and steering pull.
Variations: Adapting to Different Vehicle Setups
- Pressed-In vs. Bolted-In Joints: Some trucks and SUVs utilize bolted-in ball joints instead of press-fit ones. For bolted variants, simply remove the retaining bolts with a ratchet, swap the unit, and torque the new bolts to specification without needing a C-clamp press kit.
- Integrated Control Arm Assemblies: On many modern front-wheel-drive passenger cars, the ball joint is permanently integrated into a stamped steel or aluminum control arm. In these scenarios, it is faster and safer to replace the entire control arm assembly rather than pressing out an individual joint.
- Aluminum Control Arms: Vehicles featuring aluminum suspension arms require extreme care during press operations. Never use impact wrenches on press kits for aluminum arms; use hand ratchets exclusively to prevent catastrophic cracking of the metal.
How Long Does It Take and What Does It Cost
- Time Investment: Expect 2 to 4 hours per side for your first attempt. Experienced mechanics equipped with hydraulic shop presses can finish both sides in under 2 hours.
- Financial Cost: DIY parts and tool rentals cost between $60 and $200 total. Professional mechanic shops typically charge between $250 and $600 per side for parts and labor combined.
Frequently Asked Questions
How long should a ball joint last?
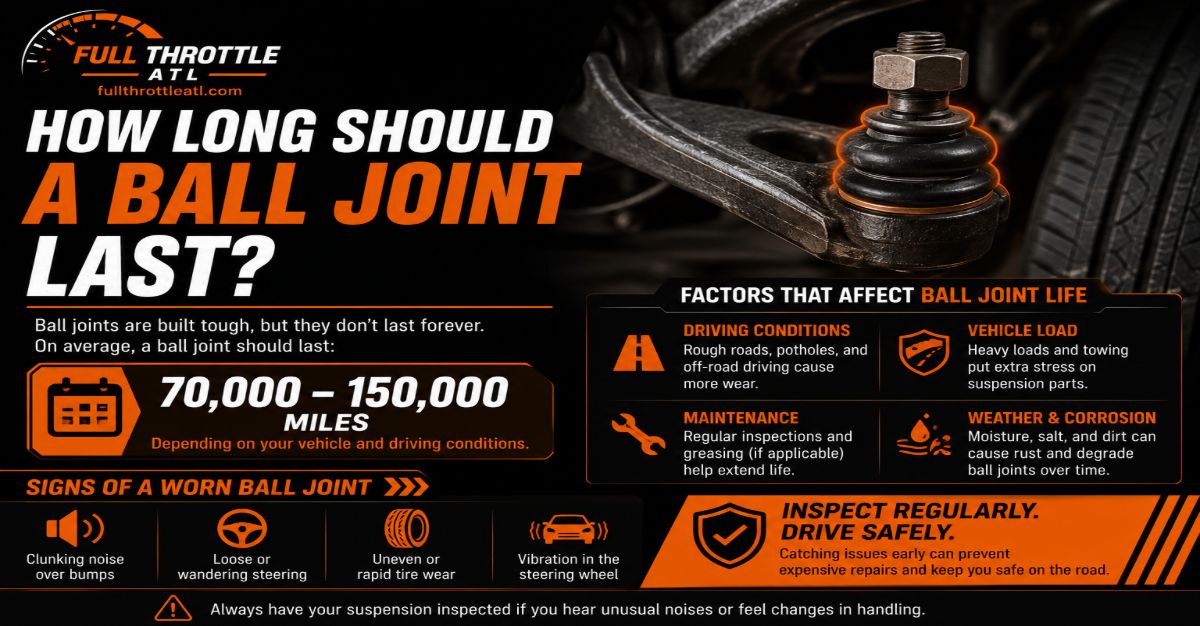
Ball joints typically last between 70,000 to 150,000 miles (112,000 to 240,000 km) under normal driving conditions. Rough roads, unpaved terrain, heavy vehicle payloads, and missing lubrication fittings will shorten this lifespan down to 40,000 miles or less.
Can I drive with a bad ball joint?
Driving with a worn ball joint is extremely dangerous and not recommended. If a ball joint separates completely while driving, the wheel will lose structural control, causing the vehicle to drop suddenly, catch the pavement, and potentially roll over.
Do I need an alignment after replacing a ball joint?
Yes, you need a professional wheel alignment immediately after ball joint replacement. Removing and reinstalling the steering knuckle and control arm shifts your vehicle suspension geometry, altering toe and camber settings which ruins tires quickly.
How do I know if my upper or lower ball joint is bad?
Lower ball joints typically carry the full weight of the vehicle and fail first, producing sharp clunking noises over bumps and a loose steering feel. Upper ball joints support steering stability; when they fail, they cause high-speed vibration and wandering steering behavior.