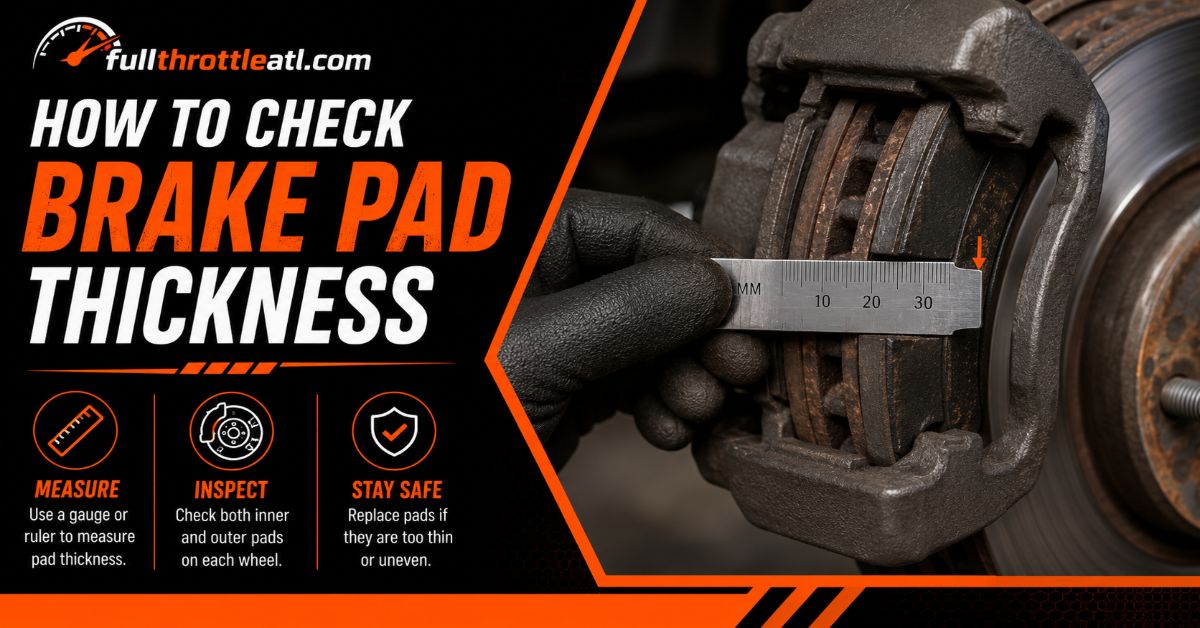
Checking your brake pad thickness involves removing the wheel and measuring the exact millimeter depth of the friction material. This 8-step process takes 20 to 30 minutes, requires basic hand tools, and is highly accessible for beginners. Success entirely depends on identifying the consumable friction material instead of mistakenly measuring the permanent metal backing plate.
Before You Start
- Time Required: 20 to 30 minutes per axle.
- Difficulty: Beginner.
- Estimated Cost: $30 to $80 for initial tool investment.
- Required Conditions: A completely flat, level concrete or asphalt surface. Never lift a vehicle on dirt, gravel, or an incline.
Tools and Materials Required:
- 1 hydraulic floor jack rated for your vehicle weight (minimum 2-ton capacity).
- 1 set of heavy-duty jack stands.
- 1 lug wrench or 1/2-inch drive breaker bar with matching lug nut socket.
- 1 set of color-coded brake pad feeler gauges (or a digital metric caliper).
- 1 bright LED flashlight.
- 2 rubber or heavy plastic wheel chocks.
- 1 click-style torque wrench capable of reaching 100 lb-ft.
- 1 can of aerosol brake parts cleaner (optional for dirty calipers).
- 1 clean microfiber cloth.
Step-by-Step Measurement Process
Step 1: Secure the Vehicle on a Level Surface
Park your car on a flat concrete driveway or garage floor to prevent the vehicle from shifting while elevated. Engage the emergency parking brake as firmly as possible. Take your 2 wheel chocks and place them tightly against the front and rear of a tire on the opposite axle from the one you are lifting. If you are lifting the front driver-side wheel, chock the rear passenger-side wheel.
Success Checkpoint: You will know this step worked when you push firmly against the trunk or hood and the vehicle does not roll in either direction.
Common Mistake: Lifting the car on hot asphalt during summer. Floor jacks can sink into soft asphalt under heavy loads and cause the vehicle to tip. Use a thick piece of plywood under the jack if concrete is unavailable.
Step 2: Loosen the Lug Nuts
Use your lug wrench or breaker bar to turn each lug nut on the target wheel counterclockwise by exactly 1/2 turn. Do this while the tire is still touching the ground. The weight of the car provides the friction needed to keep the wheel from spinning while you break the factory torque seal. Do not remove the lug nuts completely.
Success Checkpoint: You will know it worked when you can easily turn the lug nuts further with a standard ratchet or your fingers, but they still securely hold the wheel to the hub.
Step 3: Lift and Secure the Vehicle
Position your hydraulic floor jack under the designated factory lift point. You can find this point by feeling along the pinch weld under the doors for two small notches or consulting your owner manual. Pump the jack until the tire is about 2 inches off the ground. Slide your jack stand under the structural frame rail or the designated jack stand support area beside the jack. Slowly turn the jack handle to lower the car completely onto the jack stand saddle.
Success Checkpoint: You will know the car is secure when you physically push the front fender side-to-side with moderate force and the vehicle remains entirely rigid on the stand.
Common Mistake: Leaving the hydraulic jack engaged to support the weight. Hydraulic seals can fail without warning. The weight must rest entirely on the mechanical steel jack stand.
Step 4: Remove the Wheel
Spin the loosened lug nuts entirely off the wheel studs by hand and place them in a magnetic tray or a clean cup so they do not get lost. Grip the tire at the 9 o’clock and 3 o’clock positions, pull it straight back toward your body, and slide it off the hub. Lay the wheel flat on the ground and push it under the car chassis next to the jack stand.
Success Checkpoint: The rotor, brake caliper, and suspension components are now fully visible and unobstructed. The wheel sitting under the car serves as a physical fail-safe in the rare event the jack stand fails.
Step 5: Locate the Caliper Inspection Window
Locate the metal brake caliper assembly clamping down on the shiny circular rotor. Take your LED flashlight and look at the top or front face of the caliper for a small rectangular cutout known as the inspection window. Look through this window to view the brake pad sandwich. You must identify two distinct parts: the 5 mm thick steel backing plate sitting against the caliper pistons, and the softer, textured friction material pressed directly against the shiny rotor.
Success Checkpoint: You will know you are looking at the right area when you can see a distinct dividing line between the dark grey or black friction material and the metal plate it is glued to.
Step 6: Measure the Friction Material Thickness
Take your set of color-coded feeler gauges and insert the blades between the metal backing plate and the shiny rotor surface. Start with the green 8 mm gauge. Slide it into the gap strictly against the friction material edge. If it does not fit, move down to the yellow 5 mm gauge. Find the exact gauge size that slides snugly into the gap without you having to force or bend the tool.
Read the measurement on the gauge:
- 8 mm to 12 mm (Green): Excellent condition. No action is required.
- 4 mm to 5 mm (Yellow): Worn down. You should plan to replace the brake pads within the next few months.
- 3 mm or less (Red): Critical safety hazard. The pads must be replaced immediately before driving again.
Repeat this exact measuring process for the inner brake pad located on the backside of the rotor. You will need to position your head inside the wheel well and angle your flashlight to see the inner inspection window.
Success Checkpoint: You have recorded a specific millimeter measurement for both the inner pad and the outer pad.
Common Mistake: Measuring the chamfered edge. Many brake pads have angled slopes at the top and bottom ends to prevent squealing. Always measure the thickest, flat center point of the friction block.
Step 7: Remount and Hand-Tighten
Pull the wheel out from under the car. Lift it up and align the holes with the wheel studs on the hub. Push the wheel completely flush against the rotor hat. Thread all of your lug nuts onto the studs by hand, turning them clockwise until they are snug. Ensure the wheel is seated evenly and is not hung up on the hub lip.
Success Checkpoint: The wheel does not wobble on the hub, and you cannot turn the lug nuts any further using just your bare hands.
Step 8: Lower and Torque to Specification
Raise the floor jack slightly to lift the vehicle off the jack stand. Remove the jack stand from under the car. Slowly lower the jack until the tire touches the ground and compresses slightly, but do not drop the full weight of the vehicle just yet.
Set your torque wrench to the exact foot-pound specification listed in your owner manual (typically between 80 and 100 lb-ft). Attach your socket and tighten the lug nuts in a star pattern. Start at the top nut, move to the bottom right, then top left, middle right, and bottom left. Pull the torque wrench in a smooth, steady motion until you hear and feel a distinct click. Stop pulling immediately. Once all nuts click, lower the jack the rest of the way and remove it.
Success Checkpoint: Every lug nut has clicked once at the factory torque spec, and the jack is completely clear of the vehicle.
Common Mistake: Double-clicking or pushing past the click on the torque wrench. This over-tightens the nut and can permanently stretch or snap the wheel stud.
Common Mistakes and How to Fix Them
Beginners often run into specific measurement errors and mechanical roadblocks. Here is how to identify and correct the most frequent issues.
Measuring the Metal Backing Plate
The most dangerous error you can make is including the metal backing plate in your measurement. The backing plate is roughly 5 mm thick. If your friction material is dangerously low at 1 mm, but you measure both the material and the plate together, you will read 6 mm. You will mistakenly think your brakes are safe. How to fix it: Shine a bright flashlight into the caliper window and look for the physical seam between the textured pad and the smooth steel plate. Place the edge of your feeler gauge exactly on that seam, not behind the plate.
Checking Only the Outer Pad
Many people look at the outer pad through the wheel spokes and assume the brakes are fine. However, the inner pad (the one closest to the engine) typically wears out much faster than the outer pad because it is pushed by the hydraulic piston first. How to fix it: Always take off the wheel and measure the inside pad. If the inner pad is 3 mm thinner than the outer pad, your caliper slide pins are likely seized. You will need to remove the caliper, clean the pins with a wire brush, and apply high-temperature silicone brake grease.
The Wheel is Stuck to the Hub
After removing all the lug nuts, you might find that the wheel refuses to pull off the car. This happens when rust and galvanic corrosion fuse the aluminum wheel to the steel hub. How to fix it: Thread two lug nuts back onto the studs, leaving about a 5 mm gap between the nut and the wheel. Take a heavy rubber mallet and strike the inner sidewall of the tire from underneath the car. Rotate the tire a quarter turn and strike again until the corrosion breaks loose. The loose lug nuts will prevent the heavy wheel from flying off and landing on your foot.
Road Grime Blocks the Inspection Window
Sometimes the caliper is so covered in brake dust and road tar that you cannot see the pads or the backing plate at all. How to fix it: Place a cardboard box under the brake assembly. Spray the caliper generously with dedicated aerosol brake parts cleaner. The grime will melt off instantly. Wipe the inspection window with a clean microfiber cloth. Never use water or soapy degreasers on bare metal brake components because they will cause flash rust.
Variations for Different Situations
The standard process covers 90% of passenger vehicles, but you may encounter situations that require a slightly different approach.
The Wheel-On Visual Check
If you have modern alloy wheels with wide, open spokes, you can often perform a preliminary check without lifting the car. Park the vehicle and turn the steering wheel all the way to the left or right to angle the front wheels outward. Shine your flashlight directly through the wheel spokes into the caliper window. While you cannot use a feeler gauge easily from this angle, you can visually compare the thickness of the friction material to the thickness of the steel backing plate. If the pad material looks thinner than the backing plate, you are likely near the 4 mm replacement threshold and must do a full wheel-off measurement.
Using a Digital Caliper Instead of Feeler Gauges
If you do not own color-coded feeler gauges, you can use a digital metric caliper. However, the caliper jaws are often too bulky to fit into the inspection window while the brake assembly is clamped together. To use a digital caliper, you must remove the two bolts holding the brake caliper to the mounting bracket, slide the caliper off the rotor, and pull the brake pads completely out of their retaining clips. You can then measure the friction material block directly. This method takes an additional 15 minutes per wheel but provides a flawless, exact measurement down to the decimal.
Dealing with Drum Brakes
Many compact cars and trucks use disc brakes on the front wheels and drum brakes on the rear wheels. You cannot check drum brake thickness using the steps above. Drum brakes hide the friction material (brake shoes) completely inside a sealed metal drum. To check them, you must remove the wheel, pull off the metal drum cover, and measure the brake shoe lining. Brake shoes have a different safety tolerance and generally require replacement when the lining reaches 2 mm thick.
How Long Does It Take and What Does It Cost?
Checking your brake pad thickness is a fast, virtually free maintenance task once you own the basic tools.
- Time Breakdown: Gathering tools and securing the vehicle takes 5 minutes. Lifting the car and removing the wheel takes 5 minutes. Measuring both pads takes 5 minutes. Reassembly and torquing takes 5 minutes. You can expect to spend about 20 minutes on the first wheel. As you build confidence, checking the remaining wheels will take about 10 minutes each.
- Cost Breakdown: The measurement process itself is free. If you are starting with an empty garage, expect to spend $40 for a basic 2-ton floor jack, $25 for a pair of jack stands, $20 for a torque wrench, and $10 for a set of brake pad feeler gauges. Total initial investment is around $95. Comparing this to a mechanic shop, which typically charges $50 to $100 for a comprehensive brake inspection, the tools pay for themselves on your first attempt.
Frequently Asked Questions
How often should I check my brake pad thickness?
You should measure your brake pads every 10,000 miles or during every tire rotation. If you drive aggressively, live in a mountainous area with heavy downhill braking, or tow a heavy trailer, check your pads every 5,000 miles.
Can I keep driving safely on 2 mm brake pads?
No. At 2 mm, the pad material is dangerously compromised. Under heavy emergency braking, the thin material can crack, separate from the backing plate, and cause total brake failure. Furthermore, the metal backing plate will soon gouge into the rotor, costing you hundreds of extra dollars in repairs.
Why is my car squealing when I stop if my pads measure 6 mm?
Brake squeal on thick pads is usually caused by dust buildup or a lack of brake grease on the metal contact points where the pad slides into the caliper bracket. It can also be caused by cheap, low-quality metallic pad formulations. It does not strictly mean the pads are worn out.
Do rear brake pads wear out faster than front brake pads?
No. The front wheels handle up to 70% of a vehicle’s stopping power due to weight transfer when decelerating. Because of this extreme load, front brake pads typically wear out two to three times faster than rear brake pads. Always check the front brakes first.
What does a metal-on-metal grinding noise mean?
Grinding means your friction material has completely worn away to 0 mm. The steel backing plate is now physically carving deep grooves into your brake rotor. Your braking distance is severely compromised. The vehicle is unsafe to drive and requires an immediate tow to a flat, safe repair location.