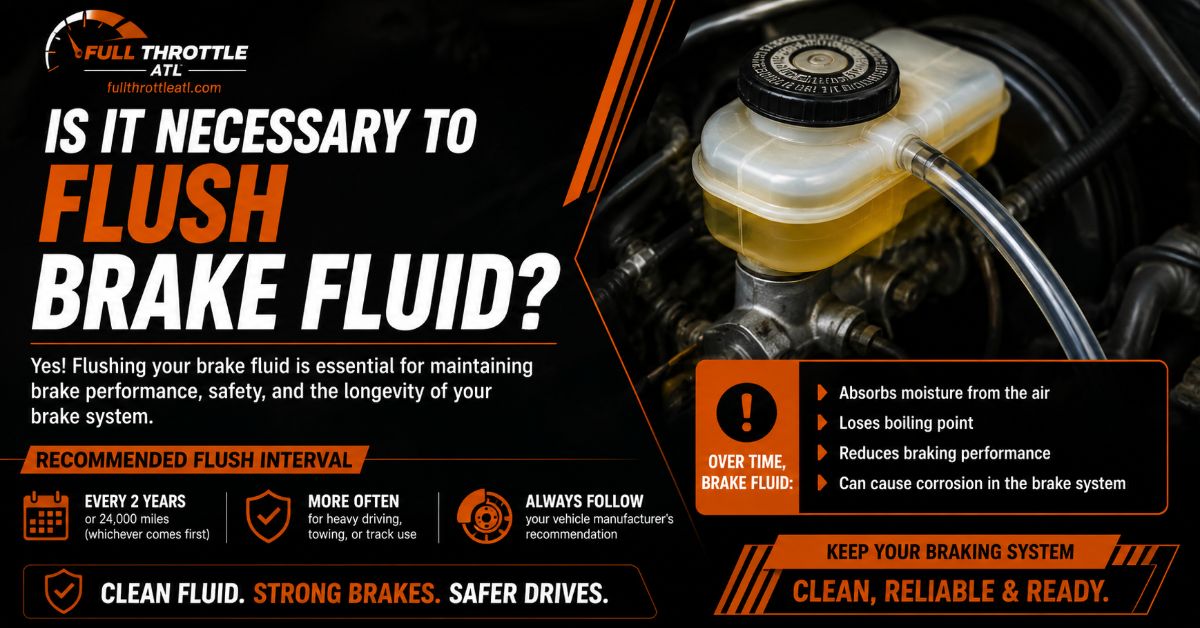
Yes, flushing your brake fluid is an essential maintenance requirement to preserve stopping power, protect expensive Anti-lock Braking System (ABS) components from internal corrosion, and prevent total brake failure caused by fluid boiling. Because glycol-based brake fluid is hygroscopic, it continuously absorbs moisture from the atmosphere, dropping its boiling point and contaminating the hydraulic system over time.
At a Glance: Brake Fluid Flush Essentials
- Recommended Interval: Every 2 years or 20,000 to 30,000 miles, regardless of mileage, due to time-based moisture absorption.
- Failure Threshold: Fluid with a water content of 3% or higher or copper content exceeding 200 ppm requires an immediate flush.
- Safety Danger: Water in brake lines boils into compressible gas during heavy braking, causing a “spongy” pedal or complete vapor lock pedal loss.
- Cost Range: $15–$30 for DIY materials; $100–$220 for professional service at an independent shop or dealership.
- Fluid Standard: Never mix silicone-based DOT 5 fluid with glycol-based DOT 3, DOT 4, or DOT 5.1 fluids.
Why Is Flushing Brake Fluid Necessary?
Flushing brake fluid is necessary because modern automotive hydraulic braking systems rely on incompressible liquid to transfer force from your foot to the brake calipers. Over time, brake fluid degrades chemically and mechanically, leading to three catastrophic failure modes if left unserviced:
[Moisture Ingress] ──► [Lowered Boiling Point] ──► [Fluid Boils Under Heat] ──► [Vapor Lock / Brake Failure]
         │
         └──► [Additive Depletion] ──► [Internal Corrosion] ──► [ABS Module / Caliper Seizure]
- Vapor Lock (Boiling Fluid): Glycol brake fluid absorbs water through atmospheric venting and microscopic rubber hose pores. Under hard braking, temperatures at the caliper can exceed $200^\circ\text{C}$ ($392^\circ\text{F}$). Water inside the fluid boils into vapor. Because steam is compressible while liquid is not, pressing the pedal merely compresses the gas bubbles, resulting in a floorboard-sinking pedal and zero stopping force.
- Internal Component Corrosion: Fresh brake fluid contains anti-corrosion additives and pH buffers. As water content accumulates, these additives deplete. The water-rich fluid corrodes steel brake lines, caliper pistons, and the internal micro-valves of the Anti-lock Braking System (ABS) and Electronic Stability Program (ESP) modules. Replacing an ABS hydraulic unit often costs between $1,200 and $2,500.
- Particulate & Sludge Accumulation: Heat cycling breaks down internal rubber seals and hoses, shedding microscopic particles into the fluid. This sludge clogs the tiny orifices within the master cylinder and ABS block, causing stuck calipers, uneven pad wear, and dragging brakes.
What Is the Difference Between a Brake Flush, Bleed, and Top-Off?
A brake fluid flush completely evacuates all degraded fluid and contaminants from the entire hydraulic network; a bleed merely purges trapped air bubbles from specific lines; a top-off adds fluid to the reservoir without addressing system contamination.
| Parameter | Brake Fluid Flush | Brake Fluid Bleed | Brake Fluid Top-Off |
| Primary Objective | Remove 100% of old, wet, chemically degraded fluid & debris. | Purge trapped air bubbles to restore firm pedal feel. | Restore fluid level in the reservoir as pads wear down. |
| Volume of Fluid Used | 1.0 to 1.5 Liters | 0.2 to 0.5 Liters | 0.05 to 0.1 Liters |
| Scope of Service | Entire system (Master cylinder, lines, ABS block, all calipers). | Individual caliper line or affected brake channel. | Master cylinder reservoir only. |
| Solves Moisture Risk? | Yes, completely resets fluid wet boiling point. | No, leaves old, wet fluid in the remaining lines. | No, new fluid mixes with degraded old fluid. |
| Service Frequency | Every 24 months / 20k–30k miles. | After brake repairs or when pedal feels spongy. | As needed during routine pad inspection. |
How Does Brake Fluid Absorb Water (The Hygroscopic Problem)?
Most automotive brake fluids are composed of glycol-ethers and borate esters, compounds engineered specifically for high heat resistance and low temperature viscosity stability. However, these glycol compounds are chemical desiccant-like structures: they actively pull water vapor directly out of ambient air.
Moisture enters a sealed braking system through four main vectors:
- Reservoir Venting: The master cylinder reservoir cap features a tiny breather vent or flexible rubber diaphragm designed to accommodate fluid level drops as pads wear. Ambient air—and the humidity within it—continually contacts the fluid surface.
- Micro-Pores in Rubber Hoses: Flexible rubber brake hoses located at each wheel are microscopic filters. Over time, water molecules pass directly through the hose walls via osmotic diffusion.
- Caliper Piston Seals: Every time you step on the pedal, the caliper piston extends past its rubber square-cut seal. When released, the piston retracts, dragging microscopic films of ambient moisture trapped on the outer piston wall back into the hydraulic chamber.
- Service Exposure: Opening the fluid reservoir during routine checks introduces fresh, humid air into the container.
What Are the Main Types of Brake Fluid, and How Do They Compare?
Brake fluids are graded by the Department of Transportation (DOT) based on their dry boiling point (100% pure fluid) and wet boiling point (tested at 3.7% water absorption by volume). They are further categorized by chemical base and low-temperature kinematic viscosity.
| Fluid Grade | Chemical Base | Min. Dry Boiling Point | Min. Wet Boiling Point | Viscosity at −40∘C | Ideal Application / Compatibility |
| DOT 3 | Glycol-Ether | $205^\circ\text{C}$ ($401^\circ\text{F}$) | $140^\circ\text{C}$ ($284^\circ\text{F}$) | $\le 1500\text{ cSt}$ | Domestic commuter cars, light trucks, older vehicles. Mixes with DOT 4 & 5.1. |
| DOT 4 | Glycol / Borate Ester | $230^\circ\text{C}$ ($446^\circ\text{F}$) | $155^\circ\text{C}$ ($311^\circ\text{F}$) | $\le 180^\circ\text{ cSt}$ | European vehicles, modern sedans, crossovers, heavy SUVs. Higher thermal capacity. |
| DOT 4 Low Viscosity (LV) | Glycol / Borate Ester | $265^\circ\text{C}$ ($509^\circ\text{F}$) | $170^\circ\text{C}$ ($338^\circ\text{F}$) | $\le 750\text{ cSt}$ | Modern vehicles with advanced ABS/ESP micro-valves requiring rapid cold response. |
| DOT 5.1 | Borate Ester / Glycol | $260^\circ\text{C}$ ($500^\circ\text{F}$) | $180^\circ\text{C}$ ($356^\circ\text{F}$) | $\le 900\text{ cSt}$ | Performance fleets, track days, heavy towing. Compatible with DOT 3 & DOT 4. |
| DOT 5 | Silicone-Based | $260^\circ\text{C}$ ($500^\circ\text{F}$) | $180^\circ\text{C}$ ($356^\circ\text{F}$) | $\le 900\text{ cSt}$ | Classic cars, military, long-term storage. Incompatible with ABS. Never mix with glycol! |
Critical Safety Rule: Never mix DOT 5 (silicone) with glycol-based fluids (DOT 3, DOT 4, DOT 5.1). Silicone fluid does not absorb water; any moisture present pools into pure water pockets that freeze at $0^\circ\text{C}$ ($32^\circ\text{F}$) or boil at $100^\circ\text{C}$ ($212^\circ\text{F}$), causing immediate hydraulic collapse.
How Do You Flush Brake Fluid? (Step-by-Step Procedure)
To successfully perform a complete brake fluid flush on a standard passenger vehicle, follow this step-by-step procedure.
Before You Start: Requirements & Prerequisites
- Total Time Required: 1 to 2 hours (DIY); 30 to 45 minutes (Professional shop).
- Skill Level: Intermediate.
- Required Tools & Materials:
- 1.0 to 1.5 liters of fresh, unopened DOT-rated brake fluid.
- Flare nut wrenches (typically 8mm, 9mm, 10mm, or 11mm).
- Fluid extraction pump or syringe.
- Clear vinyl tubing (1/4-inch inner diameter) and catch bottle.
- Torque wrench, floor jack, and 4 jack stands.
- Nitrile gloves, safety glasses, and brake cleaner.
- Optional: Pressure bleeder tool (e.g., Motive Products bleeder).
          [ Master Cylinder Reservoir ]
   (Source of Fresh Fluid - Keep Filled!)
                   │
    ┌──────────────┴──────────────┐
    ▼                             ▼
[Right Rear]                 [Left Rear]
 (Furthest)                   (2nd)
    │                             │
    ▼                             ▼
[Right Front]                [Left Front]
    (3rd)                     (Closest)
1.Vehicle Setup and Safety Preparation:Ensure vehicle is safely supported on jack stands before wheel removal.
Park the vehicle on a firm, level concrete surface. Engage the parking brake, loosen wheel lug nuts slightly, jack up all four corners of the vehicle, and seat it securely on jack stands. Remove all four wheels to gain unobstructed access to the caliper or wheel cylinder bleeder screws.
2.Clean and Extract Reservoir Fluid:Prevent contamination from entering the master cylinder.
Clean the outer surface of the master cylinder reservoir with brake cleaner to prevent dirt from falling inside. Remove the reservoir cap and use a fluid extraction pump or clean syringe to siphon out old, dark fluid. Leave approximately 1/4 inch of fluid at the bottom to prevent air from entering the master cylinder bore.
3.Refill Reservoir with Fresh Fluid:Always use a brand-new, factory-sealed container.
Fill the master cylinder reservoir to the MAX mark with fresh, unsealed brake fluid from a new bottle. Place the cap loosely back on the reservoir to prevent ambient moisture absorption while performing the work. Check this fluid level continuously throughout the flushing process.
4.Execute Flushing Sequence at Each Wheel:Follow the standard furthest-to-closest order relative to the master cylinder.
Attach a flare nut wrench to the bleeder screw of the Right Rear caliper (for standard left-hand drive vehicles). Push one end of a clear vinyl tube tightly over the bleeder nipple, submerging the other end in a catch bottle containing 2 inches of clean fluid.
Crack the bleeder valve open 1/4 to 1/2 turn. Execute your chosen method (Two-Person, Pressure, or Vacuum) until the fluid passing through the clear tube runs completely clear, bright, and free of dark streaks or micro-bubbles. Tighten the bleeder screw to manufacturer specification (typically 6 to 10 lb-ft).
Repeat this process in sequence:
- Right Rear (Passenger side rear)
- Left Rear (Driver side rear)
- Right Front (Passenger side front)
- Left Front (Driver side front)
5.Final Fluid Level Adjust and Pedal Test:Verify hydraulic firmness before reinstalling wheels.
Top off the master cylinder reservoir strictly to the MAX line. Reinstall the reservoir cap tightly. Start the vehicle engine and firmly depress the brake pedal 3 to 5 times. The pedal must feel hard and high, with zero sponge feeling or sinking movement under sustained pressure. Inspect all 4 bleeder screws for liquid leaks before mounting wheels and lowering the vehicle.
Success Checkpoint: You will know the flush is complete when the fluid exiting every bleeder valve matches the clear, light-amber color of the fresh fluid in your bottle, and the brake pedal feels firm and rock-solid with the engine running.
What Are the Different Methods for Flushing Brake Fluid?
There are three primary mechanical methodologies used to flush brake fluid, each carrying distinct operational trade-offs regarding speed, equipment cost, and single-operator feasibility.
| Method | Mechanical Process | Primary Advantages | Drawbacks & Risks |
| Pressure Bleeding (Recommended) | Pressurized vessel (10–15 PSI) forces fresh fluid down from the master cylinder out through opened bleeders. | Fast; strictly 1-person operation; impossible to draw air into the system; completely purges ABS channels. | Requires purchasing a specialized pressure tank ($50–$100); bad cap adapters can leak under pressure. |
| Two-Person Manual | Person A pumps and holds pedal down; Person B opens/closes bleeder valve systematically. | Requires zero special tools beyond a wrench and clear hose; zero tool cost. | High risk of communication error; pushing old pedal to floor can tear master cylinder piston seals. |
| Vacuum Bleeding | Vacuum pump attached to individual bleeder nipple sucks fluid out from master cylinder. | Affordable ($20–$40 hand pump); 1-person execution; simple setup. | Can draw ambient air past the bleeder screw threads, creating false air-bubble visual signals. |
| Gravity Bleeding | Open bleeder valves and allow natural gravity to drain fluid slowly through the system. | Zero cost, extremely gentle, zero risk of over-pressurization. | Extremely slow (takes 2–3 hours); insufficient force to flush heavy particulates or ABS blocks. |
How Often Should You Flush Brake Fluid, and How Do You Test It?
Automotive manufacturers recommend flushing brake fluid every 2 years or 30,000 miles, whichever occurs first. However, climate, driving conditions, and vehicle storage dictates precise replacement urgency.
Testing Fluid Health: Copper vs. Water Content
Visual inspection alone is unreliable; fluid that looks clean can still hold dangerous levels of moisture. Professional technicians use two primary diagnostic methods:
- Electronic Conductivity Testers: Measures electrical resistance within the fluid. Fluid resistance drops as water content rises.
- 0%–1% Water: Fluid is healthy.
- 2% Water: Fluid is degrading; schedule a flush soon.
- 3% or higher: FAILED. Fluid dry boiling point has dropped by up to $100^\circ\text{C}$ ($212^\circ\text{F}$). Immediate flush required.
- Chemical Copper Test Strips (ASTM F3080 Standard): Measures copper concentration in parts per million (ppm). Copper acts as an indicator for anti-corrosion additive depletion. When additives break down, copper braze inside the lines corrodes first.
- 0–100 ppm: Corrosion protection is active.
- 200+ ppm: Additives are exhausted; internal corrosion is occurring. Replace fluid immediately regardless of moisture level.
How Much Does a Brake Fluid Flush Cost?
A professional brake fluid flush costs between $100 and $220, while a DIY flush costs between $15 and $30 for fluid and basic tubing.
| Cost Element | DIY Execution | Independent Auto Repair Shop | Authorized Dealership |
| Fluid (1.5L) | $15 – $30 | $20 – $40 | $35 – $65 |
| Labor Fee | $0 (Self) | $80 – $130 | $120 – $180 |
| Hazardous Waste Disposal | $0 – $5 (Recycling center) | $5 – $15 | $10 – $20 |
| Total Expected Cost | $15 – $35 | $105 – $185 | $165 – $265 |
What Common Mistakes Should You Avoid During a Brake Flush?
When performing a brake fluid flush, avoiding operational errors protects the vehicle’s hydraulic architecture from severe damage:
- Letting the Master Cylinder Run Dry: If the reservoir drains empty while a bleeder screw is open, air is drawn directly into the master cylinder piston bore and internal ABS valve channels. Resolving this requires bench-bleeding the master cylinder and running automated ABS cycle routines via an electronic scan tool.
- Over-Pushing the Brake Pedal (Two-Person Method): Pushing the pedal all the way to the floorboard during manual bleeding forces internal rubber piston seals into regions of the master cylinder bore that have developed rust ridges over years of partial movement. This tears the seals, causing master cylinder internal fluid bypass (pedal slowly sinks at stoplights).
- Spilling Fluid on Painted Surfaces: Glycol-based fluids (DOT 3, 4, 5.1) are powerful industrial solvents. If spilled on automotive paint, immediately douse the area with generous amounts of water and car wash soap. Do not wipe it with a dry towel, as wiping rubs the softened paint directly off the metal.
- Using Open or Stale Fluid Bottles: Once opened, a bottle of brake fluid absorbs ambient humidity within days. Never use an opened bottle that has sat on a shelf for more than 1 month.
How Do You Troubleshoot Issues After a Brake Flush?
If problems occur immediately following a fluid replacement, use this diagnostic resolution guide:
Problem 1: Brake pedal feels soft, spongy, or sinks to the floor
- Root Cause: Air bubbles are trapped inside the hydraulic lines or the ABS hydraulic control unit (HCU).
- Resolution: Re-bleed the system starting at the furthest wheel. If the reservoir ran dry at any point, connect a bidirectional scan tool (e.g., Launch, Autel, FORScan) to execute an ABS Automated Bleed Routine. This cycles the internal solenoid valves to purge trapped air into the outer lines.
Problem 2: Brakes are dragging or overheating after driving
- Root Cause: Overfilled reservoir or blocked relief port.
- Resolution: Check the master cylinder fluid level. If filled past the MAX mark, thermal expansion pushes against the master cylinder piston, gently applying the brakes continuously while driving. Siphon excess fluid out until the level sits strictly between MIN and MAX.
Problem 3: Fresh fluid turned dark within days of service
- Root Cause: Disintegrating rubber hoses or incomplete flush.
- Resolution: The system was either not flushed long enough to evacuate sludge trapped in the rear brake lines, or internal flexible rubber brake hoses are breaking down from age, shedding black particulate into the fresh fluid. Replace aging rubber hoses with stainless-steel braided lines and re-flush.
Vehicle & Driver Profile Recommendations
┌────────────────────────────────────────────────────────────────────────┐
│                        VEHICLE DRIVER PROFILE                          │
├──────────────────┬───────────────────┬──────────────────┬──────────────┤
│ Daily Commuter   │ Heavy Towing / SUV│ EV / Hybrid      │ Track / Race │
│ (DOT 3 / DOT 4)  │ (DOT 4 / DOT 5.1) │ (DOT 4 Low-Visc) │ (High-Temp)  │
└──────────────────┴───────────────────┴──────────────────┴──────────────┘
- The Daily Commuter: Follow the factory 2-year/30,000-mile interval using standard OEM-specified DOT 3 or DOT 4 fluid. Prioritize consistent interval timing over expensive high-performance fluids.
- The Towing & Heavy Hauling SUV: Upgrade to high-temp DOT 4 or DOT 5.1. Heavy loads create extreme thermal transfers down the brake lines during steep downhill descents. Test fluid every 12 months with copper test strips.
- Electric & Hybrid Vehicles (EVs): EVs utilize regenerative braking, meaning hydraulic friction brakes are used less frequently. However, this causes moisture accumulation without thermal evaporation. EV manufacturers (such as Tesla) specify fluid testing every 2 years and flushing strictly when moisture exceeds 3% or low-viscosity DOT 4 requirements are met.
- Track Day & Performance Enthusiasts: Use specialized race-grade DOT 4 fluids with dry boiling points exceeding $310^\circ\text{C}$ ($590^\circ\text{F}$). Race fluids are highly hygroscopic and must be completely flushed before and after intense track seasons.
- Classic Car Collectors (Non-ABS): Consider converting to DOT 5 Silicone during a complete system overhaul. DOT 5 does not absorb water, will not corrode rare vintage components during long-term garage storage, and will not damage custom paint jobs if leaks occur.
Frequently Asked Questions
What happens if you never flush your brake fluid?
If you never flush your brake fluid, accumulated water lowers the boiling point until hard braking causes fluid vaporization and catastrophic brake pedal failure. Furthermore, depleted anti-corrosion additives cause internal rust, destroying calipers, steel lines, and expensive ABS hydraulic control modules.
Can I just siphon and refill the brake fluid reservoir?
No, siphoning and refilling the reservoir only replaces roughly 20% to 30% of the total fluid. The degraded, water-contaminated fluid remains trapped inside the brake lines, calipers, and wheel cylinders where heat and corrosion damage occur most severely.
Is a brake fluid flush necessary when changing brake pads?
While not mechanically mandatory during every pad change, flushing fluid during pad service is highly recommended. Compressing caliper pistons back into their bores pushes dirty, contaminated fluid from the calipers up into the system; flushing prevents this old fluid from recirculating.
How do I know if my brake fluid needs to be flushed?
Your brake fluid needs to be flushed if it fails an electronic moisture test (>3% water), shows high copper content on a test strip (>200 ppm), feels spongy when pressing the pedal, or if 2 years have passed since its last service. Dark color indicates contamination but must be confirmed with testing.
Will a brake flush fix a spongy brake pedal?
Yes, if the spongy feeling is caused by air bubbles or boiled moisture trapped in the fluid, a complete flush will purge the air and restore a firm pedal. However, if the sponginess is caused by a leaking master cylinder or expanded rubber brake hoses, those mechanical parts must be replaced.