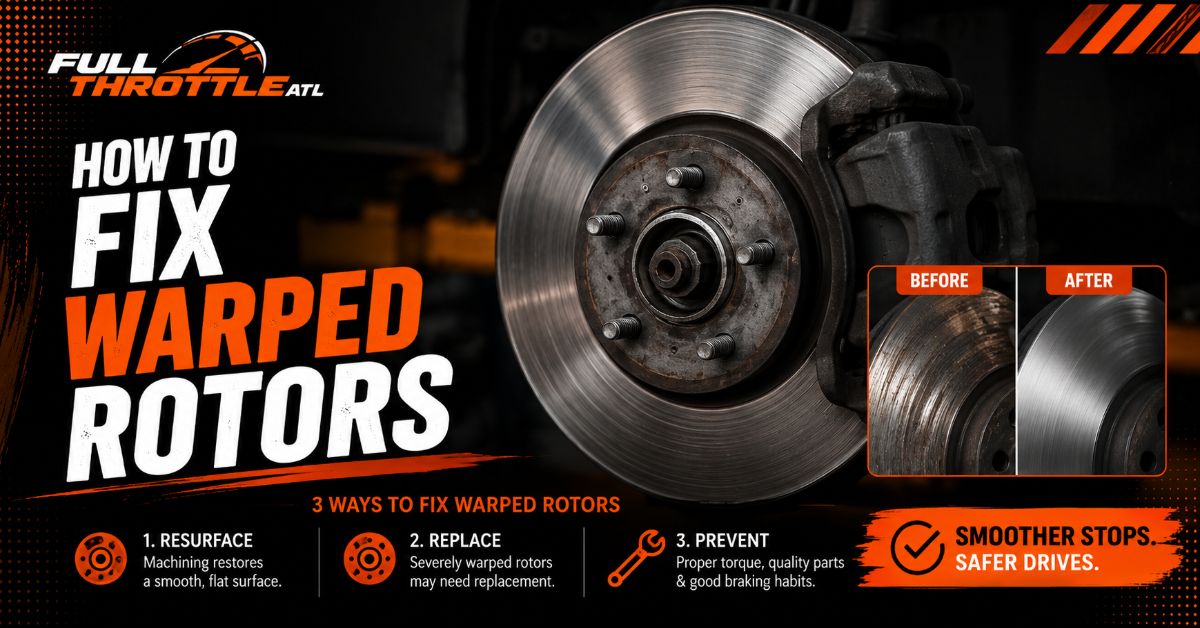
Fixing warped rotors requires replacing or resurfacing the damaged disc and eliminating the underlying root causes—such as wheel hub rust, stuck caliper pins, and uneven wheel lug torque—that cause brake pedal pulsation. By following this 9-step procedure, you can replace warped rotors, service your calipers, and properly bed in new pads in 1.5 to 3 hours for $100–$250 in parts. Success depends on scraping the wheel hub face down to bare, shiny metal to prevent lateral runout greater than $0.002\text{ inches}$.
Before You Start
| Metric / Parameter | Specification |
| Total Time Required | 1.5 to 3.0 hours (front or rear axle pair) |
| Difficulty Level | Intermediate (Basic mechanical hand tool proficiency) |
| Estimated Cost | $100–$250 DIY vs. $400–$800 Professional Repair Shop |
| Required Axle Scope | Always replace rotors and pads in pairs across the same axle |
Required Tools and Materials Checklist
- New Brake Rotors & Matching Pads: 1 pair rotors, 1 set pads (ceramic or semi-metallic matching OEM spec).
- Hydraulic Floor Jack & Rated Jack Stands: Minimum 2-ton rating; never work under a car supported solely by a jack.
- Torque Wrench: $1/2\text{-inch}$ drive ($10\text{ to }150\text{ ft-lbs}$ range).
- Brake Caliper Tool: Heavy-duty C-clamp or specialized caliper piston wind-back tool (for rear twist-in pistons).
- Impact Screwdriver & Rubber Mallet: For stubborn Phillips rotor retention screws and rusted rotor hats.
- Socket Set & Breaker Bar: $12\text{mm}$ to $19\text{mm}$ metric sockets, plus hex/Torx drivers if required by vehicle manufacturer.
- Cleaning & Lubrication Supplies: 2 cans aerosol brake cleaner, silicone/ceramic high-temp brake grease, wire brush/drill wire wheel attachment.
- Safety Equipment: Safety glasses, dust mask (to avoid inhaling brake dust), nitrile gloves, wheel chocks, bungee cords.
Step-by-Step Rotor Replacement and Runout Elimination Guide
1.Prep, Loosen, and Elevate the Vehicle Safely:Time: 15 minutes | Tools: Floor jack, jack stands, wheel chocks, breaker bar.
Park the vehicle on a hard, level concrete surface, engage the parking brake, and place wheel chocks behind the tires on the opposite end of the car. Using a breaker bar and lug socket, loosen each lug nut on the target wheels by a $1/2$ turn while the tire is firmly on the ground. Position your hydraulic floor jack under the manufacturer’s designated frame lift point, elevate the car until the wheel spins freely, and lower the frame securely onto jack stands. Remove the lug nuts entirely and pull the wheel off to expose the brake assembly.
- Success Checkpoint: The vehicle sits rock-solid on jack stands with zero movement when firmly shaken at the fender.
- Common Mistake: Attempting to break lug nuts loose after jacking up the car. This spins the free wheel and risks knocking the vehicle off the jack.
2.Disassemble Caliper and Hang Safely:Time: 15 minutes | Tools: Socket set, bungee cord.
Unbolt the upper and lower caliper guide pin bolts using the correct socket (typically $12\text{mm}$ to $15\text{mm}$) while holding the slide pin nut steady with an open-ended wrench if it spins. Slide the caliper body off the mounting bracket and brake pads. Immediately loop a bungee cord through the caliper housing and hook it to the front strut spring or upper control arm to support its weight.
- Success Checkpoint: The caliper hangs securely from the suspension without putting any tension, twisting, or strain on the flexible rubber brake line.
- Common Mistake: Letting the heavy caliper dangle by its rubber hose. This causes invisible internal tearing of the Teflon hose lining, leading to hose restriction or brake drag.
3.Remove Caliper Bracket and Old Brake Pads:Time: 15 minutes | Tools: Breaker bar, metric socket set.
Remove the old brake pads and stainless steel abutment clips from the mounting bracket using a flathead screwdriver. Locate the two large caliper bracket bolts on the backside of the steering knuckle, attach a breaker bar with a $15\text{mm}$ to $19\text{mm}$ socket, and loosen them counter-clockwise (these bolts are factory-installed with high torque and threadlocker). Remove both bolts, pull the steel caliper bracket off the knuckle, and set it on your workbench.
- Success Checkpoint: The caliper bracket and old pad hardware are fully removed, leaving the rotor entirely unobstructed.
- Common Mistake: Rounding off bracket bolt heads by using 12-point sockets or adjustable wrenches instead of 6-point sockets.
4.Remove Seized Rotor Screws and Rust-Bonded Rotors:Time: 15 minutes | Tools: Impact driver, 3lb sledgehammer / mallet.
Inspect the center hat of the rotor for small Phillips countersunk retaining screws. If present, place an impact screwdriver fitted with a #3 Phillips bit into the screw head and strike the end firmly with a hammer to shock the threads loose while simultaneously turning it counter-clockwise. Once screws are out, grasp the rotor and pull it forward; if rust has bonded the rotor inner hat to the hub shaft, strike the flat face of the old rotor hat between the wheel studs hard with a 3-lb mallet until the rust bond snaps.
- Success Checkpoint: The rotor detaches cleanly from the wheel studs without damaging or stripping the threaded hub studs.
- Common Mistake: Stripping the soft Phillips rotor screw with a standard hand screwdriver. Always use an impact driver or apply penetrating fluid and heat if severely seized.
5.De-Rust the Wheel Hub Face to Bare Metal:Time: 15 minutes | Tools: Wire brush / drill cup brush, brake cleaner.
Scrub the entire mating face of the steel wheel hub assembly using a stiff wire brush or a drill-mounted wire wheel attachment until all rust, scale, and corrosion are completely eradicated. Spray the bare hub face with brake cleaner and wipe clean with a lint-free rag to clear microscopic debris.
- Success Checkpoint: The hub surface shines as uniform bare metal with zero rust flakes or raised pitting around the wheel studs.
- Common Mistake: Skipping hub cleaning. A tiny rust flake just $0.002\text{ inches}$ ($0.05\text{ mm}$) thick creates lateral runout that causes severe brake pedal pulsation within 1,000 miles.
6.Degrease and Mount the New Rotor Flush:Time: 10 minutes | Tools: Brake cleaner, shop towel, 1 lug nut.
Spray both friction surfaces and the interior hat of the brand-new rotor thoroughly with aerosol brake cleaner to dissolve the clear, oily anti-rust transit coating applied at the factory, then wipe dry with a clean shop towel. Slide the new clean rotor onto the wheel studs until it sits flush against the hub face. Thread one lug nut onto a top stud by hand and snug it up against the rotor hat to hold the disc perfectly flat while you complete the installation.
- Success Checkpoint: The new rotor face is dry, free of oil, and held completely flush against the scrubbed hub face without wobbling.
- Common Mistake: Installing new rotors right out of the box without removing shipping oil. The oil burns onto the new pads, glazing them and causing immediate brake fade.
7.Retract Caliper Piston (Handling Standard vs. EPB Systems):Time: 20 minutes | Tools: C-clamp / wind-back tool, turkey baster / syringe.
Pop open the engine hood, unscrew the brake fluid reservoir cap, and siphon out fluid using a clean syringe if the level sits at the “MAX” line. For standard front calipers, place an old brake pad across the hollow piston face and tighten a C-clamp against it until the piston retracts fully into its bore. For rear calipers equipped with internal parking brakes, use a dedicated piston wind-back tool to push and rotate the piston clockwise simultaneously.
- Success Checkpoint: The caliper piston sits completely flush inside its rubber dust boot, and brake fluid in the engine bay reservoir has not overflowed.
- Common Mistake: Forcing rear pistons back with a C-clamp on vehicles equipped with an Electronic Parking Brake (EPB). This destroys the internal motor gears; you must trigger “Service Mode” via scanner or remove the electronic motor first.
8.Service Slide Pins, Reinstall Bracket, and Torque Fasteners:Time: 25 minutes | Tools: Ceramic brake grease, torque wrench, socket set.
Pull the steel guide pins out of the caliper bracket, wipe away old dirty grease, coat them in high-temperature silicone or ceramic brake grease, and reinsert them into their rubber boots. Install new stainless steel abutment hardware into the bracket slots and apply a micro-film of grease where the pad ears rest. Bolt the caliper bracket to the steering knuckle and tighten to OEM torque spec ($65\text{ to }85\text{ ft-lbs}$). Insert the new brake pads into the bracket, slide the retracted caliper over the pads, and torque the guide pin bolts ($25\text{ to }35\text{ ft-lbs}$).
- Success Checkpoint: Guide pins slide smoothly back and forth under thumb pressure, and all main structural fasteners are tightened to exact foot-pound specifications.
- Common Mistake: Getting grease onto the friction faces of the pads or the rotor surface. Keep hands clean and use brake cleaner if accidental contact occurs.
9.Mount Wheel, Torque in Star Pattern, and Bed In Pads:Time: 20 minutes | Tools: Torque wrench, vehicle.
Reinstall the wheel, hand-tighten all lug nuts, and lower the car until the tire barely touches the ground. Use a calibrated torque wrench to tighten lug nuts in a criss-cross “star pattern” to factory specification ($80\text{ to }100\text{ ft-lbs}$ for cars, $100\text{ to }140\text{ ft-lbs}$ for trucks/SUVs). Before moving the shift lever out of Park, press the brake pedal 5–6 times until it feels firm to seat the pads against the rotor.
- Success Checkpoint: The brake pedal is high and firm, and lug nuts are torqued evenly across all studs.
- Common Mistake: Driving away immediately without pumping the brake pedal first. The first pedal application will drop straight to the floor, resulting in an immediate crash risk.
Torque Specification Quick-Reference
Never rely on guesswork when securing brake components. Incorrect torque on bracket bolts causes component detachment, while uneven lug nut torque distorts the rotor hat.
| Component | Standard Torque Range (Compact / Midsize) | Standard Torque Range (Truck / SUV) |
| Caliper Guide Pin / Slider Bolts | $20 – 35\text{ ft-lbs } (27 – 47\text{ Nm})$ | $28 – 45\text{ ft-lbs } (38 – 61\text{ Nm})$ |
| Caliper Mounting Bracket Bolts | $60 – 85\text{ ft-lbs } (81 – 115\text{ Nm})$ | $85 – 140\text{ ft-lbs } (115 – 190\text{ Nm})$ |
| Rotor Retention Screws | Hand-snug with impact driver ($7 – 10\text{ ft-lbs}$) | Hand-snug with impact driver ($7 – 10\text{ ft-lbs}$) |
| Wheel Lug Nuts | $80 – 90\text{ ft-lbs } (108 – 122\text{ Nm})$ | $100 – 150\text{ ft-lbs } (135 – 203\text{ Nm})$ |
Common Mistakes and How to Fix Them
1. The Brake Pedal Feels Soft or Spongy After Assembly
- Root Cause: Piston not fully seated, air introduced into hydraulic lines, or slider pins bound up.
- Recovery Action: Keep the car parked. Pump the pedal 10 times. If firmness does not return, inspect the brake fluid reservoir. If fluid dropped below “MIN”, air entered the system. You must perform a 2-person brake fluid bleed or use a vacuum bleeder at each caliper bleeder valve until zero bubbles emerge.
2. Immediate Pedal Vibration Returns Within 500 Miles
- Root Cause: Rust scale was left on the hub surface, or lug nuts were unevenly torqued with an impact gun.
- Recovery Action: Remove the wheel and rotor. Attach a dial indicator with a magnetic base to the knuckle and measure lateral runout on the rotor face. If runout exceeds $0.002\text{ inches}$, remove the rotor, scrub the hub face down to shiny bare metal with a wire wheel, reinstall, and torque lug nuts in a star sequence with a manual torque wrench.
3. Squealing or High-Pitched Scraping Noise When Braking
- Root Cause: Dry pad contact points, incorrectly seated anti-rattle shims, or dust shield bent against the rotor.
- Recovery Action: Lift the car and spin the wheel by hand to locate the contact source. If the thin metal dust shield is touching the inner rotor face, push it back gently by $1/4\text{ inch}$ using a flathead screwdriver. If screeching comes from pads, remove pads and apply high-temp ceramic grease to the metal backing plate ears and piston contact rings.
4. Excessive Smoke or Burning Rubber Odor After Driving
- Root Cause: Shipping oil was not cleaned off the new rotor, or a caliper slider/piston is frozen and dragging.
- Recovery Action: Pull over safely. Touch the wheel rim center carefully (do not touch the rotor directly). If one wheel is burning hot while the other is cool, the caliper piston or slide pins are seized, forcing the pads against the rotor continuously. Re-grease slide pins or replace the damaged caliper assembly immediately.
Process Variations for Alternative Scenarios
Variation A: Machining (Resurfacing / Turning) Existing Rotors
If your current rotors meet the manufacturer’s Minimum Thickness specification (stamped on the rotor edge or hat) and have sufficient metal remaining, you can turn them on a brake lathe instead of buying new ones.
- Take the pulled rotors to an auto parts store or machine shop equipped with an on-car or bench brake lathe.
- The technician measures thickness with a micrometer; if thickness exceeds discard limits, $0.010\text{ to }0.020\text{ inches}$ of metal is cut off to restore a perfectly flat plane.
- Clean the resurfaced rotors with brake cleaner before installation, follow Step 5 through Step 9, and always install brand-new pads.
Variation B: Servicing Rear Brakes with Electronic Parking Brakes (EPB)
Modern vehicles with push-button parking brakes utilize electric servo motors mounted directly to the rear calipers.
- Place the vehicle ignition in “ON” (engine off), access the instrument cluster menu or attach an OBD2 scan tool, and select “Brake Service / Retract EPB”.
- Listen for the electric motors running for 5–10 seconds as they retract the internal parking brake spindle mechanism.
- Compress the piston straight back into the housing using a standard C-clamp without forcing or turning it.
Crucial Bedding-In (Pad Transfer) Procedure
To prevent future thermal distortion (“warping”) and pad material buildup, you must perform a controlled thermal bedding process immediately after installation. Bedding deposits an even, microscopic layer of friction material onto the raw rotor face.
- Initial Warm-up: Accelerate to $35\text{ mph}$ on a clear, empty road. Apply moderate brake pressure to slow the vehicle down smoothly to $5\text{ mph}$. Repeat this 5 times in quick succession. Do not come to a complete stop.
- Aggressive Heat Cycles: Accelerate to $50\text{ mph}$. Brake hard down to $10\text{ mph}$ (about 80% pedal effort without engaging ABS). Repeat this 5 times in quick succession. You may smell hot brake pads; this is normal.
- Cool-Down Phase: Drive uninterrupted for 10 minutes at $30\text{ to }45\text{ mph}$ without touching the brake pedal. Airflow through the wheel spokes will cool the rotors evenly.
Critical Warning: Never hold the brake pedal firmly down while standing still when rotors are piping hot during or right after bedding. This transfers an uneven block of pad material to one spot, creating a high spot that acts like a “warped” rotor.
Frequently Asked Questions
Can I fix warped rotors by resurfacing them myself at home?
No. Resurfacing requires a precision brake lathe capable of cutting metal within tolerances of $0.0005\text{ inches}$. Home tools like sanders or angle grinders ruin the rotor surface flat plane, creating severe safety hazards and extreme brake pulsation.
Do I always have to replace brake pads when replacing rotors?
Yes. Old brake pads inherit the uneven wear grooves and transfer patterns of the warped rotors they were paired with. Installing old pads onto a smooth new rotor transfers those high spots back onto the new disc surface, inducing rapid wear and premature pedal pulsation.
Why do rotors warp even when they are brand new?
New rotors rarely physically warp from heat alone; instead, uneven lug nut torque, rust scale trapped between the hub and rotor, or improper pad bedding creates lateral runout. As the rotor turns, high spots hit the pads every revolution, wearing unevenly over time.
How do I know if my front or rear rotors are warped?
If you feel pulsation through the steering wheel when braking at highway speeds, the front rotors are affected. If you feel the vibration predominantly through the seat, floorboard, or brake pedal without steering wheel shake, the rear rotors are causing the issue.