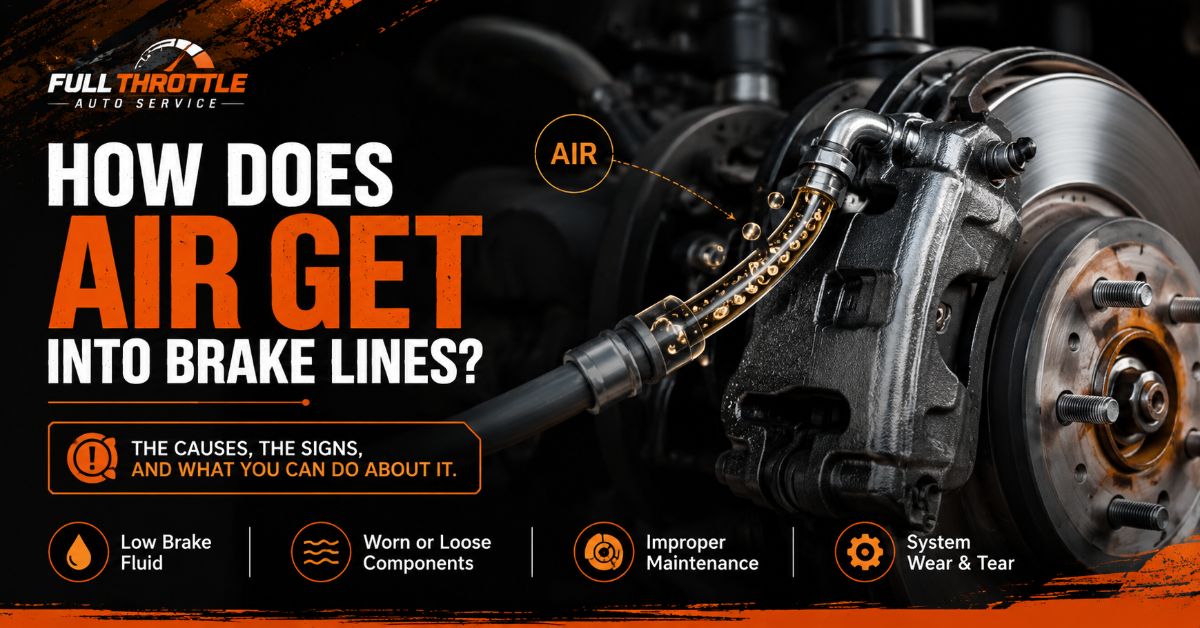
Air enters hydraulic brake lines through fluid boiling, degraded rubber seals, open component replacement, or low reservoir levels, introducing compressible gas pockets into an incompressible system. To eliminate spongy pedal feel and restore stopping power, you must perform a full hydraulic bleed across all four wheels. This process takes 45 to 60 minutes, costs $15 to $35 in materials, and requires a simple systematic sequence: prepare the reservoir, attach a submerged bleed line, execute a strict pump-hold-crack cycle, monitor fluid level, and torque the valves to specification.
Before You Start
- Time Required: 45–60 minutes
- Difficulty Level: Intermediate (Beginner-friendly with proper safety prep)
- Expected Cost: $15–$35 (DIY materials) or $120–$220 (Professional shop cost)
- Prerequisite Skills: basic wheel removal, jacking safety, clear communication with an assistant (or operation of a pressure bleeder).
Required Tools & Materials Checklist:
- [ ] Fresh Brake Fluid: 1–2 quarts (DOT 3, DOT 4, or DOT 5.1 as specified on your reservoir cap—never mix silicone DOT 5 with glycol-based fluids).
- [ ] Clear Vinyl Tubing: 3 feet, $1/4\text{-inch}$ or $3/16\text{-inch}$ inside diameter (ID) for a tight friction fit over bleeder nipples.
- [ ] Bleeder Wrench: 6-point box-end wrench or dedicated bleeder wrench (typically 8mm, 10mm, or 11mm).
- [ ] Catch Container: Clear plastic bottle with a pre-filled 1-inch layer of clean brake fluid.
- [ ] Pedal Stop Block: A standard 2×4 piece of wood placed under the brake pedal.
- [ ] Torque Wrench: Low-range inch-pound capacity (10–200 in-lbs).
- [ ] Safety Gear & Cleaners: Safety glasses, nitrile gloves, aerosol brake cleaner, and shop rags.
- [ ] Lifting Equipment: Hydraulic floor jack and rated jack stands (never rely solely on a jack).
Phase 1: Mechanics of Hydraulic Contamination
Understanding how atmospheric air enters a closed hydraulic loop prevents repeat contamination. Hydraulic systems rely on Pascal’s Principle: pressure applied to an enclosed fluid is transmitted undiminished in all directions. Because liquids are virtually incompressible, 100 lbs of force applied at the master cylinder translates directly into clamping force at the brake calipers.
Air, however, is a highly compressible gas. When air pockets enter the lines, the force from your foot squishes the air bubbles rather than pushing the brake pads against the rotors, resulting in a soft, “spongy” pedal that sinks toward the floorboards.
[Master Cylinder] ---> [Hydraulic Line (Incompressible Fluid)] ---> [Caliper Piston] = FIRM PEDAL
[Master Cylinder] ---> [Fluid + Trapped Air (Compressible Gas)] ---> [Lost Motion] = SPONGY PEDAL
The Four Atmospheric Entry Pathways
1. Fluid Boiling and Hygroscopic Vaporization
Glycol-based brake fluids (DOT 3, DOT 4, DOT 5.1) are hygroscopic, meaning they absorb moisture directly through microscopic pores in rubber hoses and reservoir seals over time. Fresh DOT 4 fluid has a dry boiling point exceeding $230^\circ\text{C}$. After absorbing 3.7% water content by volume, its wet boiling point plummets to $155^\circ\text{C}$. Under heavy braking—such as mountain descents or hard emergency stops—frictional heat exceeds this lowered boiling threshold. The water within the fluid boils, turning into steam pockets. Once cooled, these vapor pockets condense back into gaseous voids within the line.
2. Dynamic Lip-Seal Defect Under Vacuum
Master cylinder piston seals and caliper piston dust boots rely on directional tension to seal fluid inside under high pressure ($500\text{ to }1,500\text{ PSI}$). However, when you release the brake pedal rapidly, a temporary vacuum is created inside the hydraulic bore. If the rubber seals are aged, hardened, or cracked, this micro-vacuum pulls outside air past the seal lips without leaking visible liquid outward.
3. Component Replacement and Open Loop Servicing
Replacing a worn caliper, rubber brake hose, wheel cylinder, or master cylinder breaks the sealed environment. The fluid drains out by gravity, filling the vacated lines with ambient air at atmospheric pressure ($14.7\text{ PSI}$).
4. Reservoir Fluid Depletion
As brake friction pads wear down, caliper pistons extend permanently outward into the caliper bores to keep the pads close to the rotor. This draws fluid volume down from the master cylinder reservoir. If the fluid level drops below the “MIN” fill threshold, the master cylinder primary piston draws air directly from the top of the reservoir on every pedal stroke.
Step-by-Step Brake Bleeding Process (Two-Person Method)
Execute these steps in strict numerical order. Deviating from this order can trap air pockets in the anti-lock braking system (ABS) valves or damage internal master cylinder components.
Step 1: Secure the Vehicle and Isolate the Master Cylinder
Park the vehicle on a hard, level concrete surface. Engage the parking brake, raise the car using a hydraulic floor jack, and set the chassis firmly on four jack stands. Remove all four road wheels. Open the hood and wipe down the exterior of the master cylinder reservoir with brake cleaner to prevent dirt from falling inside. Remove the cap and siphon out old, dark fluid using a clean turkey baster or syringe until the level rests $1/4\text{-inch}$ above the bottom of the reservoir. Refill immediately to the “MAX” mark with fresh, unopened brake fluid.
Place a 2×4 wood block on the floorboard directly underneath the brake pedal. This physical stop prevents the operator from pushing the brake pedal all the way to the floorboard during bleeding, which forces internal piston seals across unpolished, rusted areas of the master cylinder bore and tears them.
- Success Checkpoint: You’ll know this step is complete when the vehicle is stable, the reservoir contains fresh, clear fluid filled to the “MAX” line, and the pedal travel is blocked by the 2×4 wood piece.
- Mistake to Avoid: Opening the reservoir cap without cleaning it first. A single grain of sand introduced into the master cylinder can score internal piston seals or clog delicate ABS solenoid valves.
Step 2: Establish the Longest-Path Bleeding Sequence
Locate the bleeder valve nipples on the rear of each wheel caliper or wheel cylinder. You must bleed the system starting at the wheel furthest from the master cylinder (measured by total hydraulic brake line length) and end at the closest wheel.
[Master Cylinder (Left Front)]
       |
       +---> 1. Passenger Rear (Furthest)
       +---> 2. Driver Rear
       +---> 3. Passenger Front
       +---> 4. Driver Front (Closest)
- Standard Order (Left-Hand Drive Vehicles): Passenger Rear $\rightarrow$ Driver Rear $\rightarrow$ Passenger Front $\rightarrow$ Driver Front.
- Right-Hand Drive Vehicles: Driver Rear $\rightarrow$ Passenger Rear $\rightarrow$ Driver Front $\rightarrow$ Passenger Front.
- Exceptions: Certain split-diagonal dual-circuit systems (common on older cars or specific European models) specify Passenger Rear $\rightarrow$ Driver Front $\rightarrow$ Driver Rear $\rightarrow$ Passenger Front. Always verify against your repair manual if operating on non-standard hydraulic setups.
- Success Checkpoint: You’ll know this step is complete when you have visually located all four bleeder valves, sprayed them with penetrating oil, and confirmed your wheel sequence.
- Mistake to Avoid: Cracking a stuck bleeder valve open with an 8-point or open-ended wrench. Soft steel bleeder valves easily strip; always use a dedicated 6-point box-end wrench or flared socket.
Step 3: Install the Submerged One-Way Bleed Line
Place your 6-point box-end wrench over the bleeder valve nipple on the first designated wheel (Passenger Rear). Push one end of your clear $3/16\text{-inch}$ ID vinyl tubing firmly over the valve nipple until it seats completely over the flared ridge. Route the tubing up in a vertical loop above the caliper before leading it down into your clear catch container. Submerge the bottom tip of the tubing under at least 1 inch of fresh brake fluid inside the container.
      [Vertical Loop]
         /       \
 [Bleeder]        \
 [ Valve ]         \=====> [Catch Jar]
                           [==========]  <-- Submerged 1" in Fresh Fluid
- Success Checkpoint: You’ll know this step is complete when the tubing fits snugly on the nipple without air gaps around the fitting, loops vertically higher than the valve, and dips beneath the liquid layer in your catch jar.
- Mistake to Avoid: Leaving the tube end suspended in dry air. If the valve is opened while the tube end is dry, atmospheric air can siphon back up into the caliper bore.
Step 4: Execute the Pump, Hold, and Crack Cycle
Coordinate verbally between Person A (sitting in the driver’s seat) and Person B (positioned at the wheel). Follow this verbal and physical routine without variation:
- Person A: Slowly depresses the brake pedal 3 times through its partial stroke (down to the 2×4 block) over 5 seconds. On the 3rd stroke, hold firm, steady downward pressure on the pedal and call out loudly: “HOLDING!”
- Person B: Uses the box wrench to turn the bleeder valve counterclockwise one-quarter turn ($90^\circ$). Old fluid and air bubbles will rush into the clear line, and Person A’s pedal will sink downward until it contacts the 2×4 block.
- Person B: Rapidly closes the bleeder valve by turning it clockwise until snug ($90^\circ$ back) before the fluid stream slows to a stop. Call out loudly: “CLOSED!”
- Person A: Maintains foot pressure until hearing “CLOSED,” then slowly releases the brake pedal back to its top rest position over 2 to 3 seconds. Never release foot pressure while the valve is open.
- Repeat: Perform this cycle 5 to 10 times per wheel.
- Success Checkpoint: You’ll know this step is complete for a given wheel when the fluid exiting through the clear tube transitions from dirty/bubbly to completely clear, bubble-free, and golden in color.
- Mistake to Avoid: Releasing the brake pedal before the bleeder valve is locked down tight. Releasing the pedal while the valve is cracked open draws air straight back through the bleeder threads.
Step 5: Conduct Fluid Intercept Top-Offs
After completing the bleeding cycle on a single wheel, immediately move to the engine bay. Inspect the fluid level in the master cylinder reservoir. Add fresh fluid from your sealed container until the level returns to the “MAX” mark.
- Success Checkpoint: You’ll know this step is complete when the reservoir level never drops below the halfway mark (“50% capacity”) at any point during the four-wheel procedure.
- Mistake to Avoid: Letting the reservoir run completely dry. If the fluid level drops below the bottom outlet port, the master cylinder gulps massive amounts of air into the main lines, forcing you to restart the entire process from Step 1.
Step 6: Perform Final Torque, Cleanup, and System Static Test
Once all four wheels present clear, bubble-free fluid, perform the final torque sequence:
- Tighten each bleeder valve to factory specifications using your torque wrench. Standard bleeder valve torque is 70 to 100 in-lbs (8 to 11 N·m). Do not overtighten, or you will snap the hollow valve inside the caliper housing.
- Remove the vinyl hose and wrench.
- Wash down all four calipers, bleeder nipples, and surrounding chassis paint with aerosol brake cleaner, then wipe thoroughly dry with shop rags. Brake fluid is glycol-based and strips automotive paint within minutes if left uncleaned.
- Top off the master cylinder to the “MAX” line one final time and reinstall the reservoir cap securely.
- Reinstall all four wheels, torque the lug nuts to factory specification, and lower the car.
- Static Test: With the engine OFF, press the brake pedal firmly. The pedal must feel completely rock-solid within 1 to 2 inches of initial travel and hold its height under heavy pressure without creeping toward the floorboards.
- Success Checkpoint: You’ll know this step is complete when the pedal holds solid static pressure, no fluid dampness appears around the bleeder threads, and the master cylinder cap is locked down.
- Mistake to Avoid: Driving the car before performing a static firm-pedal check with the engine off, followed by a low-speed ($5\text{ MPH}$) test stop in your driveway.
Alternative Bleeding Methods
Method B: Single-Person Pressure Bleeding (Motive Tool Style)
If working alone, a pressurized brake bleeder is the most reliable option. It attaches directly to the master cylinder reservoir cap using a sealed adapter and pressurizes the system to 10–15 PSI.
[Pressure Tank (12 PSI)] === (Sealed Cap) ===> [Master Cylinder] ---> [Open Bleeder]
- Fill the pressure tank with 2 quarts of fresh brake fluid.
- Screw the custom adapter cap firmly onto the master cylinder reservoir.
- Pump the pressure tank up to 12 PSI (never exceed 15 PSI to avoid bursting the plastic reservoir).
- Move sequentially to each wheel starting from Passenger Rear. Fit your hose and wrench, open the valve $90^\circ$, and let the continuous pressure force fluid and air bubbles out until clear.
- Close the valve to 80 in-lbs, relieve pressure at the tank pump cap, and disconnect.
Method C: Vacuum Bleeding at the Caliper (Mityvac Style)
Vacuum bleeders attach at the bleeder valve nipple and draw fluid out through suction.
- Top off the master cylinder reservoir.
- Apply Teflon tape to the external threads of the bleeder valve screw to prevent air from leaking past the threads under vacuum.
- Attach the vacuum pump hose to the valve nipple and pull 15 to 20 in-Hg of vacuum on the hand pump.
- Crack the bleeder valve $90^\circ$. Fluid and air will be drawn into the hand-pump container.
- Close the valve once the fluid flows clear, then release vacuum pressure. Top off the reservoir frequently.
Common Mistakes and How to Fix Them
1. The Brake Pedal Remains Soft and Spongy After Full Bleeding
- Root Cause: Air is trapped inside the Anti-Lock Braking System (ABS) Hydraulic Control Unit (HCU) proportioning valves, or air bubbles are stuck in high loops of the hard lines.
- Recovery Fix: If air entered the ABS pump, standard manual or vacuum bleeding cannot cycle the internal solenoid valves to push the air out. You must plug a bi-directional OBD-II scan tool into the vehicle, navigate to the brake diagnostic menu, and run an “ABS Automated Bleed.” This program pulses the internal solenoids and runs the pump motor while you crack the bleeder valves, purging the trapped HCU air pockets.
2. A Continuous Stream of Micro-Bubbles Appears in the Tubing
- Root Cause: The clear tubing is pulling ambient air past the unsealed external threads of the open bleeder screw, rather than drawing air from inside the brake line.
- Recovery Fix: Close the valve completely. Back the bleeder screw out entirely from the caliper. Clean the threads thoroughly with a wire brush and brake cleaner. Wrap two turns of PTFE (Teflon) tape around the upper male threads of the screw, leaving the bottom two leading threads raw so tape fragments do not enter the fluid path. Reinstall, torque lightly, and resume bleeding.
3. The Pedal Creeps Slowly to the Floor Under Continuous Foot Pressure
- Root Cause: Internal bypass leakage inside the master cylinder. The rubber primary or secondary piston cups have aged, torn, or rolled over, allowing fluid to slip past the piston seal inside the cylinder bore without external fluid leakage.
- Recovery Fix: Replace the master cylinder assembly. You must perform a bench-bleed on the new unit prior to installation on the vehicle by using short return-hoses from its outlet ports back into its reservoir, cycling the piston on a bench vise until zero air bubbles remain.
4. A Bleeder Valve Snap/Shears Off Inside the Caliper
- Root Cause: The steel bleeder screw rusted into the aluminum caliper body due to galvanic corrosion and excessive torque.
- Recovery Fix: Do not attempt to drive the vehicle. Apply heat gently around the caliper boss with a propane torch (avoiding rubber boots), tap the center with a punch, and use a spiral screw extractor (Ez-Out). If the extractor fails, the caliper assembly must be replaced.
Troubleshooting Decision Matrix
| Symptom | Primary Cause | Diagnostic Test | Corrective Action |
| Pedal firm with engine off, soft when engine starts | Normal power booster expansion OR tiny residual air | Pump pedal 3x with engine off. Start engine while holding pressure. Pedal should drop slightly (~1/2 inch) then hold firm. | Re-bleed front calipers; if persistent, perform ABS scan tool cycle. |
| Pedal sinks completely to floor, no fluid leaks | Master cylinder internal seal bypass | Hold steady medium pressure at a stoplight for 30 seconds. | Replace and bench-bleed the master cylinder. |
| Brakes drag / wheels hot after driving | Clogged master cylinder compensating port OR bad rubber line | Crack bleeder valve on hot dragging wheel; if fluid squirts out under pressure and wheel frees up, line/port is blocked. | Replace collapsed flexible brake hose or clean master cylinder port. |
| Fluid turns dark/black within 3 months | Internal rubber line degradation | Inspect fluid color at catch jar; check for floating black specks. | Replace all flexible rubber brake hoses with new or braided stainless steel lines. |
Frequently Asked Questions
Can I mix DOT 3 and DOT 4 brake fluid?
Yes, DOT 3 and DOT 4 are both glycol-based fluids and are fully miscible. You can top off or flush a DOT 3 system with DOT 4 fluid, which offers a higher boiling point ($230^\circ\text{C}$ vs $205^\circ\text{C}$). However, never add DOT 3 to a system that explicitly requires DOT 4, and never mix DOT 5 (silicone-based) with any other fluid type.
What happens if I accidentally spill brake fluid on my car’s paint?
Brake fluid acts as a aggressive solvent on automotive clear coats and paint. If a spill occurs, do not wipe it dry with a shop towel, as this smears the fluid into the paint pores. Immediately drench the area with copious amounts of water or spray liberally with aerosol brake cleaner to neutralize and wash away the glycol compounds.
How do I know if my master cylinder needs to be bench-bled?
If you purchase a new master cylinder or if the reservoir was allowed to run completely dry, the unit must be bench-bled before connecting it to the vehicle’s hard lines. Pushing air from a dry master cylinder all the way down through 15 feet of brake line during a standard wheel-bleed is extremely difficult and almost always leaves air trapped in the upper piston chambers.
Why does my brake pedal feel spongy only when the engine is running?
When the engine runs, the vacuum brake booster multiplies foot pressure by 3x to 5x. Static air bubbles that felt firm under light foot pressure with the engine off compress significantly under this amplified booster pressure, revealing the hidden soft pedal feel.
How often should hydraulic brake fluid be completely flushed?
Brake fluid should be fully flushed every 2 years or 24,000 miles, regardless of mileage driven. Because glycol fluid passively absorbs ambient moisture through rubber hose pores, its water content rises by roughly 1% to 1.5% per year, progressively lowering its boiling point and increasing the risk of vapor lock under emergency braking.
Summary of Correct System State
When your hydraulic brake system is correctly purged of all atmospheric air, it operates as a fully closed, incompressible loop. With the vehicle stationary, your brake pedal should present a clean, firm bite point within the first 1 to 2 inches of pedal travel, holding its resistance indefinitely without creeping downward. The fluid level in the master cylinder reservoir should rest steadily at the “MAX” mark with a clean, clear golden hue, ensuring instant, predictable stopping power under all thermal conditions.