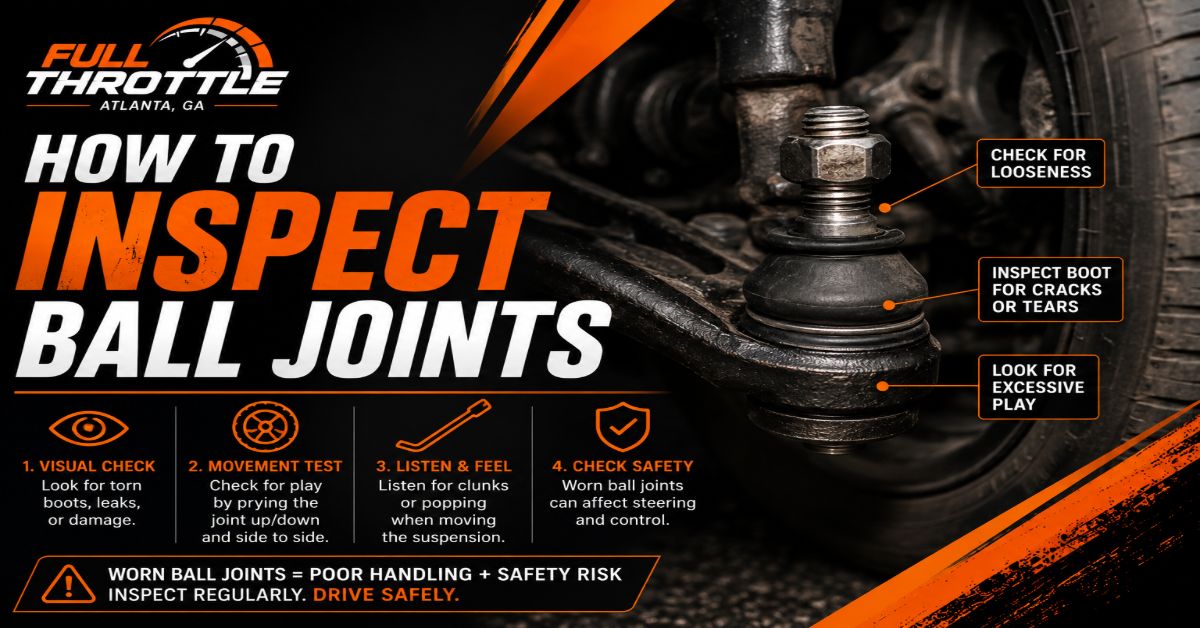
Inspecting your vehicle’s ball joints prevents catastrophic steering failure by identifying worn components before separation occurs. This 5-step process takes 30 to 45 minutes, requires intermediate mechanical skill, and relies on proper suspension loading to reveal hidden wear. Success depends entirely on matching your lifting method to your suspension type.
Before You Start
- Time Required: 30–45 minutes
- Difficulty Level: Intermediate
- Cost: 0 if using existing tools, or $30–$60 if purchasing a basic pry bar and jack stand set.
- Tools & Materials Checklist:
- 1 Floor jack rated for your vehicle weight
- 2 Jack stands with proper weight capacity
- 2 Wheel chocks
- 1 Pry bar (12 to 24 inches)
- 1 Dial indicator with magnetic base (optional)
- 1 LED flashlight
- 1 Pair of safety glasses
- 1 Pair of mechanics gloves
- Prerequisite Conditions: Park on level concrete. Never perform this inspection on asphalt, gravel, or an inclined surface.
Step 1: Secure the Vehicle and Chock Tires
Park your vehicle on flat, solid ground, engage the emergency brake firmly, and place wheel chocks tightly behind the rear tires.
- Action: Pull the mechanical or electronic parking brake until fully engaged. Wedge two heavy-duty wheel chocks directly behind the rear tires to prevent any rolling movement while the front end is lifted. Put on your safety glasses and mechanics gloves.
- How to Do It: Walk around the vehicle to verify the chocks are wedged against the tread face of both rear tires. If your vehicle has an automatic transmission, shift firmly into Park (P).
- Success Checkpoint: You will know this step worked when the vehicle cannot roll forward or backward even if pushed with moderate force.
- Common Mistake: Parking on an asphalt driveway on a hot day. Heavy jack stands can sink into soft asphalt, causing a fatal tip-over. Always use a concrete slab.
Step 2: Identify Your Suspension and Raise the Vehicle
Consult your owner manual to determine if your vehicle uses a Short-Long Arm (SLA) suspension or a McPherson strut setup, then lift the vehicle accordingly.
- Action: Position your floor jack under the correct factory lift point based on your suspension design, lift the vehicle, and lower it securely onto two jack stands.
- How to Do It: If you have an SLA suspension, place the floor jack directly under the lower control arm to keep the coil spring compressed (loaded), then lift until the front tire clears the ground by 3 to 4 inches. If you have a McPherson strut suspension, place the floor jack under the vehicle’s reinforced frame lifting point so the suspension hangs completely free (unloaded). Slide rated jack stands under the designated frame pinch welds or subframe rails, and slowly lower the vehicle onto the stands. Leave the floor jack in place as a secondary backup support.
- Success Checkpoint: You will know this step worked when the vehicle rests solidly on both jack stands with zero rocking motion when shaken by the fender.
- Common Mistake: Lifting an SLA suspension by the frame. Doing this unloads the ball joint and pulls the internal socket together, masking dangerous vertical play and giving you a false sense of security.
Step 3: Test for Vertical Play Using a Pry Bar
Check for vertical looseness in the ball joint assembly by leveraging a pry bar underneath the tire tread.
- Action: Place a 12-to-24-inch pry bar directly beneath the bottom tire tread and apply steady upward leverage against the ground while observing the lower ball joint.
- How to Do It: Wedge the tip of the pry bar under the center of the tire tread. Place a small wooden block under the fulcrum of the bar if needed to protect your driveway. Pry upward while keeping your eyes and fingers close to the lower ball joint boot. Watch for any gap opening up between the ball joint stud housing and the control arm or steering knuckle. If you are using a dial indicator, magnetize the base to the lower control arm and rest the plunger tip directly on top of the steering knuckle boss above the ball joint stud. Pry upward and read the gauge. Upward play exceeding 0.050 inches (1.27 mm) indicates total failure.
- Success Checkpoint: You will know this step worked when you can clearly see whether the joint moves up and down independently of the control arm.
- Common Mistake: Prying against the dust boot itself. Prying on the rubber boot tears the material and lets in abrasive road dirt, ruining a healthy joint. Always pry against the wheel tread.
Step 4: Test for Horizontal Play at 12 and 6 O’Clock
Isolate and measure horizontal and rocking play in the steering knuckle and ball joint assembly.
- Action: Grip the front tire firmly at the 12 o’clock and 6 o’clock positions and push inward with your top hand while pulling outward with your bottom hand in a rapid rocking motion.
- How to Do It: Stand facing the side of the tire. Place your left hand at the top edge (12 o’clock) and your right hand at the bottom edge (6 o’clock). Push and pull sharply back and forth in a pulsing rhythm. Feel for any clicking sensation, clunking feedback, or excessive sloppiness in the joint. Have an assistant look closely at the upper and lower ball joints while you do this to see if the stud shifts sideways inside its socket.
- Success Checkpoint: You will know this step worked when you can differentiate between a loose wheel bearing (which causes play at all clock positions) and a worn ball joint (which creates specific movement at the top and bottom pivot points).
- Common Mistake: Shaking the tire at the 3 o’clock and 9 o’clock positions. That motion tests your outer and inner tie rod ends, not your ball joints. Stick strictly to 12 and 6 o’clock.
Step 5: Visually Inspect the Dust Boots and Grease Fittings
Examine the physical condition of the rubber dust boot and check for structural compromise or total grease loss.
- Action: Shine an LED flashlight directly onto the rubber dust boot surrounding each ball joint to check for tears, cracks, pinholes, or grease leaks.
- How to Do It: Wipe away loose dirt and road grime from the rubber boot using a clean shop rag. Inspect the folds of the rubber accordion boot for hairline cracks, splitting, or punctures caused by flying road debris. Look for fresh grease weeping out of the seams. If your ball joint features a grease zerk fitting, check whether it is missing or damaged.
- Success Checkpoint: You will know this step worked when the rubber boot appears pliable, intact, and dry, with no wet oil trails or gaping holes visible under direct LED light.
- Common Mistake: Assuming a dusty boot is a damaged boot. Normal road dust mixed with old surface oil looks alarming but is harmless. Look for fresh, wet splitting or active grease extrusion.
Common Mistakes and How to Fix Them
- Mistake 1: Misdiagnosing Wheel Bearing Play as Ball Joint Wear.
- Symptom: The tire rocks loosely at 12 and 6 o’clock, but the ball joint stud itself remains stationary while the entire wheel hub wobbles.
- Fix: Have an assistant press the brake pedal firmly while you repeat the 12 and 6 o’clock shake. If the play disappears, your wheel bearing is loose, not your ball joint. If the play remains, the ball joint is worn.
- Mistake 2: Failing to Lock the Steering Wheel.
- Symptom: The steering wheel turns freely during testing, making it impossible to feel genuine horizontal ball joint play.
- Fix: Loop the driver seatbelt across the steering wheel and buckle it tightly, or lock the ignition column before lifting the vehicle.
- Mistake 3: Reusing Damaged Hardware During Reassembly.
- Symptom: A cotter pin snaps or a castle nut strips out because old, rusted fasteners were reinstalled.
- Fix: Always discard old cotter nuts and cotter pins. Replace them with grade-8 hardware matching factory thread pitch specifications.
- Mistake 4: Ignoring Minor Boot Tears.
- Symptom: A small 5mm tear in the rubber boot is left unaddressed because the joint still feels tight.
- Fix: Once a boot tears, moisture and grit enter the socket and destroy the internal bearing surface within weeks. Replace the boot immediately if grease is still clean, or replace the entire ball joint assembly.
Variations: Adapting the Process for Different Setups
- Vehicles with Integrated Control Arm Ball Joints: On many modern economy vehicles (such as Honda Civics or Toyota Camrys), the lower ball joint is pressed directly into the stamped steel lower control arm and cannot be replaced separately. If it fails, you must replace the entire lower control arm assembly. Budget an extra 60 to 90 minutes per side if you encounter this design.
- Upper and Lower Ball Joint Configurations: Heavy-duty trucks and older rear-wheel-drive sedans often feature both upper and lower ball joints. When inspecting these double-wishbone systems, you must place the floor jack under the lower control arm for the lower joint test, but move the jack to support the frame when testing the upper joint to ensure proper load distribution.
- Sealed vs. Greasable Joints: Aftermarket ball joints often include a zerk fitting for periodic greasing using a hand grease gun. If you discover a dry greasable joint with no physical play, inject synthetic chassis grease until the rubber boot swells slightly. Sealed factory joints cannot be greased and must be replaced if dry.
How Long Does It Take / What Does It Cost
- Time Investment: A thorough inspection of both front wheels takes between 30 and 45 minutes for a DIYer working at a steady pace. If you need to remove the front wheels for better visibility, add 15 minutes.
- Financial Cost: Performing the inspection yourself costs $0 if you already own basic hand tools and a floor jack. Buying a professional-grade 24-inch pry bar and a magnetic dial indicator kit runs between $40 and $80 total. Paying a professional mechanic shop for a front-end suspension inspection typically costs $100 to $150, though many shops bundle this into a standard alignment check.
Frequently Asked Questions
Can I drive with a bad ball joint?
Driving with a worn ball joint is extremely dangerous and not recommended. As the internal socket wears past its clearance limit, the ball stud can pull entirely out of its socket while driving. This causes the wheel to tuck under the fender, resulting in an immediate loss of steering control and a severe crash.
How do I know if my ball joint is upper or lower?
Look behind your front wheel assembly. If your vehicle has a traditional truck or older car suspension design, you will see a control arm at the top and a control arm at the bottom, each connected to the steering knuckle by a ball joint. Modern front-wheel-drive cars typically feature only a lower ball joint attached to the bottom control arm, with a McPherson strut handling the top support.
What are the main symptoms of a failing ball joint?
The most common symptoms include a sharp clunking or popping noise when driving over speed bumps or turning into a driveway, vague or wandering steering response, uneven front tire wear on the inner or outer edges, and a steering wheel that fails to return to center smoothly after completing a turn.
Do I need a wheel alignment after replacing a ball joint?
Yes, replacing a ball joint requires removing structural suspension components that directly control wheel geometry. Whenever you replace a ball joint, your vehicle’s camber and toe settings will shift. You must schedule a professional four-wheel alignment immediately after installation to prevent rapid tire destruction.