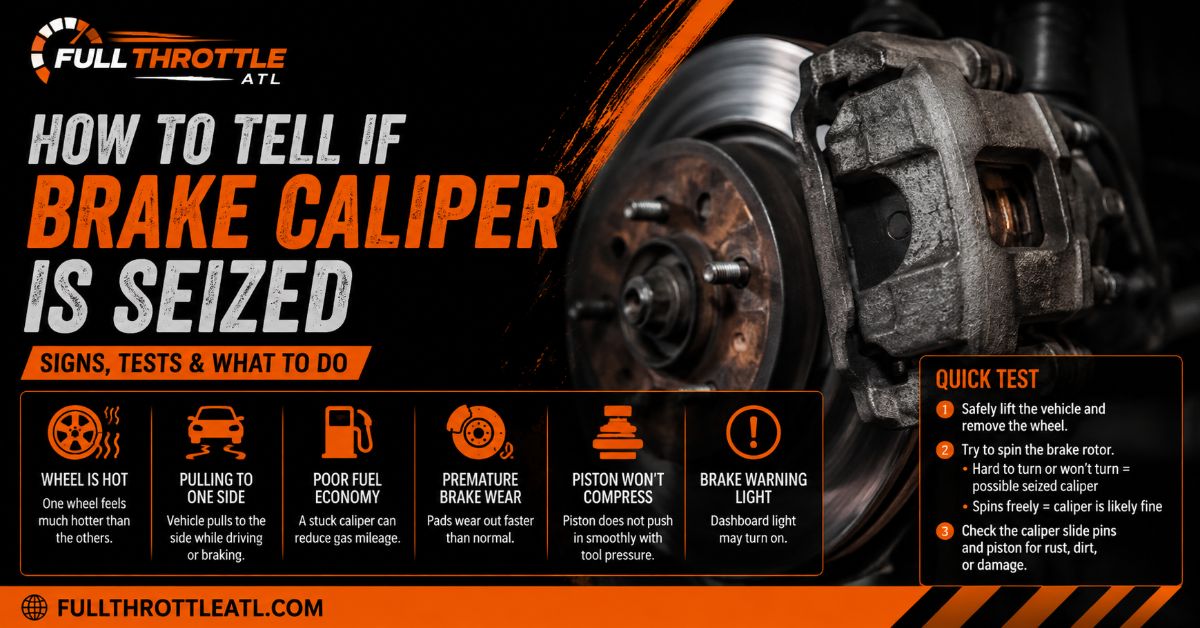
Diagnosing a seized brake caliper requires isolating thermal, mechanical, and hydraulic friction across 6 structured steps. You will perform non-invasive heat and drag checks, lift the vehicle, inspect pad wear patterns, leverage the body, and test the slide pins and piston compression independently. Expect to complete this diagnostic in 45 to 60 minutes per wheel using basic hand tools and a jack, requiring no advanced mechanical skills beyond safe lifting. Success relies on isolating whether the failure stems from dry slide pins, a rusted piston bore, or a collapsed rubber hydraulic hose.
Before You Start
| Parameter | Specification / Detail |
| Total Time Required | 45–60 minutes per wheel |
| Difficulty Level | Beginner to Intermediate |
| Estimated Cost | $0 (if tools owned) to $25 (for brake cleaner & IR thermometer) |
| Prerequisites | Ability to safely jack up vehicle and remove lug nuts |
Required Tools and Materials
- Vehicle Support: Minimum 2-ton rated floor jack, 2 jack stands, 2 wheel chocks.
- Wheel & Caliper Tools: Lug wrench, 8mm–17mm socket set, 6-inch C-clamp (or disc brake pad spreader).
- Diagnostic & Inspection Tools: Infrared laser thermometer, 12-inch flathead screwdriver or pry bar, aerosol brake cleaner.
- Safety & Support Hardware: Mechanic’s wire or heavy-duty bungee cord, nitrile gloves, safety glasses.
Step-by-Step Diagnostic Process
Step 1: Perform the Thermal and Free-Spin Drag Check
Drive the vehicle for 5 to 10 minutes using light, normal braking, then park on a flat surface and measure rotor temperatures with an infrared thermometer. Point the laser directly through the wheel spokes at the center rotor hat on both the left and right sides of the same axle from a distance of 6 to 12 inches. Record both temperature readings immediately. Next, safely place the transmission in Neutral (or press the clutch) with the parking brake off on level ground, and attempt to roll the car 1 to 2 feet by hand to gauge wheel resistance.
- Success Checkpoint: You will know this step is conclusive when you obtain a baseline temperature reading; a normal temperature variance between sides is less than 15°C (30°F), whereas a seized caliper yields readings exceeding 50°C (100°F) higher than the opposite wheel along with noticeable rolling drag.
- Common Mistake: Avoid touching the wheel or rotor face with bare skin to check for heat, as stuck calipers routinely heat rotors past 260°C (500°F), presenting a severe burn hazard.
Step 2: Elevate the Vehicle and Remove the Wheel Assembly
Loosen the lug nuts on the suspected wheel by 1/2 turn counterclockwise while the tire rests firmly on the ground. Position two wheel chocks securely behind and in front of the tires on the opposite end of the car, position your floor jack under the manufacturer’s designated jack point, and raise the vehicle until the tire sits 2 inches above the ground. Lower the vehicle onto an appropriately rated jack stand, completely unscrew the lug nuts, and pull the wheel straight off the hub.
- Success Checkpoint: You will know it worked when the vehicle rests stably on the jack stand with zero wobble when firmly shaken at the fender, and the brake assembly is fully accessible.
- Common Mistake: Working on a vehicle supported only by a hydraulic floor jack without jack stands. Hydraulic seals can fail without warning, causing the vehicle to drop.
Step 3: Inspect the Assembly and Conduct a Hand-Spin Test
Grasp the brake rotor with two hands (wearing gloves) and attempt to spin it forward and backward by hand. Visually examine the inner and outer brake pads through the inspection window in the top of the caliper body, looking for uneven friction material thickness between the inner and outer pads. Spray aerosol brake cleaner over the slide pin boots and piston dust seal to flush away road grime, then inspect the rubber rubber boots for tears, hardening, or heat melting.
- Success Checkpoint: You will know it worked when the rotor spins smoothly with light, uniform pad contact friction, or when you visually verify a clear defect such as an inner pad worn down to backing steel while the outer pad retains 6mm+ of friction material.
- Common Mistake: Mistaking a rust ridge on the outer edge of the rotor for a seized caliper. Ensure the drag is coming from the pad surface rubbing the flat face of the disc.
Step 4: Perform the Mechanical Pry Leverage Test
Insert the blade of a 12-inch flathead screwdriver or pry bar through the top viewport of the caliper housing between the metal backing plate of the outer pad and the caliper body structure. Apply steady, moderate leverage toward the outside of the vehicle to push the floating caliper body outward away from the rotor face.
- Success Checkpoint: You will know it worked when the caliper body slides outward on its mounting pins by 1mm to 3mm under moderate leverage, relieving all clamping pressure from the pads and allowing the rotor to spin completely free by hand.
- Common Mistake: Prying directly against the thin metal backing of the inner pad or flex hose bracket, which bends the pad hardware or cracks the caliper casting.
Step 5: Relieve Hydraulic Reservoir Pressure and Unbolt Caliper Body
Open the vehicle hood and loosen the cap on the brake fluid reservoir by 1 full turn to prevent internal pressure lock during piston testing. Locate the two caliper mounting bolts on the back side of the knuckle (typically 12mm to 14mm hex heads), loosen them counterclockwise using a socket set, and lift the caliper body off the mounting bracket. Immediately hook a mechanic’s wire or heavy-duty bungee cord through a mounting eyelet on the caliper body and suspend it from the suspension coil spring.
- Success Checkpoint: You will know it worked when the caliper lifts cleanly off the pads without force, and hangs freely by the wire with zero strain placed on the rubber brake hose.
- Common Mistake: Allowing the heavy iron caliper to drop and hang by its flexible rubber brake hose, which tears the internal reinforcement fabric and causes line failure or internal hose restriction.
Step 6: Execute the Pin and Piston Isolation Mechanics Test
Grasp each slide pin on the caliper bracket with your fingers and push/pull them horizontally in and out of their bores to verify smooth gliding movement. Next, position a 6-inch C-clamp over the caliper body with the threaded screw pad resting against the face of the hydraulic piston (use an old brake pad placed over the piston face to distribute pressure evenly) and turn the handle clockwise to compress the piston. If the piston resists movement, open the bleed valve on the caliper by 1/4 turn using an 8mm or 10mm wrench while continuing to turn the C-clamp handle.
- Success Checkpoint: You will know the exact root cause based on movement: smooth pin travel and effortless piston retraction confirm a functional caliper; frozen pins indicate guide rail failure; a piston that retracts only when the bleeder is opened confirms a collapsed brake hose; and a piston that refuses to compress even with the bleeder open confirms a seized caliper piston.
- Common Mistake: Forcing a piston on a rear caliper with a standard C-clamp without checking if it features an integrated screw-type emergency brake mechanism, which requires a rotating wind-back tool.
Common Mistakes and How to Fix Them
1. Misdiagnosing Rust-Bound Brake Pads as a Seized Caliper
- The Failure: Road salt builds up rust scale beneath the stainless steel abutment clips on the caliper bracket. This rust expands (“rust jack”), pinching the pad ears tightly so the pads cannot retract, mimicking a stuck caliper piston.
- How to Fix It: Pull the brake pads out of the bracket. If the caliper piston compresses easily in Step 6, scrape the bracket channels down to bare metal with a wire brush or file, install new stainless clips, and apply high-temperature silicone brake lubricant to the clip-pad touch points.
2. Forcing Screw-In Rear Caliper Pistons with a C-Clamp
- The Failure: Modern rear calipers with internal mechanical parking brakes utilize a threaded internal adjustment shaft. Compressing the piston straight back with a standard C-clamp strips the internal threads and destroys the caliper body.
- How to Fix It: Look for two or four notches stamped into the face of the rear caliper piston. If present, stop using the C-clamp. Rent a caliper wind-back tool set from an auto parts store and rotate the piston clockwise while applying light inward pressure.
3. Overlooking Internal Brake Hose Collapse
- The Failure: Flexible rubber brake hoses degrade internally over time. Flaps of rubber tear loose inside the hose, acting as a one-way check valve that allows high fluid pressure to push the piston out during braking, but prevents fluid from returning when you release the pedal.
- How to Fix It: When a piston refuses to compress during Step 6, loosen the bleeder nipple on the caliper. If fluid spurts out under pressure and the piston immediately compresses easily, the caliper is fine—replace the flexible rubber brake hose and bleed the system.
4. Swelling Rubber Boots with Petroleum-Based Grease
- The Failure: Applying standard chassis grease, lithium grease, or petroleum jelly to caliper slide pins causes the EPDM rubber boots to swell, tear, and trap dirt, seizing the pins within months.
- How to Fix It: Disassemble frozen pins, thoroughly clean out degraded grease using aerosol brake cleaner and a small wire bore brush, replace damaged rubber boots, and lubricate exclusively with 100% pure silicone or ceramic synthetic brake grease rated to 1650°C (3000°F).
Situational Variations
Multi-Piston Fixed Calipers (Performance / Truck Brakes)
Fixed calipers (common on sports cars and heavy trucks) do not slide on guide pins. Instead, they feature opposing pistons on both sides of the rotor.
- Procedural Change: Skip the slide pin test. Inspect all 2, 4, or 6 pistons individually by placing a thin wood block in the center of the caliper and having an assistant lightly tap the brake pedal to see if all pistons extend evenly. Compress each piston individually with a spreader tool; if one piston stays recessed while others push out, that specific piston bore is seized.
Electronic Parking Brake (EPB) Systems
Vehicles equipped with an EPB button instead of a mechanical handbrake lever utilize an electric motor mounted to the rear caliper body.
- Procedural Change: You cannot manually push or rotate rear EPB pistons back into the bore without retracting the motor first. Place the vehicle’s computer into “Brake Service Mode” via the dashboard settings menu or an OBD2 scan tool before attempting Step 5 and Step 6. Failing to do so will strip the electric motor gears.
Cost and Time Expectations
| Diagnostic Path | Independent DIY Cost | Professional Shop Cost | Time Required |
| Self-Diagnostic Only | $0 – $25 | $90 – $150 (Diagnostic fee) | 45–60 min per wheel |
| Slide Pin Cleaning & Service | $15 – $30 (Pins & silicone grease) | $180 – $250 | 1.5 – 2 hours |
| Brake Flex Hose Replacement | $25 – $60 (Hose & fluid) | $220 – $350 | 1 – 2 hours |
| Caliper Assembly Replacement | $80 – $180 (New caliper & fluid) | $350 – $600 | 1.5 – 2.5 hours |
Frequently Asked Questions
Can I drive with a seized brake caliper?
No, driving with a seized caliper creates intense friction that quickly boils your brake fluid, causing complete brake pedal loss. The extreme heat degrades wheel bearings, warps brake rotors, and presents a severe tire blowout or vehicle fire hazard. Have the car towed immediately.
What causes a brake caliper to seize up?
The primary causes are moisture contamination inside the brake fluid (which rusts the steel piston inside its bore), torn rubber dust boots that admit road salt and dirt, dry or unlubricated slide pins, and aging rubber flex hoses that collapse internally.
Should I replace calipers in pairs?
Yes, replacing calipers in pairs across the same axle is standard practice. If one caliper has failed due to fluid contamination or age, the opposite caliper has experienced identical operating conditions and is likely near failure. Paired replacement also ensures balanced braking force across the axle.
How do I tell if the slide pins are stuck or the piston is stuck?
A caliper with stuck slide pins will typically show severe diagonal or uneven pad wear (one pad worn paper-thin, the other nearly new). A stuck piston typically causes heavy outer-to-inner clamping drag, extreme rotor overheating, and total resistance to C-clamp compression even when slide pins move freely.