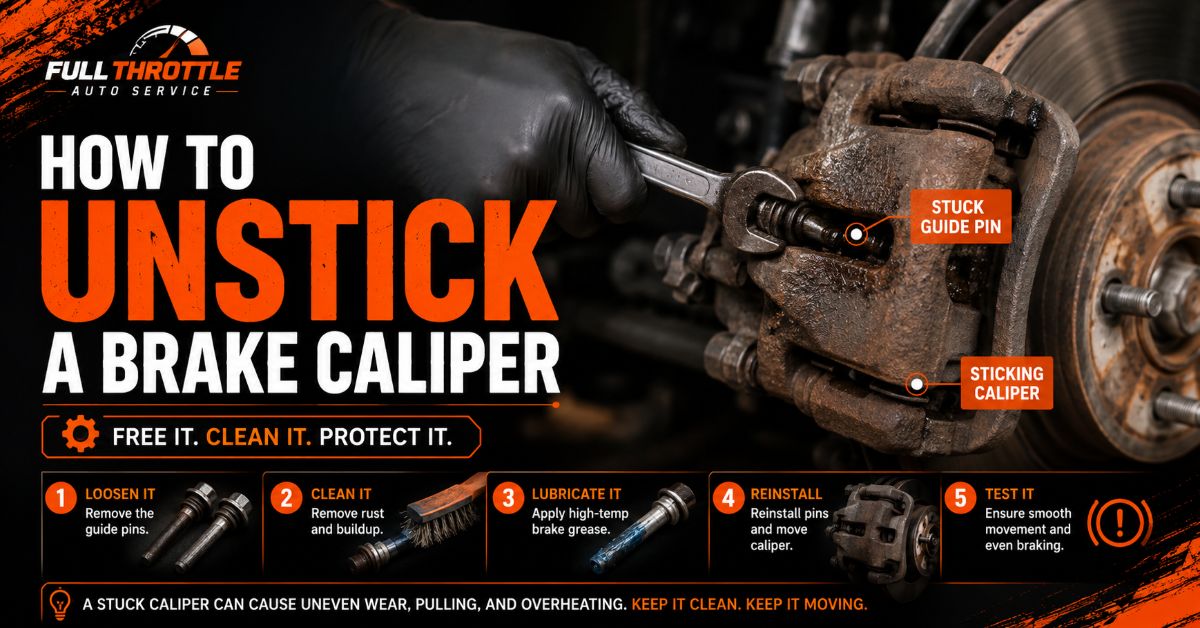
Unsticking a brake caliper requires relieving mechanical friction on slide pins and retracting a bound piston safely into its bore. Follow this 8-step guide to service frozen slide pins, restore piston movement, clear hardware rust, and reset system hydraulic pressure. Complete this repair in 1 to 2 hours per wheel using standard hand tools and specialized silicone brake paste for intermediate-level DIY skill.
🛠️ Before You Start
⚠️ Critical Safety Notice: A sticking caliper generates extreme heat that degrades brake fluid and warps rotors. If the caliper piston is heavily pitted or rusted inside the bore, temporary unsticking will fail. Replace damaged caliper assemblies immediately to preserve vehicle braking safety.
- Total Time Required: 1 to 2 hours per wheel.
- Difficulty Level: Intermediate.
- Estimated DIY Cost: $15–$35 (Materials only) vs. $200–$400 (Shop repair).
Tools and Materials Checklist
- [ ] 6-inch C-Clamp or Brake Caliper Press Tool (1 unit)
- [ ] Pure Silicone Brake Paste (1 tube; non-petroleum based only)
- [ ] Synthetic Brake Caliper Grease (1 tube; for metal-to-metal contact points)
- [ ] Aerosol Brake Cleaner (1–2 cans)
- [ ] Mechanic’s Wire or Heavy-Duty Bungee Cord (1 piece)
- [ ] Metric Socket & Open-End Wrench Set (10 mm through 17 mm)
- [ ] 3/8-inch Drive Torque Wrench (10–50 lb⋅ft capability)
- [ ] Stainless Steel Wire Brush & 400-Grit Sandpaper
- [ ] Clear Plastic Tubing (1/4-inch ID) & Catch Bottle
- [ ] Fresh Brake Fluid (DOT 3, DOT 4, or DOT 5.1 per reservoir cap recommendation)
- [ ] Wheel Chocks & Hydraulic Floor Jack with Jack Stands
📋 Step-by-Step Brake Caliper Restoration
[1. Lift & Secure] ➔ [2. Hydraulic Test] ➔ [3. Remove Caliper] ➔ [4. Clean Pins]
                                                                        │
[8. Bed-In Test]  ⬅ [7. Reset Pressure] ⬅ [6. Re-Torque] ⬅ [5. Press Piston]
Step 1: Secure the Vehicle and Access the Brake Assembly
Park the vehicle on a hard, level concrete surface, engage the parking brake (unless working on rear brakes), and place wheel chocks in front of and behind the tires on the untouched end of the vehicle. Break the lug nuts loose by 1/4 turn using a breaker bar, lift the vehicle with a floor jack under the factory jacking point, and lower it firmly onto jack stands before removing the wheel completely.
Success Checkpoint: You’ll know it worked when the vehicle rests immovably on jack stands and the brake rotor and caliper assembly are entirely exposed and accessible.
❌ Common Mistake: Working on a vehicle supported only by a hydraulic jack. Hydraulic jacks can bleed down or fail structurally; never put your body beneath a car supported without load-rated jack stands.
Step 2: Diagnose the Hydraulic vs. Mechanical Root Cause
Unscrew the brake master cylinder fluid reservoir cap under the hood, clean away surface dirt, and use a syringe to lower the fluid level by 1 cm to prevent overflow. Beneath the vehicle, fit a piece of clear tubing over the caliper’s bleeder valve, submerge the other end in a catch bottle, and open the valve 1/4 turn. If fluid squirts rapidly into the tube under high pressure and the rotor immediately turns freely, the caliper itself is functional; the rubber flexible brake hose has collapsed internally, trapping line pressure. If no pressure releases and the rotor remains locked, the caliper hardware or piston is mechanically seized.
                  Open Caliper Bleeder Valve
                              │
             ┌────────────────┴────────────────┐
             ▼                                 ▼
   Fluid spurts out rapidly           No fluid surge released
    Rotor spins freely                Caliper remains locked
             │                                 │
             ▼                                 ▼
  HYDRAULIC FAILURE                 MECHANICAL FAILURE
  (Collapsed flex line acting       (Seized slide pins or
   as a one-way check valve)        corroded caliper piston)
Success Checkpoint: You’ll know it worked when you have conclusively isolated whether your issue stems from trapped fluid pressure (brake line) or dry, rusted hardware (caliper assembly).
❌ Common Mistake: Forcing a stuck piston back without testing hydraulic pressure. This can blow out internal seals or hide a degraded inner brake hose.
Step 3: Remove and Safely Suspend the Caliper Housing
Unbolt the upper and lower caliper mounting bolts (typically 12 mm to 14 mm socket sizes) while using a thin open-end wrench to hold the slide pin hex nuts steady. Pry the main caliper body off the bracket using a flathead screwdriver against the old brake pad. Immediately hook a piece of mechanic’s wire through the top bolt hole of the caliper housing and secure it tightly to the vehicle frame or coil spring suspension.
Success Checkpoint: You’ll know it worked when the caliper body hangs freely without putting any strain, tension, or sharp bends on the rubber brake fluid hose.
❌ Common Mistake: Allowing the heavy iron caliper to hang by its flexible rubber brake hose. This tears internal structural braids within the line, creating weak spots or immediate leaks.
Step 4: Unstick, De-Rust, and Relubricate the Guide Pins
Grasp the caliper slide pins with your fingers or a wrench and pull them straight out of the mounting bracket holes. If seized solid, spray penetrating lubricant beneath the pin boots, let it soak for 5 minutes, and gently twist the pin back and forth until free. Clean all old, petrified grease from the pin shafts using 400-grit sandpaper and brake cleaner until smooth bare metal shows. Spray brake cleaner inside the bracket pin bores, scrub out debris with a small wire bore brush, apply a heavy coat of pure silicone brake paste across the entire shaft of each pin, and push them back into the bracket, ensuring the rubber dust boots snap fully into their retaining grooves.
       INCORRECT                       CORRECT
  ┌─────────────────┐             ┌─────────────────┐
  │ Petroleum Grease│             │ Silicone Paste  │
  └────────┬────────┘             └────────┬────────┘
           │                               │
           ▼                               ▼
   Destroys & Swells               Protects & Lubricates
     Rubber Boots                   Rubber Dust Boots
Success Checkpoint: You’ll know it worked when you can push each pin into its bore with single-finger pressure and it smoothly rebounds back slightly from trapped air compression.
❌ Common Mistake: Applying petroleum-based chassis grease or anti-seize compound to slide pins. Petroleum distorts, swells, and liquefies rubber boots within days, sealing out air and locking up the pins permanently.
Step 5: Service the Dust Boot and Retract the Caliper Piston
Peel back the outer rubber dust boot surrounding the extending caliper piston using a dull nylon trim tool. Spray a light coat of silicone lubricant into the boot pocket to lubricate the sliding outer skirt. Lay a flat, thick metal plate or an old brake pad across the face of the exposed piston. Align a 6-inch C-clamp (or caliper press tool) over the pad and against the rear back wall of the caliper casting, then slowly rotate the clamp screw clockwise.
                [C-Clamp Frame]
                │             │
  [Back Housing]               [Old Brake Pad]
                │             │
                │   [Piston]  │
                ▼      ▼      ▼
               ┌─┐    ┌──┐   ┌───┐
               │ │    │  │   │   │
               └─┘    └──┘   └───┐
                ▲             ▲
                │             │
          Caliper Body   Threaded Spindle
Success Checkpoint: You’ll know it worked when the piston glides steadily into the housing with moderate hand torque on the clamp handle, coming to rest fully flush with the inner bore casting.
❌ Common Mistake: Forcing a piston that refuses to move under moderate clamp pressure. Pushing a severely rusted or cocked piston gouges the inner aluminum/steel wall and shreds the internal rubber square-cut seal. If it will not move, replace the caliper assembly.
Step 6: Clean Contact Hardware and Reassemble the Caliper
Pry the stainless steel pad retainer clips off the caliper mounting bracket using a flat screwdriver. Scrub the dark rust deposits beneath the clips using a steel wire brush until the seating channels are bare, bright metal, then snap new hardware clips into position. Apply a paper-thin layer of synthetic high-temperature brake grease strictly to the flat metal sliding ears of the brake pads and clip faces, ensuring zero grease contacts the pad friction material or rotor face. Slide pads into the bracket, position the caliper housing over the pads, reinsert the mounting bolts by hand to avoid cross-threading, and torque all fasteners using a calibrated torque wrench:
| Fastener Location | Standard Torque Spec (lb·ft) | Standard Torque Spec (N·m) |
|---|---|---|
| Caliper Guide Pin Bolts | 23–30 lb⋅ft | 31–41 N⋅m |
| Caliper Bracket Mounting Bolts | 70–100 lb⋅ft | 95–135 N⋅m |
| Wheel Lug Nuts (Pass-Car / SUV) | 80–100 lb⋅ft | 108–135 N⋅m |
Success Checkpoint: You’ll know it worked when all bolts are torqued down to exact manufacturer specifications and the assembled caliper has slight manual lateral float on its slide pins.
❌ Common Mistake: Getting synthetic grease on the rotor face or brake pad lining, which causes friction fading, pulling, and contaminated brake pads.
Step 7: Reset Hydraulic System Pressure and Fluid Levels
Re-install the wheel, hand-tighten lug nuts, lower the vehicle to the ground, and torque lug nuts in a star pattern. Before turning on the vehicle ignition key or starting the engine, sit in the driver’s seat and manually depress the brake pedal 5 to 6 complete strokes. The pedal will travel to the floor on the first two pumps; continue pumping until firm hydraulic pedal feel returns. Check the under-hood master cylinder reservoir level, top off with fresh, sealed DOT-rated fluid until it hits the “MAX” fill line, and snap the cap shut tightly.
Success Checkpoint: You’ll know it worked when the brake pedal becomes firm and high within 3 to 4 pumps, holding firm resistance under strong foot pressure without sinking toward the floorboards.
❌ Common Mistake: Attempting to drive the vehicle immediately without pre-pumping the brake pedal. The first application of the pedal will drop flat to the floor with zero stopping power, causing an immediate collision risk.
Step 8: Perform Controlled Road Test and Thermal Check
Start the engine and perform low-speed stop tests in your driveway at 5 mph to confirm stopping force. Drive the vehicle onto a quiet street and accelerate to 30 mph, making three moderate, smooth stops. Accelerate to 45 mph and coast to a stop on a level shoulder without applying heavy foot pressure; the vehicle must coast straight without pulling to the left or right. Park the vehicle, exit, and carefully hover your hand near the wheel hub center (without touching metal directly).
Success Checkpoint: You’ll know it worked when the serviced wheel hub temperature matches the opposite wheel temperature, produces zero acrid chemical smoke/smell, and allows the vehicle to roll freely when shifting into neutral on a slight slope.
❌ Common Mistake: Ignoring a burning brake smell or high heat coming from the wheel well during the test drive. Excessive heat indicates the caliper is still binding and requires immediate total assembly replacement.
🛠️ Process Variations for Alternate Setup Types
Variation A: Screw-Type Rear Calipers (Integrated Mechanical Parking Brake)
- Distinction: Rear brake calipers that incorporate a mechanical handbrake cable feature internal helical threaded shafts inside the piston.
- Modification: Never use a standard C-clamp on these assemblies. You must use a Brake Caliper Piston Rewind Tool (cube tool or rotating press kit). Fit the tool’s two pins into the face cutouts of the piston, press inward while rotating the handle clockwise to thread the piston down into the housing.
Variation B: Electronic Parking Brake Systems (EPB)
- Distinction: Vehicles equipped with an electronic dashboard parking brake switch use electric servo motors mounted directly to the rear caliper housings.
- Modification: Before manually pressing or retracting pistons, you must place the car’s braking computer into Service/Maintenance Mode using an OBD2 diagnostic scanner or standard dashboard button sequence. Alternatively, unbolt the electric motor housing from the back of the caliper and turn the internal hex shaft clockwise with an Allen key to retract the internal actuator spindle first.
⚠️ Common Mistakes and How to Fix Them
1. The Piston Retracts, But Springs Back Out Instantly
- Root Cause: Brake reservoir cap was left sealed tight, creating internal fluid backpressure, or the inner flex hose has delaminated.
- Recovery Fix: Unscrew the master cylinder cap under the hood. Place a catch hose on the caliper bleeder valve, open the screw 1/4 turn, and re-compress the piston. If fluid squirts out freely and the piston stays down, close the valve before releasing the clamp.
2. The Slide Pin Shears Off Head-First Inside the Bracket
- Root Cause: Over-torqued bolts, corroded pin shanks, or applying rotational force to a frozen pin without penetrating oil heat cycles.
- Recovery Fix: Do not try to drill out hard slide pins at home. Unbolt the entire caliper mounting bracket and replace it with a new loaded bracket assembly, which includes pre-lubricated slide pins and boots (typically $25–$45).
3. Brake Pedal Feels Spongy or Soft After Service
- Root Cause: Air bubbles entered the brake lines while opening bleeder valves, or fluid boiled due to extreme heat prior to repair.
- Recovery Fix: Perform a full two-person hydraulic line bleed. Attach clear tubing to the bleeder screw, have an assistant pump the pedal 3 times and hold it down, open the bleeder to purge air pockets, close the valve, and repeat until clean, air-bubble-free fluid emerges.
⏱️ How Long Does It Take and What Does It Cost?
- DIY Cost Breakdown:
- Silicone Paste & Synthetic Grease: $12–$18
- Aerosol Brake Cleaner: $5–$8
- Brake Fluid (1 Pint): $6–$10
- Total DIY Expenses: $23–$36
- Professional Repair Shop Benchmark:
- Caliper Servicing/Freeing Labor: $150–$250 per axle
- Full Assembly Caliper Replacement: $350–$650 (includes parts, installation, and fluid bleed)
- Time Required:
- Experienced DIYer: 45 minutes per wheel.
- Novice / First-Timer: 1.5 to 2 hours per wheel (includes wheel lifting, safety setup, and cleaning).
❓ Frequently Asked Questions
Can I use WD-40 to unstick a brake caliper piston?
No. Never spray WD-40, penetrating oil, or engine oil inside a brake caliper piston housing or boot. Petroleum distillates decompose rubber square-cut hydraulic seals and dust boots rapidly, causing seal swelling, brake fluid failure, and complete hydraulic pressure loss. Use dedicated pure silicone brake paste only.
How long does a freed brake caliper last?
Unsticking a caliper slide pin by cleaning and applying silicone paste can last for years if boots remain intact. However, freeing a corroded caliper piston is usually a temporary fix lasting several weeks to a few months, as microscopic rust pits inside the bore quickly damage rubber seals again.
What are the symptoms of a sticking brake caliper?
Primary symptoms include the vehicle pulling sharply to one side under braking or cruising, an intense burning rubber or hot metal smell coming from the wheel well, reduced fuel economy, extreme wheel rim heat, and excessive dark brake dust accumulation on a single wheel rim.
Is it safe to replace just one brake caliper?
While you can replace a single damaged caliper if the opposite unit functions correctly, it is standard practice to replace calipers in axle pairs (left and right front/rear). Equal piston seal age and smooth slider operation ensure balanced hydraulic braking force across both sides of the car.