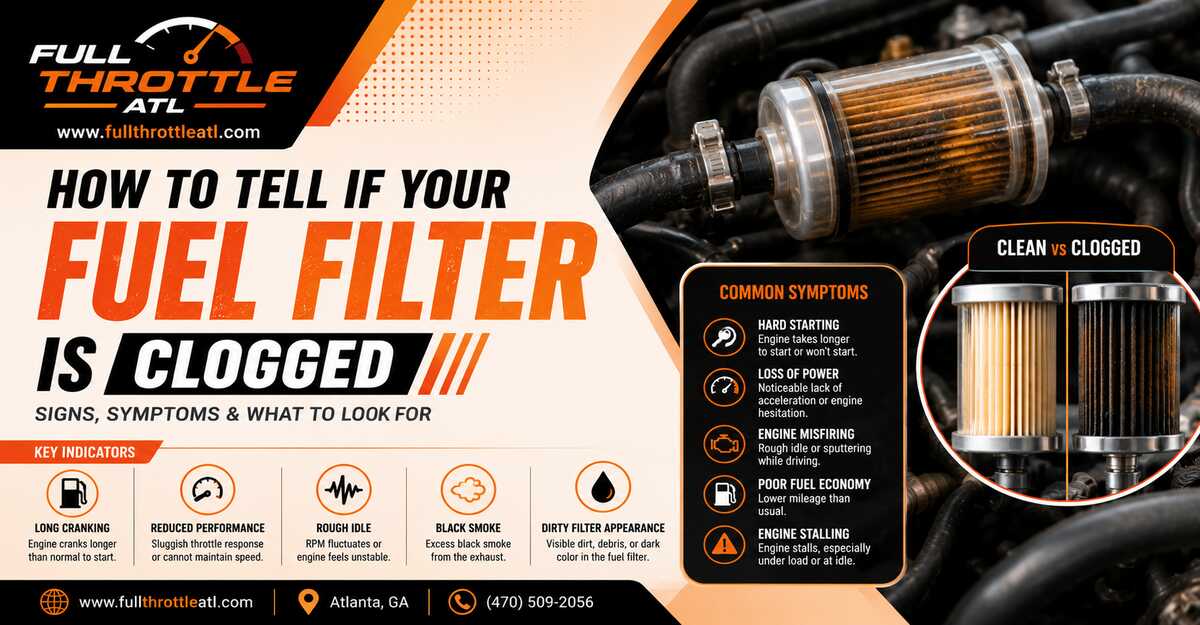
Diagnosing a restricted fuel filter requires verifying a lean fuel condition and testing line pressure against factory specifications. You will execute a static pressure test, a dynamic load test, and a physical blow test in roughly 60 minutes. Success depends entirely on accurately reading pressure fluctuations under engine load rather than just at idle.
Before You Start
- Time Required: 45–60 minutes
- Difficulty: Intermediate
- Cost: $40–$70 (for a fuel pressure test kit)
- Tools and Materials:
- Fuel pressure gauge kit with a Ford/GM/Chrysler Schrader valve adapter
- Nitrile fuel-resistant gloves and wrap-around safety glasses
- Class B (dry chemical or CO2) fire extinguisher
- 3–4 shop rags and an approved 1-gallon gasoline container
- Standard socket set and open-ended wrenches (typically 10mm, 12mm, 14mm)
- Vehicle service manual (for exact PSI specifications)
- Prerequisites: A fully charged battery reading at least 12.6V resting. A weak battery spins the fuel pump slowly, generating false low-pressure readings.
Phase 1: Symptoms Checklist
Before attaching gauges, verify your vehicle exhibits at least two of these mechanical symptoms:
- Load Hesitation: The engine stumbles or hesitates specifically when accelerating hard or driving up a steep incline.
- Lean Codes: The Check Engine Light (CEL) displays OBD-II codes P0171 (Bank 1) or P0174 (Bank 2) for System Too Lean.
- Stalling: The vehicle starts, sputters, and dies within 5 seconds of idling.
- Pump Whine: An audible, high-pitched whining from the rear of the vehicle as the fuel pump strains against the restriction.
Phase 2: Diagnostic Testing
Step 1: Relieve Fuel System Pressure
Pull the fuel pump fuse or relay from the engine bay fuse box to cut power to the pump, then run the engine until it dies.
Start the engine and let it idle until it sputters and stalls completely. Crank the ignition for an additional 3 to 5 seconds to clear any residual pressure in the rail. Turn the ignition key to the OFF position and reinstall the fuel pump fuse.
- Checkpoint: You’ll know it worked when the engine cranks but entirely fails to catch or start.
- Common Mistake: Leaving the ignition in the “ON” position after the engine dies. This keeps the ECU active and can trigger false diagnostic codes. Always turn the key fully OFF.
Step 2: Connect the Fuel Pressure Gauge
Thread the fuel pressure gauge adapter onto the fuel rail test port securely.
Locate the Schrader valve (it looks like a tire air valve) on the metal fuel rail atop the engine injectors. Remove the plastic dust cap. Wrap a shop rag around the base of the valve. Thread the pressure gauge hose fitting clockwise onto the valve until hand-tight, ensuring the internal pin depresses the valve core.
- Checkpoint: You’ll know it worked when the fitting is snug and no fuel leaks from the connection.
- Common Mistake: Using pliers to tighten the brass adapter fitting. Overtightening will crush the internal O-ring, causing a massive fuel leak when the system pressurizes. Hand-tighten only.
Step 3: Perform the Static Pressure Test (KOEO)
Turn the ignition key to the “ON” position without cranking the engine to prime the fuel pump and record the static pressure.
Turn the key two clicks forward to the “Run” position. Listen for the faint hum of the fuel pump engaging for 2 to 3 seconds. Look at the gauge face immediately. The needle should jump rapidly to your vehicle’s factory spec (typically between 40 and 60 PSI).
- Checkpoint: You’ll know it worked when the gauge holds a steady, specific PSI reading without dropping back to zero.
- Common Mistake: Misinterpreting a slow pressure build. If it takes three or four key cycles to reach 40 PSI, you either have a severely clogged filter or a failing check valve in the pump.
Step 4: Perform the Dynamic Load Test (KOER)
Start the engine and hold the RPMs at 2500 to observe how the fuel pressure reacts under simulated engine load.
With the gauge still attached, start the engine and let it reach a steady idle. Note the base idle pressure. Have an assistant press the accelerator to hold the engine steadily at 2500 to 3000 RPM. Watch the gauge needle closely as the engine revs.
- Checkpoint: You’ll know it worked when the pressure drops slightly for a split second, then recovers and holds steady (or slightly increases) at the higher RPM.
- Common Mistake: Ignoring a slow pressure decay. If the needle slowly drops from 40 PSI down to 30 PSI or lower as the engine holds 2500 RPM, the fuel filter is restricted. It can flow enough for idle, but not enough for volume demand.
Step 5: Safely Depressurize and Remove the Filter
Bleed the test gauge into a fuel container, disconnect the negative battery cable, and unbolt the inline fuel filter from the chassis.
Press the pressure relief button on the side of your fuel pressure gauge and route the bleed hose into your approved container until the gauge reads 0 PSI. Disconnect the 10mm negative battery terminal to prevent sparks. Locate the filter under the vehicle (usually along the driver-side frame rail). Disconnect the quick-release fuel lines or unthread the flare nuts using a 14mm line wrench. Slide the filter out of its mounting bracket.
- Checkpoint: You’ll know it worked when the filter is free from the vehicle and the fuel lines are dripping into your catch pan, not spraying.
- Common Mistake: Using standard open-ended wrenches on rusted filter fittings. This will round off the soft brass flare nuts. Always use a specialized line wrench (flare nut wrench) for removal.
Step 6: Perform the Bench Blow Test
Blow low-pressure compressed air or use your mouth to force air through the filter in the exact direction of fuel flow.
Drain the remaining gasoline from the filter into your container. Locate the arrow stamped on the filter body indicating flow direction (pointing toward the engine). Wipe the “IN” nozzle completely clean. Blow air forcefully into the “IN” nozzle.
- Checkpoint: You’ll know it worked when you feel the resistance level. A healthy filter allows air to pass through with almost no resistance. A clogged filter will feel like blowing through a cocktail straw blocked with a finger.
- Common Mistake: Blowing into the “OUT” nozzle. This reverses the flow, pushing trapped dirt backward and invalidating your assessment of the restriction.
Common Mistakes and How to Fix Them
- Gauge Reads 0 PSI After Connection: The pin inside your gauge adapter is not extending far enough to depress the Schrader valve core on the fuel rail. How to fix: Remove the gauge. Use a valve core removal tool to back the Schrader valve out exactly one-half turn, then reattach the gauge.
- Pressure Drops Instantly to Zero When Key is Turned Off: This mimics a clogged filter symptom (poor starting) but is actually a loss of resting pressure. How to fix: This indicates a failed anti-drainback valve in the fuel pump or a stuck-open fuel injector. The filter cannot cause an instant pressure drop when the pump turns off.
- Fuel Leaking from Quick-Disconnect Fittings: After reinstalling a filter, the nylon retaining clips fail to seat. How to fix: Push the line onto the filter nipple until you hear a distinct, loud “click.” If it doesn’t click, the internal O-ring is torn or the plastic retainer is broken and must be replaced (usually a $5 part at auto stores).
- Confusing a Bad Regulator with a Clogged Filter: A bad fuel pressure regulator will cause static pressure to read massively high (e.g., 80 PSI) or immediately low, regardless of RPM. How to fix: Pull the vacuum line off the fuel pressure regulator. If raw fuel drips out of the vacuum port, the regulator diaphragm is ruptured and must be replaced; the filter is likely fine.
Variations
- Vehicles Without a Test Port: Many modern vehicles (especially Asian imports) do not have a Schrader valve on the fuel rail. You must purchase a fuel pressure gauge kit that includes a “T-fitting.” You will disconnect the main fuel feed line where it meets the fuel rail, insert the T-fitting securely between the line and the rail, and attach your gauge to the top of the T-fitting.
- In-Tank Fuel Filters: Most vehicles built after 2006 do not have an external inline fuel filter. The filter is integrated into the fuel pump module inside the gas tank. You cannot perform a bench blow test on these. If the dynamic load test fails (pressure drops under load), you must replace the entire fuel pump assembly.
- Diesel Engines: Diesel fuel systems operate at dramatically higher pressures (Common Rail systems run at 20,000+ PSI). Never attempt to tap a mechanical gauge into a running high-pressure diesel rail. You must rely on OBD-II live data scanner readings for fuel rail pressure vs. commanded pressure.
How Long Does It Take / What Does It Cost
- Time: A complete diagnostic run (pressure tests + physical removal and blow test) takes 45 to 60 minutes of active labor for an inline filter.
- Cost: Purchasing a comprehensive fuel pressure test kit costs $40 to $70. A replacement inline fuel filter costs $10 to $25. If a shop diagnoses and replaces an inline filter, expect to pay $120 to $180 in total parts and labor.
FAQ
Can a scanner tell me if my fuel filter is clogged?
No OBD-II scanner can directly identify a clogged filter because there is no sensor inside the filter. A scanner can only infer a fuel delivery issue by reading lean codes (P0171/P0174) or viewing the Fuel Trim data showing the computer adding maximum fuel to compensate for starvation.
How often should an inline fuel filter be replaced?
Factory maintenance schedules dictate replacing external inline fuel filters every 30,000 to 60,000 miles. If you frequently run your gas tank below a quarter full, sediment from the bottom of the tank is drawn up, clogging the filter much faster.
Will a clogged fuel filter throw a Check Engine Light?
Yes, but only indirectly. As the filter restricts flow, the engine runs lean (too much air, not enough fuel). The oxygen sensors detect this lean exhaust and trigger the Check Engine Light, usually presenting as Bank 1 or Bank 2 lean codes.
Can I clean and reuse a clogged fuel filter?
No. The internal filtration media is made of tightly pleated paper or synthetic fibers designed to trap particles as small as 10 microns. Once the pores are physically packed with rust, dirt, or silica, back-flushing or soaking the filter in solvents will not clear the microscopic blockages.