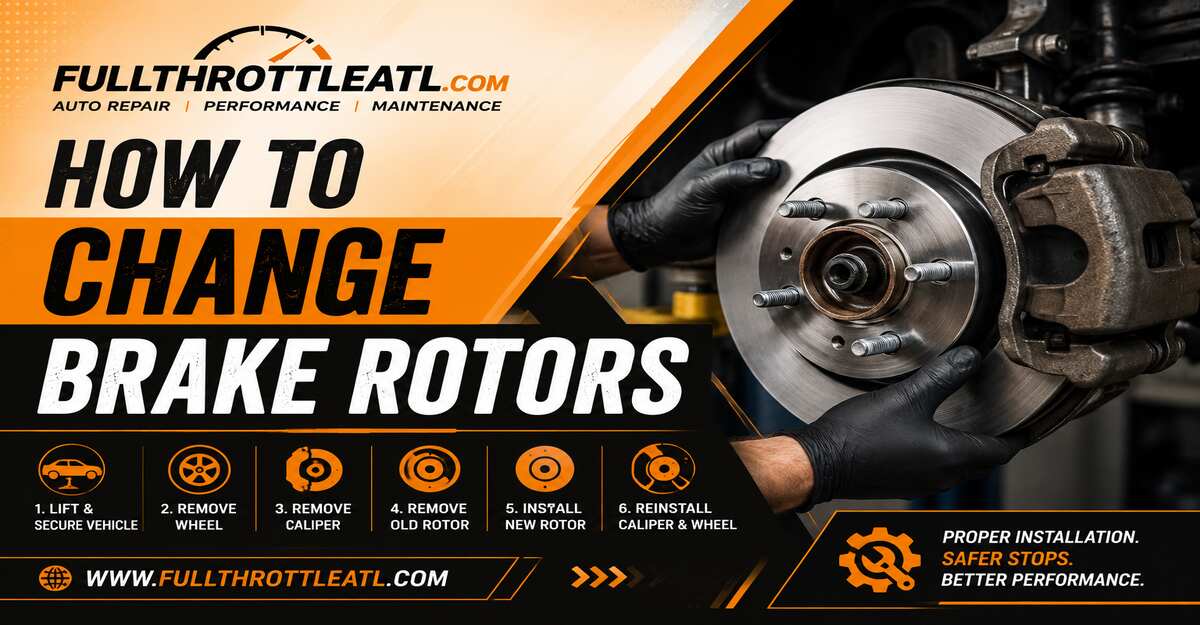
Replacing your brake rotors takes 1 to 2 hours per axle and requires a basic socket set, a C-clamp, and a torque wrench. This process involves lifting the car, unbolting the caliper and bracket, swapping the rotors, compressing the brake piston, and torquing the hardware to spec. Your success will ultimately come down to one factor: surgically cleaning the wheel hub before mounting the new rotor.
Before You Start
- Time Required: 1 to 2 hours (for a front or rear pair).
- Difficulty: Intermediate.
- Cost: $150–$300 for parts (DIY) vs. $500–$800 at a shop.
- Parts: 2 brake rotors (always replace in pairs), 1 set of brake pads, 1-2 cans of brake cleaner, 1 packet of synthetic high-temp brake grease.
- Tools: Floor jack, 2 jack stands, 2 wheel chocks, breaker bar, socket set (typically 10mm to 19mm), torque wrench, C-clamp or piston tool, brake hanger hooks, wire brush.
- Prerequisite: If replacing rear rotors on a modern car with an Electronic Parking Brake (a button instead of a handbrake lever), you must put the car into “Brake Service Mode” via the dashboard menu or an OBD2 scanner before starting.
Phase 1: Teardown and Removal
Step 1: Secure and Lift the Vehicle
Park on a flat, level concrete surface and place exactly two wheel chocks behind the tires on the opposite axle. While the car is on the ground, use your breaker bar to loosen the lug nuts on the wheels you are servicing by one half-turn. Lift the vehicle using the factory-designated jack points, lower it firmly onto two jack stands, and remove the wheels completely.
- You’ll know it worked when: The car is rock-solid on the stands and the wheels are off, exposing the brake assembly.
- Common Mistake: Never rely solely on the hydraulic floor jack to hold the car up. Hydraulic seals can fail without warning.
Step 2: Remove the Brake Caliper
Locate the two small caliper guide pin bolts (usually 12mm or 14mm) on the back of the caliper. Unscrew them and pull the caliper off the rotor. Immediately hang the caliper from the suspension coil spring using a brake hanger hook or heavy-duty zip tie. Slide the old brake pads out of the bracket and discard them.
Always suspend the caliper to protect the brake hose.. Source: 4LifetimeLines
- You’ll know it worked when: The caliper is safely suspended out of the way, and the brake pads are removed.
- Common Mistake: Letting the caliper hang by its rubber hydraulic hose. This tears the internal lining of the hose, leading to brake failure or leaks down the road [61, 62].
Step 3: Remove the Caliper Bracket and Old Rotor
Use a breaker bar to remove the two large caliper bracket bolts (usually 17mm or 19mm) located further inboard. Set the heavy bracket aside. If your rotor is held on by small retaining screws, remove them (an impact screwdriver is best here to avoid stripping the soft Phillips heads). Pull the old rotor off the hub.
- You’ll know it worked when: The wheel hub is completely exposed.
- Common Mistake: Getting stopped by a rusted-on rotor. Don’t smash the rotor face with a hammer, which damages the wheel bearings. Instead, thread two M8x1.25 bolts into the small threaded extraction holes on the rotor hat. Turn them evenly with a wrench to effortlessly pop the rust bond and push the rotor off the hub.
Phase 2: Preparation and Installation
Step 4: Clean the Wheel Hub and Prep the New Rotor
Use a wire brush to aggressively scrub the face of the bare wheel hub. You must remove every trace of rust and scale until the metal is clean and flat. Next, take your new rotor away from the car, spray the friction surfaces generously with brake cleaner, and wipe it dry with a clean rag to remove the factory anti-rust shipping oil. Slide the clean rotor onto the hub and hand-tighten a single lug nut to hold it flush in place.
A perfectly clean hub prevents steering wheel vibration.. Source: Steven White / Getty Images
- You’ll know it worked when: The new rotor sits perfectly flat against a clean hub, secured by one lug nut.
- Common Mistake: Skipping the wire brush. Even 0.002 inches of rust trapped between the hub and the new rotor will cause lateral runout, resulting in a violently shaking steering wheel within a few thousand miles [63, 64].
Step 5: Compress the Brake Piston
Open the hood and locate the brake fluid reservoir. Use a clean syringe or turkey baster to remove about an inch of brake fluid (discard this fluid; do not reuse it). Back at the wheel, place one of your old brake pads against the caliper piston. Use a C-clamp or a dedicated brake caliper compression tool to slowly squeeze the piston completely flush into the caliper housing.
Compressing the piston makes room for the thicker new pads.. Source: knowlesgallery / Getty Images
- You’ll know it worked when: The piston is fully retracted and flush with its rubber dust boot.
- Common Mistake: Failing to extract fluid from the reservoir first. Pushing the piston back forces fluid up the lines; if the reservoir overflows, the highly corrosive brake fluid will eat through the paint inside your engine bay.
Step 6: Install the Bracket, Pads, and Caliper
Bolt the caliper bracket back onto the steering knuckle and use your torque wrench to tighten the large bolts to factory specification (typically 70 to 110 ft-lbs). Snap the new stainless steel abutment clips into the bracket. Apply a very light coat of high-temperature synthetic brake grease to the “ears” (the metal tabs) of the new brake pads, and slide them into the clips. Slide the caliper over the new pads and torque the guide pin bolts to spec (typically 25 to 35 ft-lbs).
Grease the pad ears, not the friction material.. Source: Reddit
- You’ll know it worked when: Everything is bolted tightly and the new pads sit flush against the new rotor.
- Common Mistake: Getting grease on the brake pad friction material or the rotor face. This will instantly ruin the pad and severely compromise your stopping power.
To understand how these components interact under pressure, explore this cross-section of the braking system:
Generate interactive visual
The guide pins allow the caliper to float and apply even pressure to both sides of the rotor.
Phase 3: Finalization
Step 7: Remount the Wheel and Torque the Lugs
Remove the temporary single lug nut from the rotor. Mount the wheel and hand-tighten all lug nuts. Jack the car up slightly to remove the jack stands, then lower the vehicle to the ground. Use your torque wrench to tighten the lug nuts in a star (crisscross) pattern to your vehicle’s specific setting (usually 80 to 100 ft-lbs).
- You’ll know it worked when: The torque wrench clicks at the exact specified weight for every lug nut.
- Common Mistake: Torquing lug nuts in a circle instead of a star pattern, which can warp the new rotor before you even drive the car.
Step 8: Bed-In the New Brake Rotors
Before starting the car, sit in the driver’s seat and pump the brake pedal 5 to 6 times until it feels firm. Start the car and perform a “bedding-in” drive: find a safe, open road and make 5 to 6 moderately aggressive stops from 40 mph down to 10 mph (do not come to a complete stop). Drive normally for a few minutes to let the brakes cool.
- You’ll know it worked when: The brakes feel smooth, progressive, and silent during stops.
- Common Mistake: Forgetting to pump the brakes before shifting into gear. The caliper pistons are still retracted from Step 5. If you do not pump the pedal to push them back against the pads, you will have zero braking power the first time you step on the pedal [66, 67].
Common Mistakes and How to Fix Them
| Symptom | Probable Cause | Exact Fix |
|---|---|---|
| Brake pedal goes straight to the floor | Piston not reseated or air in the lines. | Stop the car immediately. Pump the pedal repeatedly. If it stays soft, you likely introduced air into the system and must bleed the brake fluid lines. |
| Pulsing or shaking steering wheel | Lateral runout from a dirty hub. | Remove the wheel, caliper, and rotor. Use a wire brush to scrub the hub perfectly flat, ensuring zero rust remains, then reassemble and re-torque the lugs. |
| Loud, high-pitched squealing | Dry abutment clips or missing grease. | Disassemble the caliper and apply high-temperature synthetic brake grease to the pad ears (where they touch the hardware clips) and the back of the brake pad shims. |
| Car pulls aggressively to one side | Seized caliper guide pins. | Remove the caliper guide pins, wipe off the old, dried grease, apply fresh synthetic silicone brake grease, and ensure the rubber dust boots are fully seated. |
Variations
- Upgraded Slotted or Drilled Rotors: If you purchased performance rotors, they are directional. Look for an “L” (Driver’s Side) or “R” (Passenger Side) stamped on the rotor hat, or check the internal cooling vanes (they should sweep backward toward the rear of the car).
- Rear Drum-in-Hat Parking Brakes: If you are changing rear rotors on an older vehicle, the inside of the rotor hat may house a mini drum brake system for the parking brake. You must ensure the physical handbrake is completely disengaged, and you may need to back off the star-wheel adjuster through the backing plate to slide the rotor off.
Frequently Asked Questions
Do I need an alignment after changing brake rotors? No. Changing brake rotors and pads does not alter the suspension geometry or steering angles of the vehicle. An alignment is only necessary if you are replacing suspension components like tie rods or struts.
Can I just replace the brake pads and leave the old rotors? While possible, it is highly discouraged. Old rotors develop microscopic grooves and a glazed surface that will rapidly chew up your new pads and cause squeaking. If you don’t replace the rotors, you must have them resurfaced (machined flat) at a machine shop.
Should I use anti-seize on the wheel hub? A very light coat of anti-seize around the center hub ring is acceptable to prevent future rusting, but you should never apply anti-seize to the flat face of the wheel hub or the lug nut studs, as it interferes with proper torque values.
How do I know what torque specs to use? Torque specifications vary significantly by make and model. Always check your vehicle’s owner’s manual or a dedicated repair manual (like Haynes or Chilton) for the exact ft-lb rating for lug nuts, bracket bolts, and guide pins.
For a visual breakdown of how to handle rotors that are completely rusted and stuck to the hub without damaging your wheel bearings, see this guide: How To Remove Stuck Brake Rotor.
How To Remove Stuck Brake Rotor
Dave Wirth · 15K views Open in How To Remove Stuck Brake Rotor


https://youtube.com/watch?v=Z3OVrx530Pw%3Fhl%3Den%26rel%3D0%26showinfo%3D0%26enablejsapi%3D1%26origin%3Dhttps%253A%252F%252Fgemini.google.com%26widgetid%3D3%26forigin%3Dhttps%253A%252F%252Fgemini.google.com%252Fapp%252F940c75fdc0bc3193%253Fhl%253DEN%26aoriginsup%3D1%26gporigin%3Dhttps%253A%252F%252Fgemini.google.com%252F%26vf%3D1