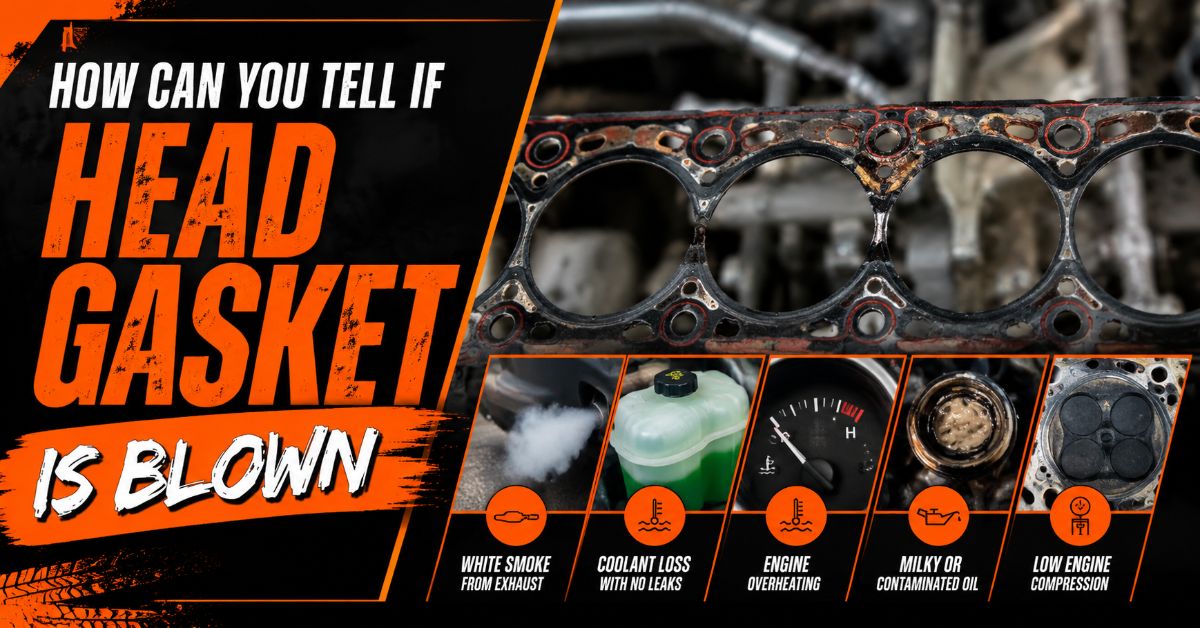
Determining whether your vehicle has a blown head gasket requires a systematic 5-step diagnostic process: visual inspection, exhaust observation, chemical combustion leak testing, cooling system pressure testing, and cylinder compression testing. This complete diagnostic takes 1.5 to 2.5 hours, requires moderate mechanical skill, and relies on strict isolation of combustion, oil, and coolant pathways to pinpoint the breach.
Before You Start
| Metric / Parameter | Specification |
| Total Diagnostic Time | 1.5 to 2.5 Hours |
| Difficulty Level | Intermediate (DIY Mechanic) |
| Estimated DIY Cost | $0 to $85 (Tool rental available at auto parts stores) |
| Required Engine Condition | Completely cold (ambient temperature below 35°C / 95°F) |
Required Tools and Equipment Checklist
- Safety Gear: 1 pair nitriled mechanics gloves, 1 pair ANSI Z87.1 safety glasses.
- Chemical Test Kit: 1 block tester tool with 1 bottle of bromothymol blue fluid.
- Pressure Tester: 1 cooling system pressure pump kit with correct radiator neck adapter.
- Compression Gauge: 1 engine compression tester (0–300 PSI range) with 14mm/18mm thread adapters.
- Hand Tools: 1 3/8-inch drive ratchet, 1 5/8-inch or 13/16-inch spark plug socket, 1 6-inch extension bar, 1 spark plug gap tool.
- Misc Supplies: 1 fluid siphon bulb, 5 clean shop rags, 1 flashlight (500+ lumens).
Step-by-Step Head Gasket Diagnostic Process
Step 1: Conduct Cold Visual & Spark Plug Inspection
Inspect the oil filler cap, dipstick, and spark plug tips for cross-contamination of oil and coolant before starting the engine.
- Ensure the engine has been switched off for at least 3 hours.
- Pull the engine oil dipstick and wipe it on a clean white shop rag. Look for a milky, chocolate-milk appearance or oil level sitting significantly above the “FULL” mark.
- Remove the oil filler cap and inspect the underside for thick yellow-white sludge.
- Remove all spark plugs using a 3/8-inch ratchet, extension, and spark plug socket.
- Inspect each spark plug tip under bright light. Compare the electrodes across all cylinders. A steam-cleaned plug (completely free of carbon deposits) or one with white, crusty deposits indicates coolant entering that specific cylinder.
Success Checkpoint: You will know this step is complete when all spark plugs, the dipstick, and the oil cap are visually verified. If heavy milky sludge or a steam-cleaned spark plug is present, you have confirmed a head gasket failure without further tear-down.
Common Mistake: Confusing short-trip moisture condensation with a blown head gasket. Vehicles driven only 5–10 minutes in cold weather accumulate mild white film strictly inside the cap top. If the dipstick oil remains translucent brown or black, proceed to Step 2.
Step 2: Execute Cold-Start Exhaust & Radiator Bubble Test
Observe the radiator neck and exhaust tailpipe during initial engine startup to detect immediate combustion gas transfer into the cooling passages.
- Siphon coolant out of the radiator filler neck until the fluid level drops 2 inches below the bottom of the filler neck rim.
- Leave the radiator cap off.
- Have an assistant start the engine while you stand to the side of the engine bay wearing safety glasses.
- Watch the open radiator neck for 30 seconds. Look for a continuous stream of violent bubbling or a geyser of fluid leaping out of the neck.
- Move to the rear of the vehicle and inspect the exhaust tailpipe. Look for dense, billowing white smoke that lingers in the air and smells distinctly sweet (like heated ethylene glycol).
Success Checkpoint: Continuous, rapid bubbling in the radiator neck immediately upon cold start confirms that high-pressure cylinder combustion gases are blowing past the gasket ring directly into the coolant jacket.
Common Mistake: Standing directly over an open radiator neck. If a major breach exists, combustion pressures (over 300 PSI) can blast hot coolant into your face instantly upon engine turnover. Always view from a 45-degree angle.
Step 3: Perform Chemical Combustion Leak Test
Use bromothymol blue test fluid in a dual-chamber block tester to verify the presence of microscopic trace carbon dioxide ($CO_2$) gas in the cooling system.
- Siphon coolant down 3 inches below the radiator neck rim so liquid does not suck into the test tool.
- Pour fresh blue block test chemical into both chambers of the test tube up to the marked fill line.
- Insert the rubber tapered stopper of the tester firmly into the radiator neck opening.
- Start the engine and let it idle until it reaches operating temperature (roughly 85°C to 95°C / 185°F to 200°F).
- Attach the rubber aspirator bulb to the top of the test tube and squeeze repeatedly for 2 minutes, drawing air from the radiator through the chemical fluid.
- Observe the fluid color in the test chambers.
Success Checkpoint: You’ll know it worked when the blue fluid remains blue (negative for combustion gas) or shifts distinctly to bright yellow for gasoline engines (or green for diesel engines), confirming a chemical breach.
Common Mistake: Sucking liquid coolant into the test chamber. Raw coolant ruins the chemical indicator fluid, turning it green prematurely and yielding a false positive. Keep the coolant level 3 inches below the adapter base.
Step 4: Perform Cooling System Pressure Drop Test
Pressurize the cooling system statically with a hand pump to identify internal pressure bleed-off caused by gasket failure.
- Fit the correctly sized expander cap adapter from your pressure kit onto the cold radiator neck.
- Attach the pressure pump quick-connect coupling to the adapter.
- Pump the hand syringe until the gauge needle reaches exact system operating pressure—typically 15 PSI (or the rating stamped on your OEM radiator cap, usually between 13–16 PSI).
- Leave the tool pressurized and monitor the needle for 15 minutes.
- Inspect the block exterior, water pump, and radiator hoses with a flashlight while monitoring the gauge.
Success Checkpoint: A system in good condition holds steady pressure with less than 0.5 PSI loss over 15 minutes. A steady drop on the gauge without external liquid dripping underneath the car proves coolant is escaping internally into the engine cylinders or oil sump.
Common Mistake: Over-pressurizing the system past 18–20 PSI. Exceeding rated cap pressure risks rupturing plastic radiator side-tanks, heater core seams, or soft bypass hoses.
Step 5: Execute Engine Cylinder Compression Test
Measure mechanical cranking pressure across all cylinders to identify adjacent cylinder wall leaks and complete your diagnosis.
- Disconnect the fuel pump relay or fuse in the main under-hood fuse box to prevent fuel injection during cranking.
- Remove all spark plugs from the engine block.
- Thread the brass hose end of the compression gauge finger-tight into cylinder #1 spark plug hole.
- Depress the accelerator pedal fully to lock the throttle body wide open.
- Crank the engine for 5 to 6 full revolutions while observing the compression gauge dial.
- Record the peak pressure reading (in PSI), release gauge pressure using the side bleed valve, and repeat for all remaining cylinders.
Success Checkpoint: Healthy cylinders yield uniform readings between 125 and 175 PSI with less than 10% variation between cylinders. Two adjacent cylinders reading low (e.g., Cylinder 2 at 135 PSI, Cylinder 3 at 45 PSI, Cylinder 4 at 140 PSI) confirms the head gasket fire ring has burned through between those two cylinders.
Common Mistake: Leaving spark plugs installed in non-tested cylinders or failing to hold the throttle wide open. Both errors restrict air intake, lowering compression readings across all cylinders by 20–40 PSI and skewing test data.
Common Mistakes and How to Fix Them
1. Opening a Hot Radiator Cap
- The Failure: Removing the cap on a hot engine causes pressurized boiling coolant (105°C+) to flash into steam, causing severe liquid burns.
- How to Fix: Touch the top radiator hose with a gloved hand. If it is hard to squeeze or hot to the touch, wait 45 minutes for the system temperature to drop below 50°C before loosening the cap.
2. Misinterpreting False Positives on Chemical Leak Tests
- The Failure: Using old, degraded block test fluid or drawing engine oil vapor into the chamber, causing the fluid to change color without exhaust gas presence.
- How to Fix: Store test fluid in an airtight glass container out of direct sunlight. If fluid is suspect, blow into the rubber tube with your mouth; human breath ($CO_2$) should turn fresh blue fluid yellow within 10 seconds. If it fails, replace the fluid kit.
3. Cranking the Engine with Fuel Injectors Active
- The Failure: Leaving the fuel system energized during a compression test washes cylinder walls with raw gasoline, causing ring blow-by and artificially low pressure numbers.
- How to Fix: Always pull the fuel pump fuse, start the engine until it stalls to clear line pressure, and verify no fuel spray emerges from spark plug wells during cranking.
4. Overlooking a Blown Intake Manifold Gasket or Oil Cooler
- The Failure: Replacing a healthy head gasket because oil and coolant mixed, when the true failure was an internal oil cooler seal or intake manifold coolant port failure.
- How to Fix: Perform Step 5 (Compression Test) before condemning the head gasket. If cylinder compression across all cylinders is high and equal (e.g., 155–165 PSI across all 4 cylinders), isolate the engine oil cooler or intake manifold gasket prior to pulling the cylinder head.
Diagnostic Variations Across Vehicle Types
Modern Aluminum Engines vs. Cast Iron Blocks
Aluminum cylinder heads on iron or aluminum blocks expand at twice the rate of cast iron when overheated. On aluminum engines, a blown head gasket is almost always accompanied by head warping. Always measure head flatness with a precision steel straightedge and feeler gauges during teardown; any gap exceeding 0.002 inches (0.05 mm) requires machine shop resurfacing.
Diesel Engines (High Compression Systems)
Diesel engines operate at compression ratios exceeding 16:1 up to 22:1 (yielding cranking compression of 350–500 PSI). Standard automotive compression gauges will explode if attached to a diesel engine. Always use a dedicated diesel compression gauge rated to 1,000 PSI connected via the glow plug or injector port. Additionally, block test fluid turns green rather than yellow when exposed to diesel exhaust gas.
Turbocharged and Supercharged Vehicles
Forced-induction engines generate significantly higher peak cylinder pressures. A head gasket breach on a turbocharged vehicle often manifests under boost conditions while remaining sealed at low idle. If low-load tests pass but coolant disappears during highway driving, perform a pressurized cooling leak-down test with 20 PSI applied while manually turning the crankshaft through individual engine strokes.
Diagnostic Time and Tool Cost Breakdown
| Diagnostic Method | Tool Required | Tool Purchase / Rental Cost | Time Required | Accuracy Rate |
| Visual / Spark Plug Check | Spark Plug Socket, Flashlight | $0 – $15 | 10–15 Minutes | 65% |
| Chemical Combustion Test | Block Tester Kit & Fluid | $30 – $40 | 15–20 Minutes | 95% |
| Cooling Pressure Test | Pressure Pump & Adapters | $45 – $80 (Rentable) | 20–30 Minutes | 85% |
| Cylinder Compression Test | 0–300 PSI Compression Gauge | $25 – $50 (Rentable) | 45–60 Minutes | 98% |
| Full 5-Step Process | All Tools Combined | $85 Total DIY Cost | 1.5 – 2.5 Hours | 99.9% |
Frequently Asked Questions
Can you drive a car with a blown head gasket?
No, driving with a blown head gasket quickly leads to severe engine destruction. Coolant thins engine oil, destroying rod bearings within miles. Furthermore, extreme engine overheating warps cylinder heads and scores cylinder walls. Tow the vehicle immediately to prevent total powertrain loss.
Will a blown head gasket always cause milky oil?
No. Milky oil only occurs when the breach lies directly between an oil passage and a coolant passage. If the gasket blows strictly between a cylinder combustion ring and a water jacket, coolant will burn out the exhaust without ever touching the oil pan.
What is the most reliable single test for a blown head gasket?
The chemical combustion leak test (block test) combined with a cylinder compression test offers the highest accuracy. The chemical test detects trace exhaust gas inside the cooling system with over 95% sensitivity, while the compression test pinpoints the exact cylinder location of the leak.
How much does it cost to fix a blown head gasket?
While the diagnostic tools cost under $85 DIY, professional head gasket replacement ranges from $1,500 to $3,200 due to intensive labor (8 to 15 shop hours). Parts themselves (gaskets, head bolts, coolant, oil) typically cost $150 to $350.
What causes a head gasket to blow in the first place?
Engine overheating is the root cause of over 90% of head gasket failures. Thermal expansion causes the metal head and block to warp, breaking the crush seal of the gasket fire rings. Secondary causes include detonation (pre-ignition), improper head bolt torque during past repairs, and long-term coolant neglect leading to acid corrosion.