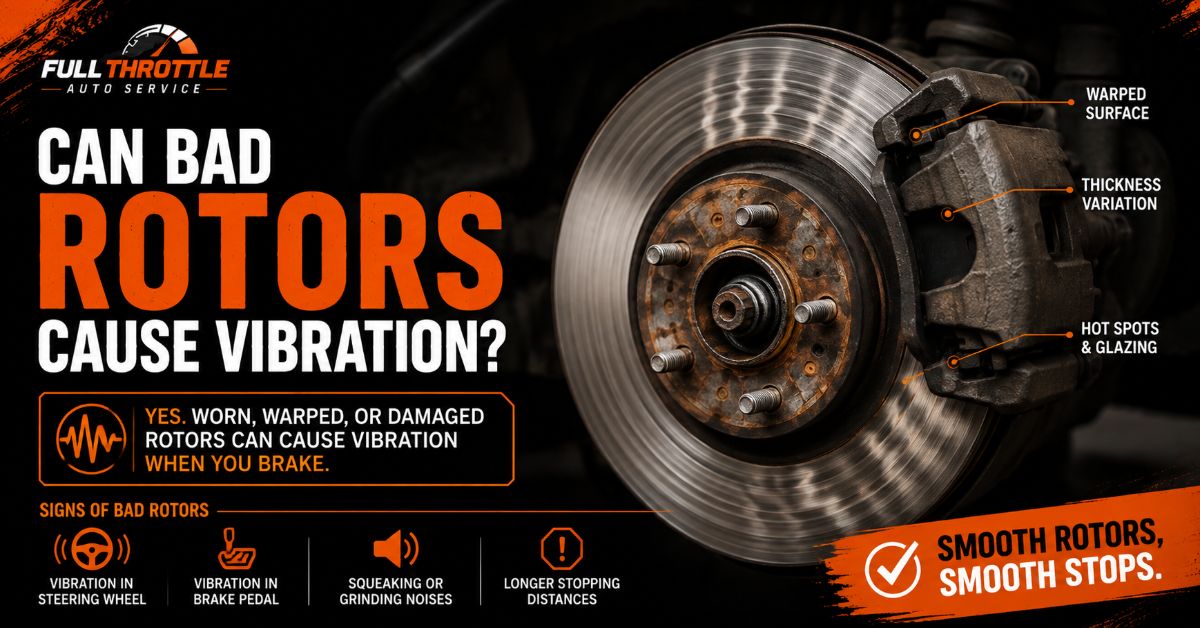
Bad brake rotors are a primary cause of vehicle vibration, specifically producing a symptom known as brake judder or pedal pulsation. This vibration occurs when brake pads clamp against an uneven, worn, or distorted rotor surface, transmitting mechanical oscillations through the brake pedal, steering wheel, or vehicle chassis during deceleration.
At a Glance
- Primary Cause: Disc Thickness Variation (DTV) as small as 0.0004 inches (10 micrometers) triggers noticeable braking vibration.
- Location Clue: Steering wheel shaking indicates front rotor issues, while pedal-only or seat vibration points to rear rotors.
- Critical Speed: Pulsation is most noticeable between 30 mph and 60 mph, becoming violent above 65 mph.
- Myth vs. Fact: Rotors rarely “warp” physically; uneven brake pad material transfer or cementite hotspots create the variation.
- Safety Impact: Driving on bad rotors increases stopping distances by up to 20% and accelerates wear on wheel bearings and suspension components.
How Do Bad Rotors Cause Vehicle Vibration?
Bad brake rotors cause vibration through a phenomenon called Disc Thickness Variation (DTV), where the flat surfaces of the brake rotor develop micro-variations in thickness across their circumference. When you apply the brakes, the caliper pistons squeeze the brake pads against the spinning rotor. If the rotor’s thickness is inconsistent, the pads rapidly push outward and retract as they pass over thin and thick spots. This hydraulic resistance pushes fluid back through the brake lines, creating a rhythmic pulsation felt in the brake pedal and chassis.
Modern automotive rotors rarely bend or “warp” into a wavy dish shape under high heat, despite common industry jargon. Instead, the friction surface becomes uneven due to pad material buildup, rust pitting, or mechanical wear. This uneven surface continuously grabs and releases the brake pads thousands of times per minute, translating microscopic surface variations into violent vehicle shaking at highway speeds.
What Are the Key Specifications and Tolerances for Rotor Vibration?
Rotor vibration is triggered by microscopic deviations beyond strict manufacturer tolerances. Vehicle braking systems rely on four critical measurements to maintain smooth performance:
| Measurement Metric | Normal Specification | Failure Threshold | Result of Exceeding Limit |
| Disc Thickness Variation (DTV) | $< 0.0002\text{ in (5 }\mu\text{m)}$ | $0.0004\text{ to }0.0008\text{ in (10–20 }\mu\text{m)}$ | Violent brake pedal pulsation and steering wheel shake |
| Lateral Runout | $< 0.001\text{ in (0.025 mm)}$ | $> 0.002\text{ to }0.0003\text{ in (0.05–0.08 mm)}$ | Uneven pad wear, leading to rapid DTV development |
| Critical Speed Range | N/A | $30\text{ to }60\text{ mph (48–96 km/h)}$ | Peak resonance range where rotor vibration is most severe |
| Lug Nut Torque Variation | Uniform per specs | $> 10\text{ lb-ft difference}$ | Distorts rotor hat, inducing artificial lateral runout |
What Is the Difference Between Disc Thickness Variation and Lateral Runout?
Lateral runout refers to a rotor wobbling from side to side as it rotates, similar to a wobbly bicycle wheel, whereas Disc Thickness Variation (DTV) means the rotor surface itself has varying thickness measurements around its circumference.
LATERAL RUNOUT (Side-to-Side Wobble):
   /   /   <- Rotor tilts back and forth as it spins around the hub
  /   /       (Triggers uneven pad wear over time)

DISC THICKNESS VARIATION (DTV - Parallel Variations):
 | |  |   |   <- Rotor faces are not parallel; thickness varies across the disc
 Thick Thin   (Triggers immediate hydraulic push-back in brake pedal)
Lateral runout is typically caused by rust build-up behind the rotor hat, uneven wheel lug nut torque, or a bent wheel hub. While runout alone might not immediately shake the brake pedal, it forces the brake pads to make light contact with the high spot of the rotor during normal driving when the brakes are not applied. Over 3,000 to 5,000 miles, this constant dragging wears down specific sections of the rotor, transforming lateral runout into Disc Thickness Variation—the direct cause of felt pulsation.
How Do Bad Rear Rotors Feel Compared to Front Rotors?
Bad front rotors send high-frequency vibrations through the steering column, causing the steering wheel to shake back and forth when braking. Bad rear rotors do not affect the steering wheel; instead, they transmit a low-to-medium frequency vibration through the floorboards, brake pedal, and driver’s seat.
+-----------------------------------------------------------------------+
|                       ROTOR VIBRATION DIAGNOSIS                       |
+-----------------------------------------------------------------------+
                                   |
                   Where do you feel the vibration?
                                   |
         +-------------------------+-------------------------+
         |                                                   |
 steering wheel shakes                               Pedal pulsates &
   during braking                                    seat/floor buzzes
         |                                                   |
         v                                                   v
 [ FRONT ROTOR ISSUE ]                               [ REAR ROTOR ISSUE ]
Because front brakes supply roughly 70% of a vehicle’s stopping power, front rotor issues feel significantly more aggressive and violent. Rear rotor vibration feels more like a shudder or hum that vibrates your seat frame, especially noticeable during gradual slowing from highway speeds.
How Do You Tell Bad Rotors from Bad Alignment or Unbalanced Tires?
You can differentiate bad rotors from alignment or tire balance issues by observing when the vibration starts and stops relative to brake pedal engagement.
- Brake Rotors: Vibration occurs only when applying the brake pedal. If you take your foot off the brake, the shaking stops immediately.
- Unbalanced Tires: Vibration occurs at specific highway speeds (typically 55–70 mph) regardless of whether you are braking, accelerating, or coasting.
- Wheel Alignment: Creates a continuous vehicle pull or drift to one side, often accompanied by uneven tire tread wear, but rarely causes vibration on its own.
- Worn Suspension: Shaking occurs over bumps or under heavy acceleration, becoming worse during high-speed cornering.
What Is “Fake Warp” and Cementite Formation?
Cementite formation is a chemical transformation of cast iron caused by extreme thermal stress, creating ultra-hard spots on the brake rotor surface that do not wear down at the same rate as the surrounding iron.
When brake rotors exceed $1,200^\circ\text{F}\ (650^\circ\text{C})$—such as during mountain driving or aggressive track braking—the iron structure inside the rotor changes into iron carbide ($\text{Fe}_3\text{C}$), known as cementite. Cementite is exceptionally hard and brittle. As the softer surrounding cast iron wears down naturally under normal braking, the cementite hotspots remain elevated, creating permanent high spots. Even if a technician resurfaces the rotor flat on a brake lathe, the softer iron surrounding the cementite will wear away again within 1,000 to 3,000 miles, causing the vibration to return.
CEMENTITE HOTSPOT FORMATION ("Fake Warp"):

   [ Normal Cast Iron Surface ] ----> Friction heat >1200°F
                                            |
                                            v
   [ Soft Iron Wear ]  [ Hard Cementite ]  [ Soft Iron Wear ]
          |                     |                 |
          v                     v                 v
   === Lower Surface ===   ^^ HIGH SPOT ^^   === Lower Surface ===

   Result: Machining flattens surface temporarily, but soft iron wears
   faster during driving, restoring DTV within 1,000-3,000 miles.
Can You Machine (Resurface) Rotors or Should You Replace Them?
You can machine brake rotors if their remaining thickness exceeds the minimum discard thickness stamped on the rotor hub or outer rim. However, replacing rotors is generally the more cost-effective long-term solution for modern passenger vehicles.
Modern vehicle manufacturers design rotors thinner to reduce un-sprung weight and improve fuel efficiency. Consequently, a modern rotor usually has only $0.030\text{ to }0.060\text{ inches }(0.75\text{ to }1.5\text{ mm})$ of usable metal above discard thickness when new. Machining removes $0.015\text{ to }0.030\text{ inches}$ per pass. A resurfaced thin rotor has lower thermal capacity, making it far more susceptible to overheating, rapid pad material transfer, and recurring vibration within 5,000 to 10,000 miles.
What Does It Cost to Replace vs. Resurface Vibrating Brake Rotors?
Resurfacing brake rotors costs $30 to $60 per rotor in labor, whereas buying new replacement rotors costs $40 to $120 per rotor for standard passenger cars.
- Resurfacing (Turning): $60 to $120 total for front or rear axle labor, assuming the rotors meet minimum thickness standards.
- New Rotor Replacement: $150 to $350 total for parts and labor per axle on economy vehicles; $300 to $600+ per axle for performance or heavy-duty trucks.
Given that a resurfaced rotor has a shorter remaining lifespan and higher risk of thermal distortion, paying the small price difference for new rotors provides a lower cost-per-mile ratio.
Is It Safe to Drive with Vibrating Brake Rotors?
Driving with vibrating brake rotors is safe for a short trip to a repair shop, but it is dangerous for extended driving. Continuous brake vibration degrades stopping performance and damages surrounding mechanical systems over time.
- Increased Stopping Distance: Vibration reduces consistent contact between the brake pad and rotor, expanding emergency stopping distances by up to 20%.
- Suspension Damage: Persistent mechanical oscillation prematurely wears out wheel bearings, tie-rod ends, ball joints, and control arm bushings.
- ABS System Dysfunction: Severe pedal pulsation confuses Anti-lock Braking System (ABS) wheel speed sensors, potentially triggering false ABS engagement during standard braking.
Why Do New Rotors Start Vibrating After Only a Few Months?
New brake rotors vibrate shortly after installation primarily due to dirty wheel hub mating surfaces or improper brake pad bedding.
WHEEL HUB CONTAMINATION (Root Cause of Early New Rotor Failure):

   [ Wheel Hub Face ]  <-- Rust/Scale debris (0.001" thick)
          ||
   [ New Rotor Hat ]   <-- Mounted unevenly over rust
          ||
   [ Rotor Face ]      <-- Rotates with 0.003" lateral runout
          ||
   Result: High spot drags against brake pad during driving -> DTV within 3,000 miles.
If a mechanic fails to scrub rust, corrosion, and scale off the wheel hub flange using a wire brush prior to installing a new rotor, the new rotor will sit at a slight angle. This introduces $0.002\text{ to }0.004\text{ inches}$ of lateral runout immediately. As you drive, the misaligned rotor continuously brushes against the brake pads, wearing unevenly and producing full-blown Disc Thickness Variation within 2,000 to 5,000 miles.
How Do You Diagnose Rotor Vibration at Home with Basic Tools?
You can diagnose bad brake rotors at home using a dial indicator with a magnetic base or a simplified low-tech visual and tactile inspection process.
1.Lift and Secure the Vehicle:Safety setup required.
Park the vehicle on a flat level surface, engage the parking brake, loosen the wheel lug nuts slightly, lift the vehicle with a jack, and lower it onto heavy-duty jack stands.
2.Inspect Rotor Faces visually:Check for physical defect indicators.
Remove the road wheel. Inspect both inner and outer surfaces of the rotor face for dark thermal spots (blueish/black patches indicating cementite), deep circular grooves exceeding $1/16\text{ inch}$, or thick patches of uneven pad material transfer.
3.Measure Lateral Runout with a Dial Indicator:Requires dial indicator tool.
Thread two or three lug nuts back onto the studs with washers to hold the rotor flush against the hub. Mount a magnetic base dial indicator to the steering knuckle, placing the tip perpendicular to the rotor face $0.5\text{ inches}$ from the outer edge. Zero the gauge and rotate the rotor by hand through 360 degrees. If the needle fluctuates by more than $0.002\text{ inches }(0.05\text{ mm})$, the assembly has excessive runout.
4.Measure Thickness Variation with a Micrometer:Isolate DTV from hub runout.
Use a digital outside micrometer to measure rotor thickness at 8 to 10 evenly spaced points around the circumference, always measuring $0.5\text{ inches}$ inward from the outer margin. Calculate the difference between the thickest and thinnest readings. Any variation exceeding $0.0005\text{ inches }(0.012\text{ mm})$ confirms Disc Thickness Variation.
When Does Changing the Rotors Fail to Fix the Vibration?
Standard rotor replacement fails to fix braking vibration when the underlying cause originates from surrounding mechanical components rather than the rotor itself:
- Wheel Hub Runout: A bent hub flange (caused by hitting a curb or pothole) will make a perfectly flat new rotor wobble. The hub face must be measured with a dial indicator; if hub runout exceeds $0.0005\text{ inches}$, the hub/bearing assembly must be replaced alongside the rotor.
- Seized Caliper Slider Pins: If a brake caliper slide pin sticks due to corrosion or dried grease, the caliper cannot slide to center itself. The inner pad drags continuously against the rotor face, generating localized thermal hotspots and recreating DTV on the new rotor within weeks.
- Worn Control Arm Bushings: Deteriorated rubber suspension bushings lose their ability to absorb minor, normal braking forces. Small runout tolerances ($0.001\text{ inches}$) that a healthy suspension dampens are instead amplified into severe steering wheel shaking.
What Is the Correct Lug Nut Torque to Prevent Rotor Distortion?
Tightening wheel lug nuts to exact manufacturer torque specifications using a calibrated torque wrench prevents distortion of the rotor hat section.
CORRECT CROSS-PATTERN LUG NUT TORQUE SEQUENCE:

       1 (Top)
     5   3
      4 2
   (Tighten evenly in stages: 50% -> 100% total torque)
Uneven tightening or over-torquing using an uncalibrated pneumatic impact gun twists the soft center hat of the brake rotor, creating immediate mechanical lateral runout. Always tighten lug nuts in a star or cross-pattern in two stages:
- Standard Passenger Cars: $80\text{ to }100\text{ lb-ft }(108\text{ to }135\text{ Nm})$
- Trucks, SUVs & Heavy Duty: $120\text{ to }150\text{ lb-ft }(162\text{ to }203\text{ Nm})$
- Torque Variance Limit: Never allow more than a $10\text{ lb-ft}$ difference between individual lug nuts on the same wheel.
How Do You Properly Bed In New Pads and Rotors to Prevent Shaking?
Bedding in (or burnishing) transfers an even, microscopic layer of friction pad material onto the raw iron rotor surface, preventing uneven material deposits that trigger brake judder.
1.Perform Moderate Decelerations:6 to 8 stops required.
Drive the vehicle to an open road. Accelerate to $45\text{ mph}$ and apply firm, moderate braking pressure to slow the vehicle smoothly down to $10\text{ mph}$. Do NOT come to a complete stop.
2.Perform Heavy Decelerations:2 to 3 stops required.
Accelerate to $60\text{ mph}$ and brake hard down to $15\text{ mph}$, forcing heat into the pads without locking up the tires or triggering ABS.
3.Cool the Brake System completely:Critical step to prevent uneven deposits.
Drive the vehicle for 5 to 10 minutes at highway speed without using the brakes to allow airflow to cool the system. Never hold the brake pedal down while standing completely still with glowing hot brakes during this process, as doing so clamps pad material onto one spot of the rotor, creating an immediate DTV hotspot.
The Bottom Line
Bad brake rotors directly cause steering wheel and pedal vibration through Disc Thickness Variation (DTV) as small as $0.0004\text{ inches}$. To permanently fix braking vibration, always clean rust off the wheel hub face before installation, torque lug nuts evenly in a star pattern to specification, and properly bed in new pads and rotors. If new rotors continue to shake, inspect the vehicle for seized caliper slider pins or bent wheel hubs before replacing components again.