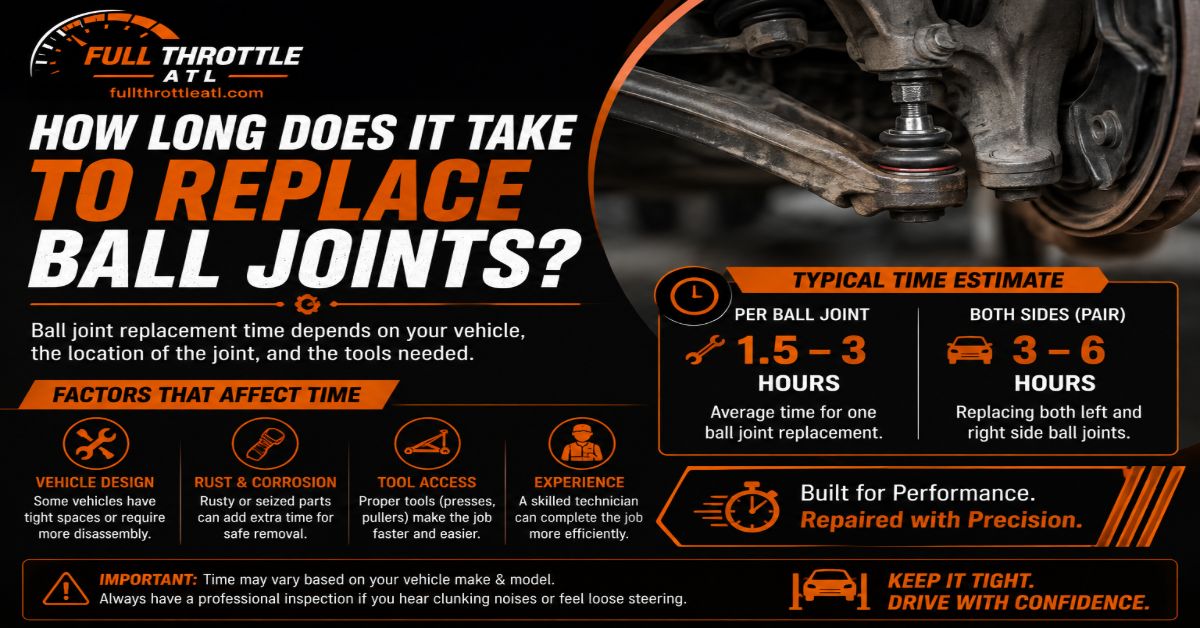
Replacing standard press-in front ball joints takes 1.5 to 3 hours per side for an intermediate DIYer, while bolt-in styles take under 1 hour. This comprehensive guide walks you through the exact 6-step process, necessary tools, torque specifications, and critical success checkpoints required to complete the job safely on your first attempt.
Before You Start
- Time Required: 3 to 6 hours total for both front sides.
- Difficulty Level: Intermediate to Advanced DIY.
- Estimated Cost: 50 to 150 dollars for parts and specialty tool rentals.
- Prerequisite Skills: Basic brake disassembly, torque wrench operation, and safety jack stand placement.
Tools Checklist
- Heavy-duty floor jack and two jack stands (minimum 2-ton capacity)
- Ball joint press kit with vehicle-specific adapter sleeves
- Pickle fork or ball joint separator tool
- 1/2-inch drive torque wrench (capable of 150 ft-lbs)
- Breaker bar and full metric or standard socket set
- Snap ring pliers
- 3 to 4 lb sledgehammer
- Wire brush and needle-nose pliers
Materials Checklist
- Replacement ball joints (1 per side, including boot, nut, snap ring, and cotter pin)
- 1 can of penetrating oil (such as PB Blaster)
- 1 can of brake cleaner
- 1 small tube of chassis grease
- 1 small bottle of medium-strength blue thread locker
- 2 new cotter pins
Step 1: Vehicle Prep and Safety
Park your vehicle on a level concrete surface, engage the parking brake firmly, and wedge wheel chocks securely behind both rear tires. Break the front wheel lug nuts loose by a quarter-turn using your breaker bar while the tires still rest on the ground. Position your floor jack under the manufacturer-approved front lift point, raise the vehicle, and lower it securely onto sturdy jack stands. Remove the front wheel lug nuts completely and pull the front wheels off to expose the suspension assembly.
- Success Checkpoint: You will know this step is complete when the vehicle rests completely stable on jack stands with zero chassis wobble and both front wheels are removed.
- Common Mistake: Lifting the car on asphalt or uneven dirt can cause jack stands to shift. Always work on flat concrete.
Step 2: Component Disassembly
Unbolt the brake caliper and its mounting bracket from the steering knuckle, then hang the assembly securely from the upper coil spring using a bungee cord. Remove the brake rotor from the wheel hub and disconnect any ABS sensor wire brackets attached to the steering knuckle. Remove the old cotter pin from the ball joint stud, loosen the main castle nut, and back it off until it sits flush with the top of the threaded stud to protect the threads during separation.
- Success Checkpoint: You will know this step is done when the brake rotor is off, the caliper is safely hung without tension on the rubber hose, and the castle nut protects the top of the ball joint stud.
- Common Mistake: Letting the brake caliper dangle by its flexible rubber hose will damage internal brake lines and cause fluid leaks. Always hang it independently.
Step 3: Separating the Joint from the Knuckle
Coat the tapered ball joint stud and the steering knuckle bore generously with penetrating oil, letting it soak for 5 to 10 minutes. Insert a pickle fork between the control arm and the steering knuckle, then strike the tail of the fork sharply with your 3 to 4 lb sledgehammer until the tapered seat breaks free. Alternatively, strike the side of the steering knuckle boss directly with the sledgehammer to create a shockwave that pops the taper loose. Once separated, remove the castle nut completely and swing the steering knuckle out of your working path.
- Success Checkpoint: You will know this step succeeded when the steering knuckle drops free from the ball joint stud and the control arm moves independently.
- Common Mistake: Missing the pickle fork or hammering the rubber boot directly will tear it, though you are replacing the joint anyway. Ensure your strikes are direct and controlled.
Step 4: Extracting the Old Ball Joint
Use snap ring pliers to remove the metal retaining ring from the bottom face of the control arm if your specific model uses one. Clean away accumulated rust, dirt, and scale around the joint flange using a wire brush. Assemble your C-frame ball joint press by selecting a receiving tube large enough to catch the body of the ball joint on the bottom, and a driving adapter that matches the top diameter of the joint. Crank the forcing screw clockwise using a breaker bar or impact wrench until the old ball joint pops out of the control arm bore.
- Success Checkpoint: You will know this step is complete when the old ball joint drops out into the receiving tube and clears the control arm ring.
- Common Mistake: Using an undersized receiving tube will block the path of the joint, causing the press to bind up and bend the C-frame tool.
Step 5: Cleaning and Installing the New Joint
Scrub the inner bore of the control arm thoroughly with brake cleaner and a stainless steel wire brush to eliminate all residual scale, rust, and debris. Position the new ball joint straight into the opening by hand, checking that it sits perfectly perpendicular to the arm. Arrange your ball joint press in reverse, placing the large receiving tube on top of the control arm and the flat installation adapter against the bottom flange of the new joint. Slowly crank the press handle, watching closely to ensure the joint enters the bore straight without tilting. Press it firmly until the top flange of the ball joint sits completely flush against the control arm face, then install the new retaining snap ring into its groove.
- Success Checkpoint: You will know this step is correct when the snap ring snaps fully into its locking groove with an audible click and you cannot slide a feeler gauge between the joint flange and the control arm.
- Common Mistake: Forcing the joint into the bore at a slight angle will shave metal off the control arm, wallowing out the hole and ruining the component. Stop immediately if resistance spikes abnormally.
Step 6: Reassembly and Torquing
Guide the new ball joint stud back into the tapered bore of the steering knuckle. Thread the new castle nut onto the stud by hand and torque it to your factory specification, typically between 45 and 80 ft-lbs, using your torque wrench. Check the alignment of the cotter pin hole through the stud slots; if the hole is blocked, tighten the castle nut slightly more until the hole aligns. Never loosen the nut to align the hole. Insert a new cotter pin through the hole and bend the legs tightly around the nut. Reinstall the brake rotor, apply blue thread locker to the brake bracket bolts, torque those bolts to 75 to 100 ft-lbs, and remount the brake caliper. Put the wheels back on, lower the vehicle to the ground, and torque your lug nuts to 80 to 120 ft-lbs. Drive immediately to an alignment shop for a professional front-end alignment.
- Success Checkpoint: You will know this step is successful when all fasteners meet exact torque specs, the cotter pin is secured, and the steering wheel tracks straight during your test drive before alignment.
- Common Mistake: Reusing old cotter pins leads to metal fatigue failure, allowing the castle nut to spin off while driving. Always install a fresh cotter pin.
Common Mistakes and How to Fix Them
- Ball joint rotates in place while tightening the nut: The tapered stud fails to wedge tightly enough into the knuckle to create rotational friction. To fix this, place a floor jack directly under the bottom of the ball joint and pump it up slightly to push the taper firmly into the knuckle while you tighten the nut.
- The new joint slides into the control arm by hand: The control arm bore is stretched out, wallowed, or rusted past tolerance. You must abort the repair, remove the entire control arm assembly, and replace the arm itself.
- Loud clunking noises occur when turning or hitting bumps: The castle nut is loose, the snap ring was omitted, or a bolt was under-torqued. Safely lift the vehicle, use a pry bar to check for play, and re-torque all components to factory specifications.
- The steering wheel is crooked after completion: Front-end geometry shifted during disassembly and component replacement. Schedule a professional wheel alignment immediately to correct toe and camber settings.
Variations Based on Vehicle Design
- Bolt-In Ball Joints: Found on many trucks and older rear-wheel-drive platforms, these joints attach to the control arm using two or three heavy bolts instead of being pressed in. To replace these, remove the mounting bolts, pull the old joint out, bolt the new one in, and torque the fasteners to factory specifications. This cuts total replacement time down to under 1 hour per side.
- Upper Control Arm Assemblies: On many modern front-suspension layouts, the ball joint cannot be pressed out separately because it is permanently forged into the upper control arm. In this scenario, you must unbolt the entire upper control arm from the inner chassis frame and replace the complete arm assembly.
How Long Does It Take / What Does It Cost
- Time Investment: Expect 1.5 to 3 hours per side for standard press-in ball joints if you are an intermediate DIYer. Bolt-in replacements take 45 to 60 minutes per side.
- Financial Cost: DIY parts cost between 30 and 80 dollars per joint, plus tool rental deposits. Professional shop labor typically runs between 250 and 600 dollars total for parts and installation per axle.
Frequently Asked Questions
Can I drive my car without getting an alignment after replacing ball joints?
Driving without an alignment after a ball joint replacement is unsafe and ruins your tires. Changing suspension components alters your steering geometry, specifically toe and camber angles. This causes rapid tire tread wear, unstable high-speed handling, and unpredictable steering response until alignment settings are corrected professionally.
Do I need to replace both ball joints at the same time?
Replacing both sides at the same time is strongly recommended. Suspension components experience identical wear cycles and road stress. If one ball joint fails due to age or mileage, the opposite side is usually near the end of its operational lifespan. Replacing both ensures balanced handling and prevents a second teardown soon after.
How do I know if my ball joints are actually bad?
Bad ball joints produce distinct warning signs, including persistent clunking or popping noises when turning the steering wheel or driving over bumps. You may also notice excessive steering wheel play, wandering while driving straight, or uneven tire wear on the inner or outer edges of the front tires.
Is it safe to use an impact wrench on a ball joint press?
Using an impact wrench on a ball joint press is acceptable only if you use high-impact rated press tools and proceed with caution. Standard hand tools with a breaker bar provide better tactile feedback, letting you feel if the joint binds or goes in crooked before it damages the control arm bore.