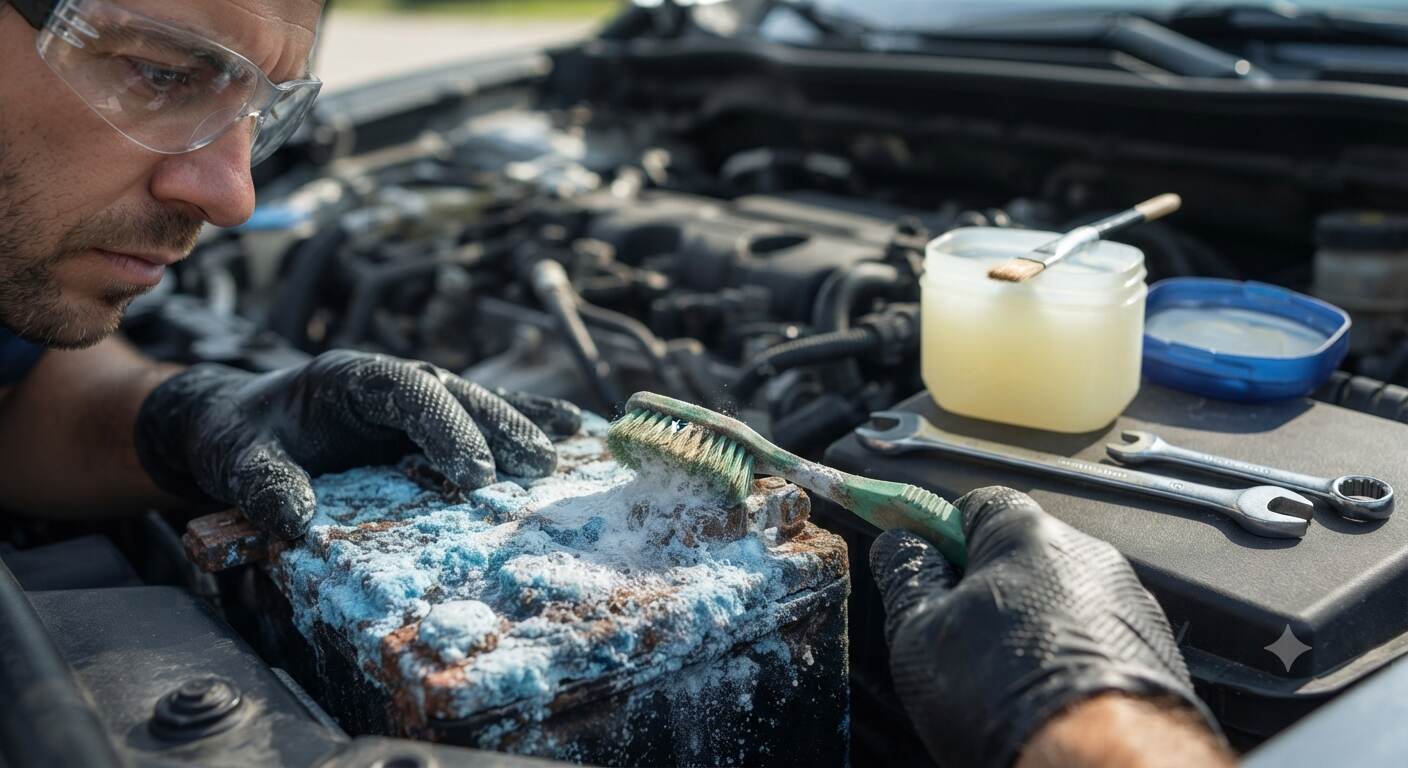
There is nothing quite as frustrating as turning your ignition key or pressing the start button on a busy morning, only to be met with a disappointing click, a flickering dashboard, or absolute silence. Often, the culprit behind a dead-seeming electrical system is not a completely dead battery, but rather a sneaky layer of fluffy white, blue, or green crust choking your battery terminals. When sulfuric acid fumes escape from the battery vents and react with the surrounding lead and copper components, corrosion forms rapidly.
Ignoring this powdery buildup can restrict electrical current flow, strain your alternator, and eventually leave you stranded on the side of the road. Fortunately, learning how to clean corroded car battery terminals is a straightforward, budget-friendly maintenance task that almost any car owner can accomplish in under thirty minutes with basic household supplies. In this comprehensive guide, we will walk you through the essential safety precautions, required tools, step-by-step cleaning procedure, preventative tricks, and expert tips to keep your electrical system running at peak performance.
Understanding Car Battery Corrosion: Why It Happens
Before diving into the cleaning process, it helps to understand what causes that unsightly crust in the first place. Car batteries contain a liquid solution of sulfuric acid and water. As the battery charges and discharges through normal use, hydrogen and oxygen gases escape through the vent caps. When these gases react with atmospheric moisture and the exposed metal of the battery posts or cable clamps, chemical reactions occur that result in metal salts—commonly recognized as corrosion.
Furthermore, factors like age, overcharging, micro-cracks around the terminal posts, or loose cable connections can accelerate this buildup. If left unchecked, the corrosion acts as an insulator, blocking the vital flow of electricity from your battery to your starter motor and electrical accessories.
Project Overview At-a-Glance
| Project Parameter | Details & Specifications |
|---|---|
| Main Topic | How to clean corroded car battery terminals |
| Estimated Time | 20 to 30 minutes |
| Difficulty Level | Beginner / DIY Friendly |
| Estimated Cost | Under $5 (using household items) |
| Required Safety Gear | Safety glasses, heavy-duty rubber gloves |
| Key Cleaning Agents | Baking soda, water, petroleum jelly |
Phase 1: Preparation and Essential Safety Gear
Working under the hood of a car always demands respect for mechanical and electrical systems. Even a standard 12-volt automotive battery can deliver a powerful electrical arc or expose you to caustic acid if handled carelessly. Before you touch a single wrench, make sure you are properly equipped.
Gather Your Materials and Tools
- Baking Soda: Acts as a mild alkaline base that instantly neutralizes acidic corrosion.
- Clean Water: Used for mixing the paste and rinsing away residue.
- Wire Brush or Old Toothbrush: Essential for scrubbing away stubborn crust.
- Wrench Set (Typically 10mm): Required for loosening terminal clamp nuts.
- Clean Rags or Microfiber Towels: For drying and wiping down components.
- Petroleum Jelly (Vaseline) or Dielectric Terminal Grease: Used to seal out moisture and prevent future buildup.
- Commercial Alternative: Optional automotive battery cleaner spray (such as an AutoZone DIY spray).
Gear Up and Secure the Vehicle
- Put on Safety Glasses: Protect your eyes from accidental splashes of acid or flying debris while scrubbing.
- Wear Rubber Gloves: Acidic residue can irritate skin and cause chemical burns.
- Turn Off the Vehicle: Ensure the ignition is completely switched off, the keys are out of the ignition, and the engine is cool to the touch to prevent accidental electrical shorts or burns from hot engine parts.
Phase 2: Disconnecting the Cables Safely
One of the most critical rules of automotive electrical work is disconnecting the cables in the correct sequence. Getting this wrong can cause dangerous electrical sparks or short-circuit your vehicle’s sensitive onboard computers.
Disconnecting the Negative Terminal First
Locate the negative cable clamp. It is almost always marked with a minus sign (-) symbol, colored black, or connected to a black cable leading directly to the vehicle chassis or engine block. Using your 10mm wrench, loosen the nut on the negative cable clamp just enough to let you wiggle it loose from the battery post. Carefully pull the clamp off and tuck it securely to the side, ensuring there is zero chance it can spring back or make contact with any metal surfaces or the battery post while you work.
Disconnecting the Positive Terminal Second
Once the negative terminal is safely secured away, locate the positive cable clamp. This terminal is typically marked with a plus sign (+) symbol, covered by a red protective cap, and attached to a red cable running to the starter or fuse box. Loosen the retaining nut and pull the positive cable clamp off the post. Rest it safely out of the way alongside the negative cable.
Phase 3: Cleaning the Corrosion Away
With both cables safely detached, you can now focus on restoring the battery posts and cable clamps back to bare, shiny metal.
Applying the Neutralizing Mixture
Create a simple DIY cleaning paste by mixing three parts baking soda to one part water in a small container until it achieves a thick, spreadable consistency. Alternatively, if you prefer a commercial route, spray a dedicated automotive battery cleaner directly onto the affected areas.
Spoon or brush your baking soda paste generously over the corroded battery posts and the inner surfaces of the cable clamps. The moment the alkaline paste makes contact with the acidic crust, you will notice an energetic fizzing reaction. This chemical effervescence is completely normal and indicates that the baking soda is actively neutralizing the corrosive acid.
Scrubbing the Terminals
Allow the paste to sit and fizz for two to three minutes to break down heavy buildup. Take your wire brush or old, stiff-bristled toothbrush and scrub vigorously around the battery posts and inside the circular cable clamps. Continue scrubbing until all the white, blue, or green crust is completely gone and you can see clean, bare lead or copper metal underneath.
Rinsing and Drying Thoroughly
Wipe away the loosened slurry and dirt using a damp cloth. If you need to use a small amount of clean water to rinse the battery top, do so very carefully. Crucial Warning: Never allow dirty rinse water to enter the battery cell vent holes, as this can contaminate the internal electrolyte fluid and permanently ruin the battery.
Once rinsed, take a clean microfiber rag and dry every single component completely. Moisture left behind on the battery top can provide a conductive path for self-discharge and prompt corrosion to return even faster.
Phase 4: Reconnecting the Battery Correctly
Now that your battery terminals look pristine and are completely dry, it is time to reverse the disassembly process. Doing this in the proper order protects your electrical system from accidental sparks.
Reconnecting the Positive Terminal First
Take your positive cable clamp (the one with the red cover) and push it firmly down onto the positive battery post. Tighten the retaining nut securely with your wrench until the clamp is immovable. Do not over-tighten, as you can strip the bolt or crack the terminal clamp.
Reconnecting the Negative Terminal Last
Finally, take your negative cable clamp (the black one) and attach it securely to the negative battery post, tightening the nut down firmly. Connecting the negative terminal last minimizes the risk of electrical sparking if your wrench accidentally brushes against any surrounding metal frame components while tightening.
Protecting Against Future Corrosion
To ensure long-lasting results, take a small amount of petroleum jelly or specialized battery terminal grease and smear a thin, protective layer completely over the exposed metal posts and clamps. This creates an airtight barrier that effectively blocks out moisture, oxygen, and acidic vapors, preventing future corrosion from forming for months or even years to come.
Frequently Asked Questions
How often should I check my car battery for corrosion?
It is a good habit to inspect your car battery terminals at least twice a year during routine maintenance checks, such as when you change your engine oil or prepare for extreme seasonal weather changes like freezing winter or scorching summer. Catching light powdery buildup early prevents heavy crust formation and unexpected starting failures.
Can I use Coca-Cola instead of baking soda to clean battery terminals?
While carbonated soft drinks like Coca-Cola do contain phosphoric acid and can temporarily dissolve light corrosion due to their acidity, they also contain high amounts of sugary syrup. If you use soda to clean your terminals and fail to rinse the sticky residue away with clean water afterward, that sugary film will attract dirt, dust, and grime, accelerating future corrosion and electrical issues. Baking soda and water remain the superior, professional-recommended cleaning method.
What should I do if my car still won’t start after cleaning the battery terminals?
If you have thoroughly cleaned and tightened the battery terminals but your vehicle still refuses to start, the issue may run deeper. Your battery might simply be too old or degraded to hold a charge, requiring a professional battery test or replacement. Alternatively, a faulty starter motor, a bad alternator, a blown main fuse, or a failing ignition switch could be the underlying root cause.
Conclusion
Maintaining a clean and healthy electrical system does not require expensive tools or a trip to an auto repair shop. By dedicating just twenty minutes of your time to safely mix a baking soda paste, disconnect your cables, scrub away stubborn crust, and seal the terminals with petroleum jelly, you can dramatically extend the lifespan of your car battery and ensure reliable starts every single time you turn the key. Regular under-hood inspections pay off handsomely, saving you from the headache of unexpected breakdowns and costly emergency tows. Take care of your car’s electrical heart, and it will keep you moving forward safely on every journey.