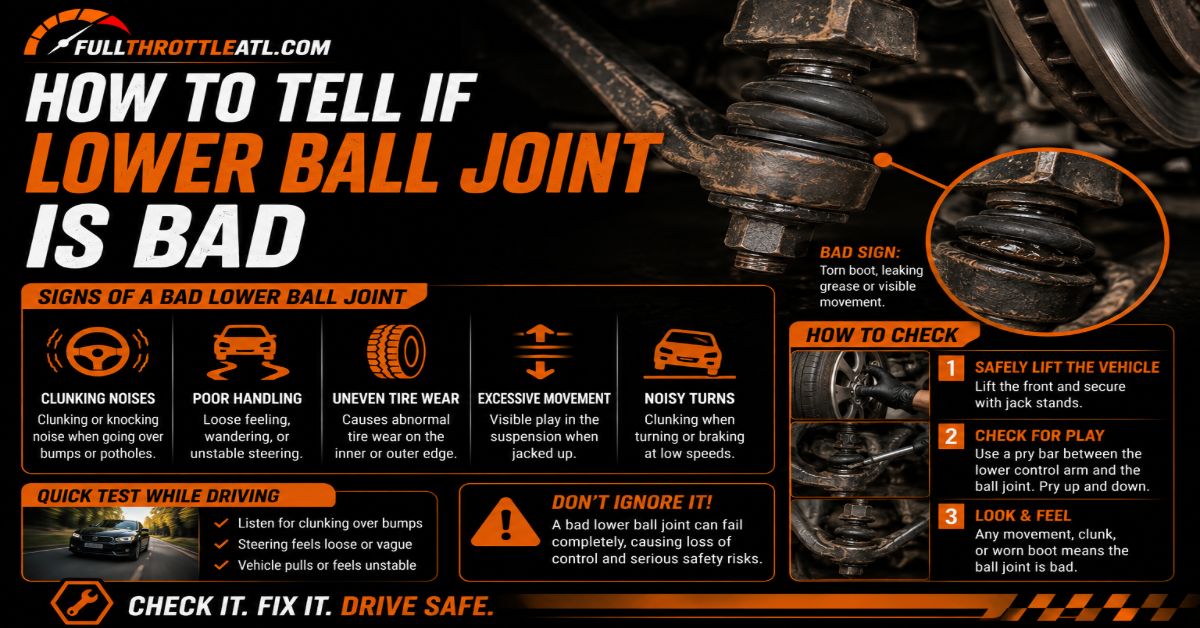
Determining if a lower ball joint is failing requires unloading vehicle suspension tension and testing for vertical and lateral play using manual rocking, a pry bar lever, or a precision dial indicator. This complete 6-step diagnostic process takes 30 to 45 minutes per side at an intermediate skill level, with precise load positioning serving as the single factor that determines test accuracy.
Before You Start
- Total Time: 30 to 45 minutes per side.
- Skill Level: Intermediate.
- Estimated Cost: $0 (inspection only) to $150 (if replacement parts are needed).
- Prerequisites & Conditions: Parked on a flat concrete surface, emergency brake fully engaged, vehicle completely cold.
- Required Tools & Materials Checklist:
- Heavy-Duty Floor Jack (1 unit, minimum 2-ton capacity)
- Jack Stands (2 units, minimum 2-ton capacity)
- Wheel Chocks (2 units)
- Large Pry Bar (1 unit, 24 to 36 inches long)
- Dial Indicator (1 unit with a magnetic or pliers base, optional)
- Flashlight or Work Light (1 unit)
- Mechanic Gloves and Safety Glasses (1 set)
- Lug Wrench or Breaker Bar (1 unit)
Step 1: Secure, Chock, and Loosen Lugs
Park the vehicle on flat, level ground, engage the parking brake firmly, and wedge two heavy-duty rubber wheel chocks securely behind the rear tires. Grab your breaker bar and loosen the front wheel lug nuts by exactly one-half counterclockwise turn without removing them completely.
- Success Check: You will know this step worked when the vehicle is completely immobilized against rolling, and the lug nuts break free without shifting the car’s position on the ground.
- Common Mistake: Lifting the vehicle before cracking the lug nuts loose, which causes the wheel to spin freely in the air when you apply torque.
Step 2: Unload the Suspension Safely
Position your hydraulic floor jack underneath the manufacturer-approved lifting point and elevate the front end according to your vehicle suspension layout. For Short-Long Arm (SLA) suspension where the coil spring sits on the lower control arm, place the floor jack directly under the lower control arm and lift until the tire clears the ground by 3 inches, then slide a jack stand under the frame. For MacPherson Strut suspension where the coil spring sits over the shock absorber, place the floor jack under the vehicle frame lifting point, lift the car, and place a jack stand under the frame so the front wheel hangs entirely free.
- Success Check: You will know this step worked when the wheel is elevated to the exact required height, the chassis rests securely on solid steel jack stands, and the suspension load is managed according to the specific spring placement design.
- Common Mistake: Lifting a MacPherson strut vehicle by the lower control arm, which leaves the internal spring compressed and hides worn-out ball joint play entirely.
Step 3: Perform Visual Boot and Wear Indicator Inspection
Crawl underneath the vehicle with a bright flashlight and locate the lower ball joint assembly where the steering knuckle connects to the outer edge of the lower control arm. Examine the rubber dust boot closely for deep cracks, splits, or total separation that allows road grime inside and forces grease out. If your vehicle uses an older design with a MOOG wear indicator grease fitting, look at the shoulder of the grease fitting to see if the movable collar is flush or recessed inside the housing.
- Success Check: You will know this step worked when you have verified whether the rubber boot is intact or compromised, and whether any mechanical wear pin indicates internal metal-on-metal degradation.
- Common Mistake: Mistaking superficial surface dry-rot cracking on an old rubber boot for a catastrophic split that has allowed moisture and grit into the joint ball race.
Step 4: Execute the 12-and-6 Wheel Rocking Test
Position yourself directly facing the suspended front tire, grab the outer rubber tread firmly with your hands placed at the 12 o’clock and 6 o’clock positions, and push inward with your top hand while pulling outward with your bottom hand in a rapid rocking rhythm. Listen closely for sharp metallic clunks or dull clicks, and pay attention to whether the entire wheel assembly rocks independently from the rest of the vehicle framework.
- Success Check: You will know this step worked when you can clearly feel whether the wheel hub remains rock-solid on its axis or exhibits loose, sloppy play along the vertical plane.
- Common Mistake: Shaking the tire at the 9-and-3 o’clock horizontal positions instead, which tests your outer tie rods and steering rack rather than the vertical play of the lower ball joint.
Step 5: Execute the Pry Bar Vertical Leverage Test
Slide your 24 to 36-inch pry bar directly underneath the bottom tread of the front tire, using the concrete garage floor as a solid fulcrum point. Lever the pry bar upward sharply to lift the tire vertically by a fraction of an inch while keeping your eyes locked directly on the lower ball joint stud and control arm housing interface. Watch for any vertical translation where the stud slides up and down inside its socket bore.
- Success Check: You will know this step worked when you observe zero vertical movement of the ball joint stud relative to the control arm, or catch the exact moment the stud slips upward inside a worn socket.
- Common Mistake: Applying leverage too gently out of fear of damaging the wheel, which fails to generate the force needed to overcome pre-load tension in a failing joint.
Step 6: Measure Tolerances with a Dial Indicator
Clamp your dial indicator magnetic or pliers base securely to the lower control arm, position the spring-loaded indicator tip flush against the bottom flat surface of the steering knuckle, and zero out the gauge dial. Repeat the pry bar vertical leverage test from Step 5 while watching the needle sweep across the dial face to record the exact millimeter of movement.
- Success Check: You will know this step worked when you have obtained an objective numerical measurement: movement under 0.50 mm (0.020 in) passes, while axial play exceeding 1.5 mm to 2.5 mm fails and requires immediate replacement.
- Common Mistake: Clamping the dial indicator base to a flexible plastic splash shield or a thin brake dust shield instead of the rigid lower control arm, resulting in false high readings caused by bracket flex.
Common Mistakes and How to Fix Them
- Confusing Wheel Bearing Play with Ball Joint Play: If the 12-and-6 rock test reveals looseness, have an assistant press the brake pedal down firmly while you rock the tire again. If the play disappears entirely, the issue is a loose or worn wheel bearing, not the lower ball joint.
- Ignoring Squeaking Noises During Stationary Turns: A loud groaning or squeaking sound when turning the steering wheel while parked indicates that the ball joint has lost all internal grease and is running dry metal-on-metal. Injecting temporary grease via a needle fitting buys time, but the joint is internally compromised and must be replaced.
- Driving at High Speeds with Severe Steering Shimmy: If your vehicle suffers from a violent steering wheel shimmy or pulls unpredictably to one side during braking, your ball joint tolerances are dangerously wide. Avoid highway driving immediately to prevent catastrophic separation and loss of steering control.
- Replacing Only the Ball Joint on Pressed-In Arms: On many modern vehicles, individual press-in ball joints can seize inside aluminum or stamped steel control arms. If you lack a heavy hydraulic press and specialized C-clamp adapters, abandon the press method and replace the entire lower control arm assembly as a single pre-assembled unit.
Variations: Adapting the Process for Different Scenarios
- Vehicles with Integrated Steering Knuckles: On European or heavy-duty truck platforms where the ball joint is bolted rather than pressed or forged into the arm, unbolt the pinch bolt first and use a pickle fork or ball joint separator tool to pop the taper stud free from the knuckle.
- Working on Rusted Salt-Belt Vehicles: If corrosion has seized the castle nut or tapered stud, apply a penetrating catalyst like PB Blaster and let it soak for 15 minutes before attempting removal. Never strike an aluminum control arm directly with a steel hammer to break a taper loose.
Frequently Asked Questions
Can I drive with a bad lower ball joint?
Driving with a compromised lower ball joint is extremely dangerous because a total joint separation causes the wheel to collapse outward, resulting in an immediate loss of steering control and potential rollover accidents. If your inspection reveals excessive play or a completely torn boot, replace the component before driving on public roads.
How much does it cost to replace a lower ball joint?
Parts typically cost between $30 and $100 per side for standard passenger vehicles, while professional mechanic labor ranges from $150 to $350 per side depending on alignment requirements and whether the entire control arm assembly must be swapped out. Total out-of-pocket costs average $200 to $450 per side when including a mandatory post-repair wheel alignment.
Do I need a wheel alignment after replacement?
Replacing a lower ball joint or control arm alters the steering geometry and changes your vehicle front-end angles. You must schedule a professional four-wheel alignment immediately after finishing the installation to prevent rapid, uneven tire wear and steering pull.
What are the main symptoms of a failing ball joint?
The primary warning signs include repetitive loud metallic clunks or pops when driving over speed bumps or turning into driveways, uneven feathering or edge wear on the front tires, erratic steering wander, and a steering wheel that feels loose or unresponsive around the center position.